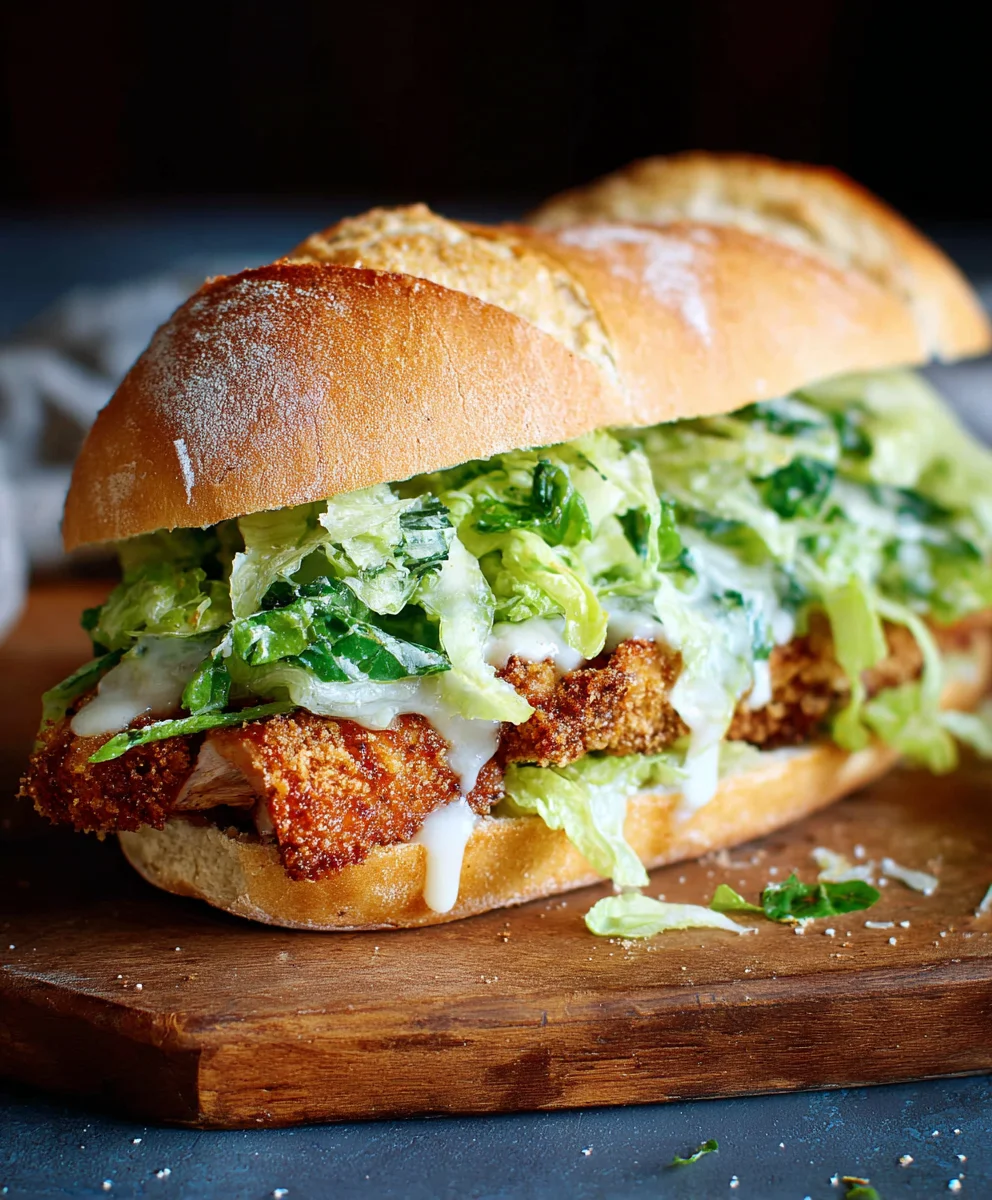
Crispy Chicken Caesar Sandwich – Easy & Delicious Recipe
Crispy Chicken Caesar Sandwich. Ah, the sheer joy of a perfectly crafted sandwich. It’s more than just a meal; it’s an experience, a handheld masterpiece that delivers comfort and satisfaction with every bite. And when that sandwich is a Crispy Chicken Caesar Sandwich, you know you’re in for a treat. What is it about this particular combination that captivates our taste buds and keeps us coming back for more? Perhaps it’s the irresistible contrast of textures: the shatteringly crisp golden chicken against the tender, slightly chewy bun. Or maybe it’s the familiar, yet always exciting, Caesar salad elements – the zesty dressing, the salty Parmesan, the hint of garlic – all amplified by the star of the show. This isn’t just any chicken sandwich; it’s a symphony of flavors that elevates a casual lunch to something truly memorable.
What makes the Crispy Chicken Caesar Sandwich so special?
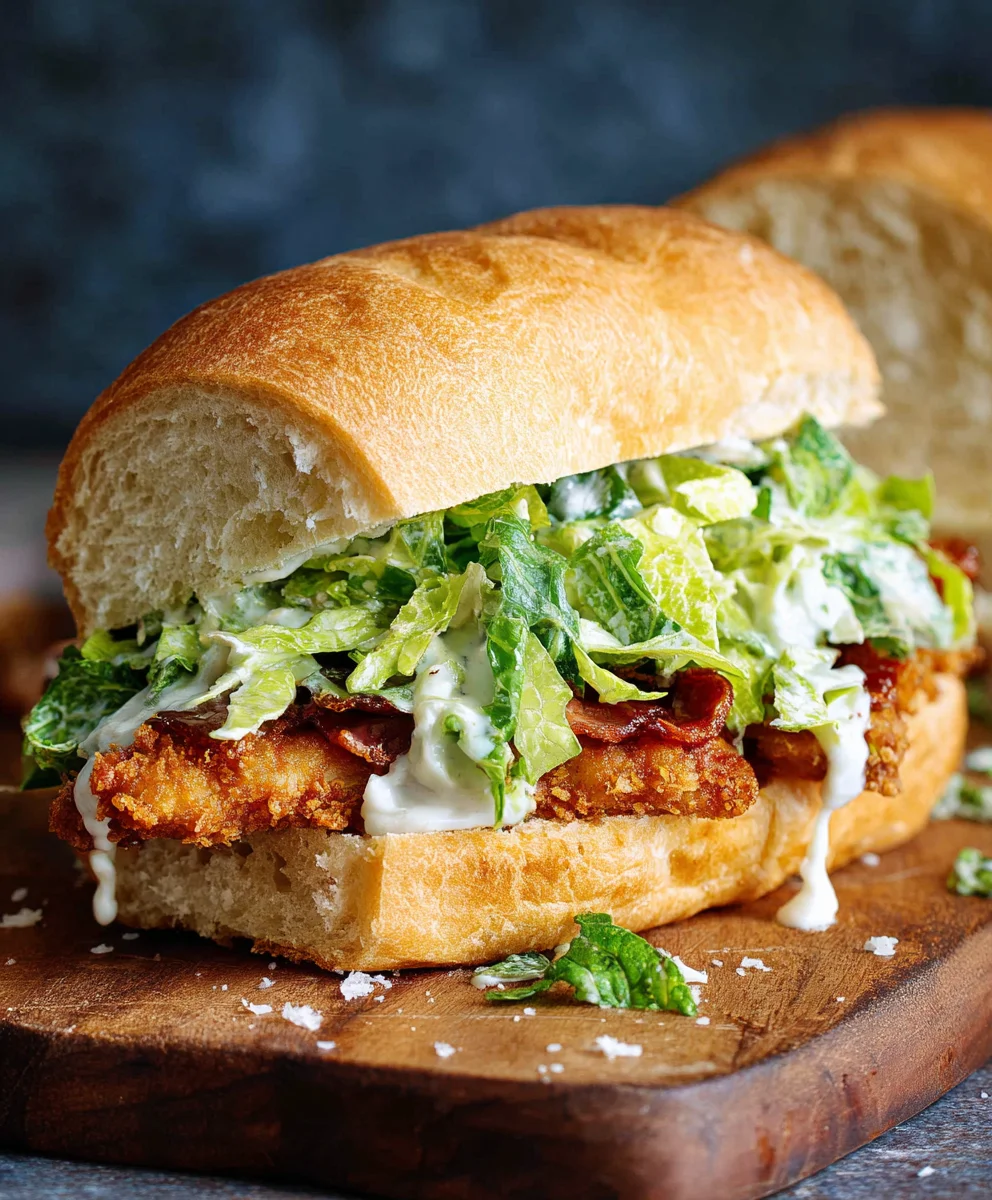
It’s the alchemy of simple ingredients coming together to create something extraordinary. We’re talking about a juicy, tender chicken breast, coated in a seasoned breading that bakes or fries to an unbelievable crispness. This is then layered onto a soft, toasted bun, generously slathered with a creamy, tangy Caesar dressing that has just the right balance of anchovy, garlic, and lemon. Add in some crisp romaine lettuce, a sprinkle of grated Parmesan cheese, and perhaps a few crunchy croutons for an extra layer of texture, and you have a sandwich that’s both indulgent and surprisingly refreshing. It’s the ultimate comfort food with a touch of sophistication, perfect for a weeknight dinner, a weekend treat, or a show-stopping picnic item.
Let’s dive into making your own!
Ingredients:
- ½ cup full-fat mayonnaise
- 3 tbsp Greek yogurt
- 1 tsp Dijon mustard
- 1 tsp Worcestershire sauce
- 2 tbsp lemon juice
- ¼ cup Parmesan cheese (freshly grated)
- 1-2 garlic cloves (minced)
- ¼ tsp black pepper
- Pinch sea salt
- 5 chicken cutlets (about 1.5 lbs total, see note 1 for preparation)
- Sea salt (to taste)
- Ground black pepper (to taste)
- Oil (for frying, such as vegetable or canola oil, enough for about ½ inch depth in your pan)
- ⅓ cup all-purpose flour
- ½ tsp salt (for the flour dredge)
Preparing the Caesar Dressing
Step 1: Combine the Creamy Base
In a medium-sized bowl, we’ll start by whisking together the base of our delicious Caesar dressing. Add the full-fat mayonnaise and the Greek yogurt. The mayonnaise provides that classic rich, creamy texture, while the Greek yogurt adds a lighter, tangy dimension and a hint of protein, making the dressing a little less heavy. Whisk these two ingredients together until they are completely smooth and well combined. Ensure there are no streaks of either ingredient remaining. This forms the foundation for all the other wonderful flavors.
Step 2: Add the Zing and Depth
Next, we introduce the flavor powerhouses that define a true Caesar dressing. To the creamy base, add the Dijon mustard. Dijon mustard is essential for its sharp, piquant flavor that cuts through the richness. Then, stir in the Worcestershire sauce. This ingredient is a secret weapon, adding a complex umami depth with notes of anchovy, vinegar, and spices. Finally, incorporate the fresh lemon juice. The lemon juice is crucial for brightness and acidity, balancing the richness of the mayonnaise and yogurt and lifting all the other flavors. Whisk everything together until it’s thoroughly incorporated and the dressing is smooth.
Step 3: Infuse with Garlic and Seasoning
Now, let’s bring in the aromatics and seasonings. Add the freshly grated Parmesan cheese to the dressing mixture. Using freshly grated Parmesan will give you the best flavor and texture, as it melts more smoothly and provides a more intense cheese flavor than pre-shredded varieties. Next, add the minced garlic cloves. The amount of garlic can be adjusted to your personal preference, but starting with one to two cloves provides a noticeable but not overpowering garlic punch. Finally, season the dressing with ¼ teaspoon of black pepper and a pinch of sea salt. Whisk everything vigorously until the garlic is evenly distributed and the cheese is mostly incorporated. Taste the dressing at this point and adjust salt and pepper as needed. Remember that the Parmesan cheese is already salty, so be mindful when adding additional salt. Set this glorious Caesar dressing aside; it will be used later to coat our crispy chicken.
Crisping the Chicken
Step 4: Dredge the Chicken for Maximum Crispiness
This is where we prepare our chicken cutlets for their transformation into crispy perfection. Ensure your chicken cutlets are relatively uniform in thickness. If they are very thick, you can gently pound them between two pieces of plastic wrap or parchment paper until they are about ½ inch thick. This ensures even cooking. In a shallow dish or a large plate, combine the ⅓ cup of all-purpose flour with ½ teaspoon of salt. This flour mixture will act as our dredge, creating a light, crispy coating. Now, take each chicken cutlet and press it firmly into the seasoned flour, ensuring it’s coated on all sides. Gently shake off any excess flour. This step is vital for achieving that satisfying crunch.
Step 5: Fry to Golden Perfection
Heat your oil in a large skillet or Dutch oven over medium-high heat. You want the oil to be hot enough for the chicken to sizzle immediately upon contact, but not so hot that it burns the coating before the chicken is cooked through. A good test is to drop a tiny bit of flour into the oil; if it bubbles vigorously, the oil is ready. Carefully place the flour-dredged chicken cutlets into the hot oil, being careful not to overcrowd the pan. Cook in batches if necessary to maintain the oil temperature and ensure even crisping. Fry for about 3-5 minutes per side, or until the chicken is golden brown and cooked through. The internal temperature should reach 165°F (74°C). You can use a meat thermometer to check for doneness. Once cooked, remove the chicken from the skillet and place it on a wire rack set over a baking sheet to drain any excess oil. This helps keep the coating wonderfully crispy. Season the hot chicken immediately with a little more sea salt and ground black pepper to taste.
Assembling the Sandwich
Step 6: Assemble and Coat
Once your crispy chicken cutlets have cooled slightly, it’s time to bring it all together. Take your favorite sandwich buns, toasting them lightly if you prefer. Spread a generous amount of the prepared Caesar dressing onto the bottom half of each bun. Then, place one or two of your perfectly crispy chicken cutlets on top of the dressing. If you like extra flavor, you can drizzle a little more Caesar dressing directly onto the chicken. Top with additional fresh lettuce if desired, and then place the top half of the bun. This creates a sandwich that’s packed with flavor and texture, delivering that irresistible crispy chicken Caesar experience with every bite.
Conclusion:
And there you have it! You’ve successfully created the most delicious Crispy Chicken Caesar Sandwich. This recipe brings together perfectly seasoned, golden-brown crispy chicken with the classic tangy Caesar dressing, fresh romaine lettuce, and optional Parmesan cheese, all nestled between soft buns. The result is a symphony of textures and flavors that is both satisfying and incredibly moreish. I truly hope you enjoyed making and devouring this fantastic sandwich as much as I do.
This Crispy Chicken Caesar Sandwich is wonderfully versatile. Serve it hot off the pan for an immediate flavor explosion. It pairs beautifully with a side of sweet potato fries, a light coleslaw, or even a simple green salad. For variations, consider adding some crispy beef bacon for an extra salty crunch, a sprinkle of red pepper flakes for a touch of heat, or even a drizzle of balsamic glaze for a sweet and tangy contrast.
Don’t be afraid to experiment and make this recipe your own! The joy of cooking is in personalization. Give it a try and let me know how it turns out. I’m confident you’ll be making this Crispy Chicken Caesar Sandwich a regular in your meal rotation.
Frequently Asked Questions:
Q: Can I make the crispy chicken ahead of time?
A: Yes, absolutely! You can prepare and cook the crispy chicken pieces up to a day in advance. Store them in an airtight container in the refrigerator. To reheat, you can briefly warm them in a skillet or in a preheated oven at around 350°F (175°C) until heated through. This will help them retain some of their crispiness before assembling your Crispy Chicken Caesar Sandwich.
Q: What if I don’t have romaine lettuce?
A: While romaine lettuce is traditional for its crisp texture, you can substitute it with other sturdy greens. Iceberg lettuce, for instance, offers a similar crunch. Alternatively, you could use a spring mix or even spinach for a softer bite. The key is to have a fresh, crisp element to balance the rich chicken and dressing in your Crispy Chicken Caesar Sandwich.
Crispy Chicken Caesar Sandwich – Easy & Delicious Recipe
A quick and easy recipe for a delicious crispy chicken Caesar sandwich, featuring homemade Caesar dressing and perfectly fried chicken cutlets.
Ingredients
-
½ cup full-fat mayonnaise
-
3 tbsp Greek yogurt
-
1 tsp Dijon mustard
-
1 tsp Worcestershire sauce
-
2 tbsp lemon juice
-
¼ cup Parmesan cheese (freshly grated)
-
1-2 garlic cloves (minced)
-
¼ tsp black pepper
-
Pinch sea salt
-
5 chicken cutlets
-
Sea salt (to taste)
-
Ground black pepper (to taste)
-
Oil (for frying, such as vegetable or canola oil)
-
⅓ cup all-purpose flour
-
½ tsp salt (for the flour dredge)
Instructions
-
Step 1
In a medium-sized bowl, whisk together the full-fat mayonnaise and Greek yogurt until smooth and well combined. -
Step 2
Add Dijon mustard, Worcestershire sauce, and fresh lemon juice to the creamy base. Whisk everything together until thoroughly incorporated and smooth. -
Step 3
Stir in the freshly grated Parmesan cheese, minced garlic cloves, ¼ teaspoon black pepper, and a pinch of sea salt. Whisk until garlic is evenly distributed and cheese is mostly incorporated. Taste and adjust seasoning if needed. -
Step 4
In a shallow dish, combine all-purpose flour with ½ teaspoon salt. Dredge each chicken cutlet in the seasoned flour, ensuring it’s coated on all sides and shake off excess. Ensure chicken cutlets are about ½ inch thick. -
Step 5
Heat oil in a large skillet over medium-high heat. Carefully place flour-dredged chicken cutlets into hot oil, cooking for 3-5 minutes per side until golden brown and cooked through (internal temperature 165°F/74°C). Drain on a wire rack and season with sea salt and ground black pepper to taste. -
Step 6
Spread a generous amount of Caesar dressing onto the bottom half of sandwich buns. Place crispy chicken cutlets on top, drizzle with more dressing if desired, add lettuce, and top with the other half of the bun.
Important Information
Nutrition Facts (Per Serving)
It is important to consider this information as approximate and not to use it as definitive health advice.
Allergy Information
Please check ingredients for potential allergens and consult a health professional if in doubt.