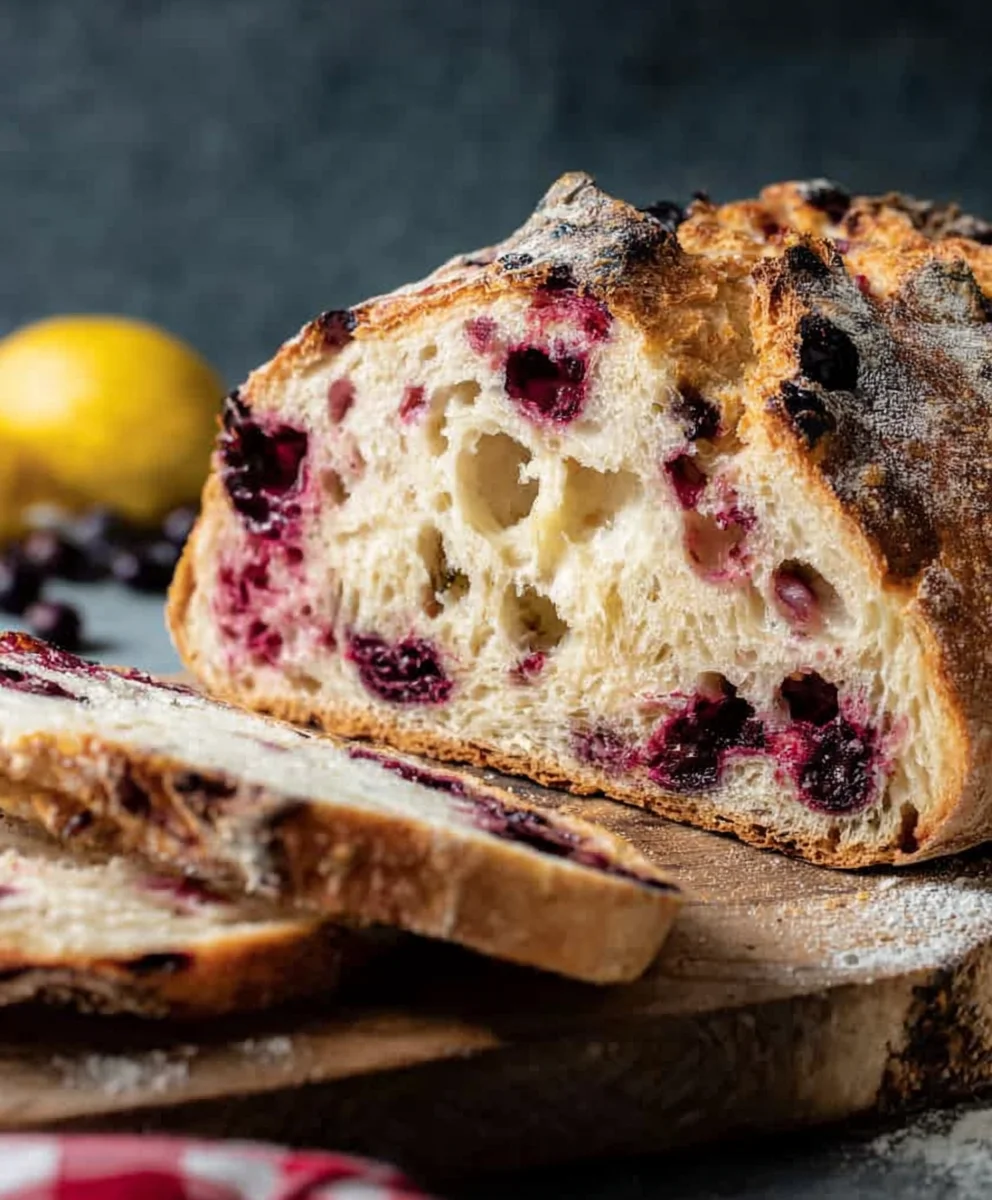
Blueberry Lemon Sourdough Bread Recipe-Fresh & Zesty
Blueberry Lemon Sourdough Bread isn’t just a breakfast item; it’s an experience. Imagin extracte that first glorious slice, still warm from the oven, the tangy sourdough crust giving way to a tender crum extractb studded with bursting blueberries and bright, zesty lemon. This isn’t your average loaf. It’s a symphony of textures and flavors that dance on your palate, a testament to the magic of fermentation meeting the sunshine of citrus and berries. People are absolutely captivated by the unique combination of sweet and tart, the characteristic chew of sourdough, and the vibrant bursts of fruit that make each bite a delightful surprise. What truly elevates this Blueberry Lemon Sourdough Bread beyond the ordinary is the way the natural tang of the sourdough starter beautifully complements the sweet succulence of the blueberries, while the lemon zest cuts through with an invigorating freshness, creating a complex yet perfectly balanced flavor profile that’s both comforting and exciting. Get ready to transform your kitchen into a haven of irresistible aromas and create a loaf that will have everyone asking for seconds!
Ingredients:
- 3 cups bread flour
- 1⅓ cups lukewarm water
- ¾ cup active, bubbly, and well-fed sourdough starter
- 3 tablespoons white sugar
- 1 teaspoon salt
- 1¼ cup fresh blueberries
- 1 tablespoon lemon zest
Autolyse and Mixing
Step 1: Autolyse the Dough
The first crucial step in creating a fantastic Blueberry Lemon Sourdough Bread is to begin extract with an autolyse. In a large mixing bowl, combine the 3 cups of bread flour and 1⅓ cups of lukewarm water. Use your hands or a sturdy spoon to mix until just combined. There should be no dry spots of flour visible. The dough will look shaggy and a bit rough at this stage, and that’s perfectly fine. Cover the bowl with a damp tea towel or plastic wrap and let it rest for at least 30 minutes, or up to an hour. This resting period allows the flour to fully hydrate, initiating gluten development without any kneading. It makes the dough more pliable and easier to work with later on, setting the stage for a beautifully textured loaf.
Step 2: Incorporate the Sourdough Starter and Salt
After the autolyse period, it’s time to introduce the magic of sourdough. Add the ¾ cup of active, bubbly sourdough starter to the rested dough. Sprinkle the 1 teaspoon of salt over the starter. Now, using your hgin extracts, begin to incorporate the starter and salt into the dough. This is where the real kneading or stretch-andgin extractld process begins. Pinch, fold, and squeeze the dough, working it until the starter and salt are evenly distributed throughout. The dough will become a bit smoother and more cohesive as you work it. Continue this for about 5-7 minutes. If the dough feels sticky, you can lightly wet your hands with water to prevent sticking. The goal here is to integrate the leavening agent and seasoning while continuing to build strength in the dough.
Bulk Fermentation and Flavor Infusion
Step 3: Bulk Fermentation and Adding Flavor
Once the starter and salt are well incorporated, cover the bowl again and let the dough rest for another 30 minutes. Following this, it’s time for the bulk fermentation phase. Over the next 3-4 hours, you’ll perform a series of “stretch and folds” every 30-45 minutes. To do this, wet your hands slightly, grab a portion of the dough from one side, stretch it upwards gently, and fold it over to the opposite side. Rotate the bowl and repeat this process 3-4 times until all sides of the dough have been stretched and folded. This builds strength and structure in the dough, trapping air and promoting a good rise. About an hour before the end of your bulk fermentation, gently incorporate the 1 tablespoon of lemon zest and the 1¼ cup of fresh blueberries. Be careful not to overwork the dough at this stage, as you don’t want to break down the blueberries too much. The zest will infuse a bright citrus aroma and flavor, complementing the sweet burst of blueberries beautifully.
Shaping and Proofing
Step 4: Preshape and Bench Rest
After the bulk fermentation is complete and the dough has noticeably increased in volume (it should look bubbly and jiggly), gently turn the dough out onto a lightly floured surface. Be gentle to preserve the air bubbles. Your goal now is to preshape the dough into a rough round or oblong shape, depending on your final loaf intention. Use your hands to gently tuck the edges underneath the dough, creating a slight tension on the surface. Avoid degassing the dough too much. Let the preshaped dough rest, uncovered, on the counter for about 20-30 minutes. This resting period, known as the bench rest, allows the gluten to relax, making the final shaping easier and preventing tearing.
Step 5: Final Shaping and Cold Proofing
After the bench rest, it’s time for the final shaping of your Blueberry Lemon Sourdough Bread. Lightly flour your hands and the surface again. Shape the dough into its final form – either a round boule or an oval batard. Create tension on the surface by gently pulling the dough towards you and tucking the edges underneath. The surface should feel smooth and taut. Once shaped, carefully place the dough seam-side up into a well-floured proofing basket (banneton) or a bowl lined with a floured tea towel. Cover the basket or bowl with plastic wrap or place it inside a plastic bag to prevent the dough from drying out. Now, it’s time for the cold proof. Place the shaped dough in the refrigerator for 12-24 hours. This slow, cold fermentation develops incredible flavor and makes the dough easier to score and handle. The longer the cold proof, the more complex the flavor will be.
Baking Your Masterpiece
Step 6: Baking the Loaf
When you’re ready to bake, preheat your oven to 475°F (245°C) with your Dutch oven or baking vessel inside for at least 30 minutes. This ensures the vessel is screaming hot, which is key for a good oven spring. Carefully remove the hot Dutch oven from the oven. Gently turn the cold-proofed dough out of its basket onto a piece of parchment paper. You can then transfer the parchment paper with the dough directly into the hot Dutch oven. Score the top of the dough with a sharp knife or a lame. A simple cross or a few diagonal slashes will do the trick. Cover the Dutch oven with its lid and place it back in the oven. Bake for 20 minutes with the lid on. After 20 minutes, carefully remove the lid of the Dutch oven. Reduce the oven temperature to 450°F (230°C) and continue baking for another 20-25 minutes, or until the crust is a deep golden brown and the internal temperature of the loaf reaches 205-210°F (96-99°C). The aroma of baked blueberries and lemon will be non-intoxicating.
Step 7: Cooling and Enjoying
Once baked, carefully remove the Blueberry Lemon Sourdough Bread from the Dutch oven and place it on a wire rack to cool completely. Resist the urge to slice into it immediately! Allowing the bread to cool for at least 2-3 hours is crucial. This allows the internal crum extractb to set properly and prevents a gummy texture. As it cools, you’ll hear a delightful crackling sound from the crust. Once fully cooled, slice your beautiful loaf and enjoy the tangy sourdough, sweet blueberries, and bright lemon zest. It’s perfect on its own, toasted with butter, or even as a base for a sweet ricotta spread.
Conclusion:
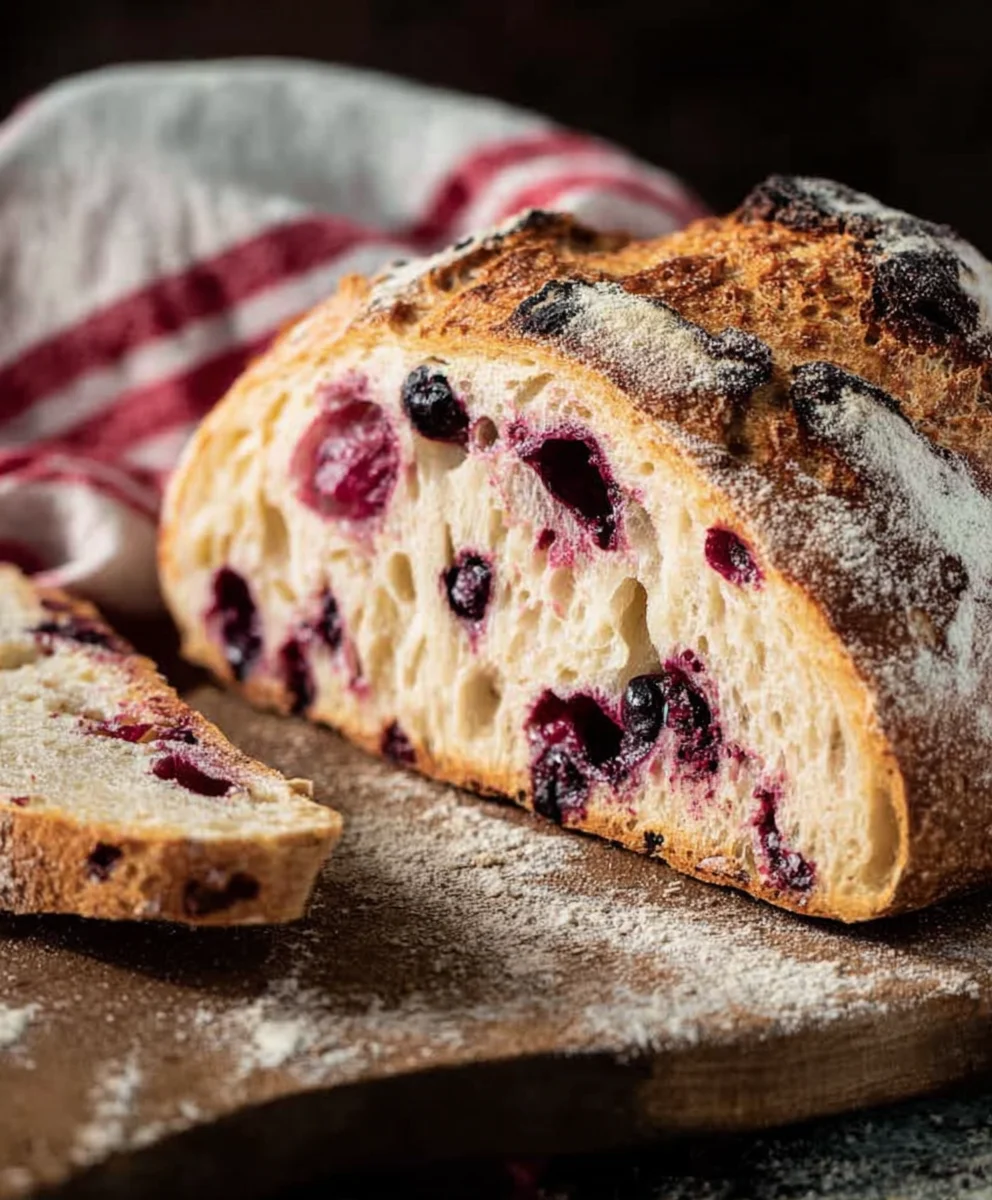
Congratulations, you’ve mastered the art of creating the most delightful Blueberry Lemon Sourdough Bread! This recipe is a celebration of tangy sourdough, bursting with sweet blueberries and bright, zesty lemon. The result is a loaf that’s not only visually appealing with its beautiful crust and vibrant berry pockets but also incredibly satisfying to eat. Its slightly chewy interior and crisp crust offer a wonderful textural contrast, making every bite an experience. We hope you enjoy this delicious journey as much as we do!
This versatile loaf is perfect for any occasion. Enjoy it toasted with a smear of butter for a simple yet elegant breakfast, or serve it alongside your favorite brunch dishes. It also makes a fantastic base for avocado toast or a delightful accompaniment to a light lunch. For those seeking to elevate their dessert game, a slice of Blueberry Lemon Sourdough Bread served warm with a dollop of whipped cream or a drizzle of honey is simply divine.
Don’t be afraid to experiment! You can swap blueberries for other berries like raspberries or blackberries, or add a sprinkle of poppy seeds for an extra textural element. A touch of lavender can also add a lovely floral note to complement the lemon. We encourage you to make this recipe your own and discover new flavor combinations. Happy baking!
Frequently Asked Questions:
Q: My Blueberry Lemon Sourdough Bread didn’t rise as much as I expected. What could be the reason?
A: Several factors can affect the rise. Ensure your sourdough starter is active and bubbly. Over-mixing the dough can also damage the gluten structure. Additionally, ambient temperature plays a role; warmer temperatures generally promote better fermentation. Make sure your proofing environment is warm enough.
Q: Can I use frozen blueberries instead of fresh ones in the Blueberry Lemon Sourdough Bread?
A: Yes, you absolutely can use frozen blueberries. It’s often recommended to toss them in a tablespoon of flour before adding them to the dough to help absorb some of the excess moisture they release during baking. This prevents the bread from becoming too wet.
Q: How can I store my Blueberry Lemon Sourdough Bread?
A: To maintain its freshness, store the cooled loaf in a bread box or wrap it tightly in a clean kitchen towel or a beeswax wrap at room temperature for up to 3-4 days. For longer storage, you can slice and freeze the bread in an airtight container or freezer bag for up to 3 months.
Blueberry Lemon Sourdough Bread
A fresh and zesty sourdough bread bursting with the flavors of blueberries and lemon.
Ingredients
-
3 cups bread flour
-
1⅓ cups lukewarm water
-
¾ cup active, bubbly, and well-fed sourdough starter
-
3 tablespoons white sugar
-
1 teaspoon salt
-
1¼ cup fresh blueberries
-
1 tablespoon lemon zest
Instructions
-
Step 1
Autolyse: Combine bread flour and lukewarm water in a bowl. Mix until just combined, cover, and let rest for 30-60 minutes. -
Step 2
Incorporate starter and salt: Add sourdough starter and salt to the rested dough. Knead or perform stretch and folds for 5-7 minutes until integrated and dough is smoother. -
Step 3
Bulk Fermentation and Flavor: Cover and let rest for 30 minutes. Perform stretch and folds every 30-45 minutes for 3-4 hours. About an hour before finishing, gently fold in lemon zest and blueberries. -
Step 4
Preshape and Bench Rest: Gently turn dough onto a floured surface. Preshape into a round or oblong. Let rest uncovered for 20-30 minutes. -
Step 5
Final Shaping and Cold Proof: Shape the dough into its final form. Place seam-side up in a floured proofing basket. Cover and refrigerate for 12-24 hours. -
Step 6
Baking: Preheat oven with Dutch oven to 475°F (245°C). Carefully transfer dough to parchment paper, then into the hot Dutch oven. Score the top. Bake covered for 20 minutes. Remove lid, reduce oven to 450°F (230°C), and bake for another 20-25 minutes until deep golden brown. -
Step 7
Cooling: Remove bread from Dutch oven and place on a wire rack to cool completely for at least 2-3 hours before slicing.
Important Information
Nutrition Facts (Per Serving)
It is important to consider this information as approximate and not to use it as definitive health advice.
Allergy Information
Please check ingredients for potential allergens and consult a health professional if in doubt.