Garlic Butter Keto Bread-Easy Low Carb Recipe
Garlic Butter Keto Bread. Oh, friends, if you’ve been missing the comforting aroma and satisfying chew of freshly baked bread while sticking to your ketogenic lifestyle, prepare to rejoice! This isn’t just any bread; it’s a golden ticket to a world where carb cravings are a distant memory. I’ve poured my heart (and a generous amount of garlic butter!) into perfecting this recipe, and trust me, the results are nothing short of magical. Imagin extracte a slice so tender it practically melts in your mouth, infused with the irresistible fragrance of toasted garlic and rich, creamy butter. It’s the perfect accompaniment to your favorite keto meals, acting as a delicious vehicle for sauces, or simply enjoyed on its own as a delightful snack. What makes this Garlic Butter Keto Bread truly special is its ability to deliver that deeply satisfying, bready experience without the carb overload, making it a staple in my kitchen and soon to be in yours.
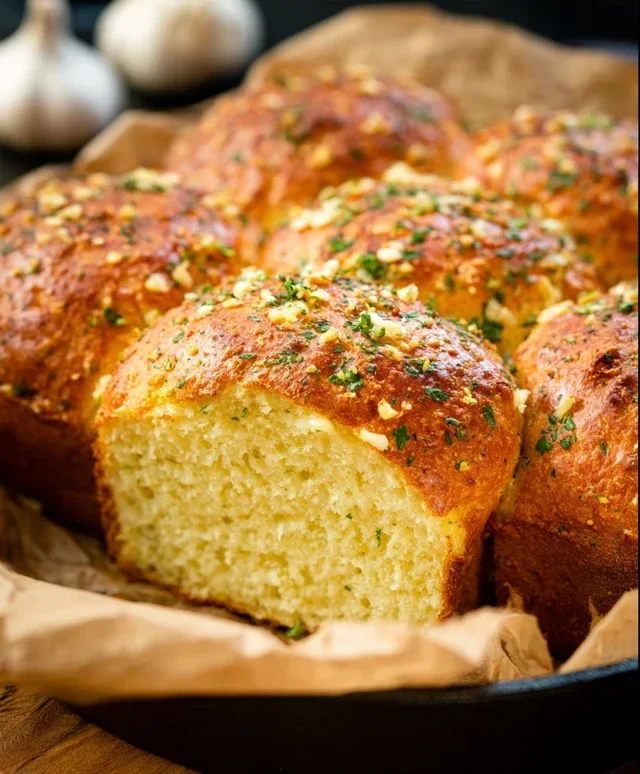
This garlic butter keto bread is a game-changer! It’s incredibly easy to make, delightfully cheesy, and has that perfect golden-brown crust that makes you forget you’re eating keto. Forget the dry, crum extractbly loaves of the past; this recipe delivers on flavor and texture. Whether you’re serving it as a side to your favorite keto meal, toasting it for an amazing sandwich, or just enjoying a slice with a smear of extra butter, this bread is sure to become a staple in your low-carb kitchen. The aroma alone as it bakes is enough to make your mouth water! It’s surprisingly satisfying and a wonderful way to enjoy bread again on a ketogenic diet.
Ingredients:
Making Your Garlic Butter Keto Bread
This recipe is surprisingly simple and doesn’t require any fancy equipment. The key is to ensure your cream cheese is properly softened to avoid lumps. I like to take it out of the fridge about an hour before I start baking.
The first crucial step involves combining the wet ingredients. In a large mixing bowl, I add the softened cream cheese and then beat it until it’s smooth and creamy. This usually takes about a minute or two with an electric mixer, but you can also do it by hand with a whisk if you’re feeling strong! Next, I crack in the four large eggs, one at a time, beating well after each addition. It’s important to incorporate each egg fully before adding the next to ensure a cohesive batter.
Now for the dry ingredients. In a separate, smaller bowl, I whisk together the almond flour, psyllium husk powder, baking powder, and salt. Giving these a good whisk ensures that the leavening agents and the flour are evenly distributed, which will lead to a better rise and texture in your bread. If you’re using garlic powder instead of fresh garlic, now would be the time to add it to the dry ingredients to distribute its flavor evenly.
The next step is where the magic starts to happen: combining the wet and dry ingredients. I gradually add the dry mixture to the wet mixture, mixing on low speed (or by hand) until just combined. Be careful not to overmix at this stage; overmixing can develop the gluten in the almond flour and lead to a tougher bread. Once the dry ingredients are incorporated, I stir in the melted butter. This adds richness and moisture to the dough.
If you’re using fresh minced garlic, this is the point where you’ll fold it into the batter. I also like to add the shredded Parmesan cheese at this stage, if I’m using it. It adds a lovely savory depth and a beautiful golden hue to the crust. Give it a gentle mix to distribute the garlic and cheese evenly throughout the batter. The batter will be quite thick, almost like a dough, which is exactly what we’re looking for.
Baking Your Delicious Loaf
Preheat your oven to 350°F (175°C). Prepare a baking sheet by lining it with parchment paper. This prevents sticking and makes for easy cleanup. I like to shape my dough into a rustic loaf on the parchment paper. You can also use a loaf pan lined with parchment paper for a more traditional shape, but I find the rustic loaf often has a better crust all around. Use slightly damp hands to gently shape the dough into your desired loaf form.
Now, it’s time to bake! Place the prepared baking sheet into the preheated oven. Bake for approximately 30-40 minutes. The baking time can vary depending on your oven and the thickness of your loaf. You’re looking for a beautiful golden-brown crust and the bread should sound hollow when tapped on the bottom. You can also insert a toothpick into the center; it should come out clean. Resist the urge to open the oven door too early, as this can cause the bread to collapse.
Once baked, carefully remove the bread from the oven. Let it cool on the baking sheet for about 10-15 minutes before transferring it to a wire rack to cool completely. This cooling process is important for the bread to set properly. If you slice it while it’s too hot, it can be gummy.
Serving Your Garlic Butter Keto Bread
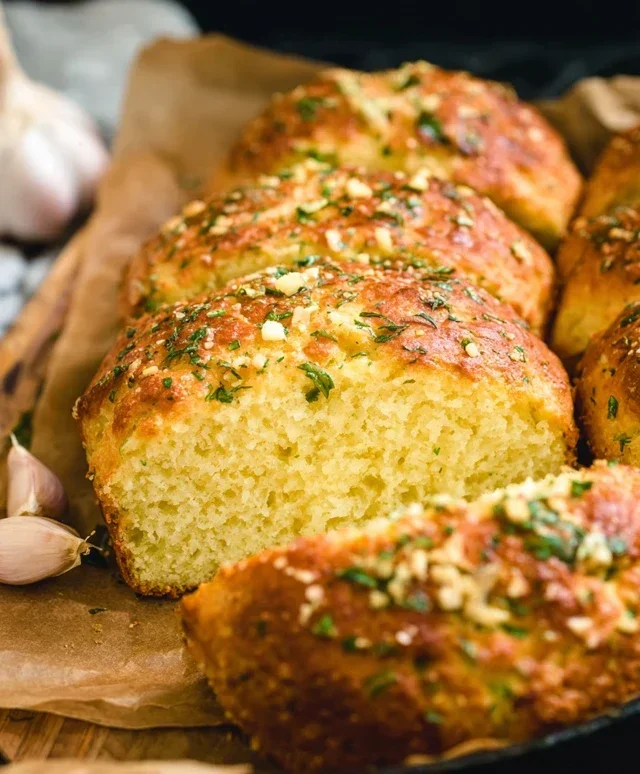
Once your garlic butter keto bread has cooled completely, it’s ready to be enjoyed! I love to slice it and serve it warm, especially with a generous spread of extra butter. It’s perfect alongside a hearty keto stew, a grilled steak, or even as the base for an open-faced avocado toast. For an extra touch of flavor and visual appeal, sprinkle some fresh chopped parsley over the top before serving. You can also freeze any leftovers; just slice the bread and store it in an airtight container in the freezer. Reheat slices in a toaster or oven. Enjoy every delicious, low-carb bite!
Conclusion:
So there you have it – your guide to creating the most delicious Garlic Butter Keto Bread! I truly believe this recipe is a game-changer for anyone following a ketogenic lifestyle or simply looking for a flavorful, healthier bread alternative. Its incredible aroma while baking, the rich garlic butter infusion, and the satisfyingly tender crum extractb make it a joy to prepare and even more of a joy to devour. This bread is incredibly versatile and pairs beautifully with almost anything. Think of it as your new go-to for sandwiches, dipping into soups and stews, or even just enjoying with a smear of extra butter. Don’t be afraid to experiment with variations; adding fresh herbs like rosemary or chives can elevate its flavor profile even further! I strongly encourage you to give this Garlic Butter Keto Bread a try. You won’t regret it!
Frequently Asked Questions:
What is the best way to store this keto bread?
For the freshest taste, I recommend storing your Garlic Butter Keto Bread in an airtight container at room temperature for up to 2-3 days. If you plan to keep it longer, it freezes beautifully! Just slice it before freezing, wrap it tightly in plastic wrap, and then place it in a freezer-safe bag. Reheat slices in a toaster or oven for the best texture.
Can I make this bread dairy-free?
Yes, you absolutely can! To make a dairy-free version, simply substitute the butter with a good quality vegan butter or coconut oil. You’ll still get fantastic flavor and texture, although the exact taste might vary slightly depending on the fat you choose.
My bread turned out a bit dense. What could have gone wrong?
A slightly dense keto bread can sometimes be due to overmixing the batter, which can develop the almond or coconut flour too much. Another common culprit is opening the oven door too early during baking, causing it to deflate. Ensure your leavening agents are fresh and that you’re measuring your ingredients accurately. Gentle mixing and patient baking are key!
Garlic Butter Keto Bread
A delicious and easy keto-friendly bread recipe, perfect for low-carb diets. This recipe features a rich garlic butter flavor and a tender crumb. Perfect served warm with your favorite keto meals.
Ingredients
-
1 and 1/2 cups almond flour
-
1/4 cup psyllium husk powder
-
2 teaspoons baking powder
-
1/2 teaspoon salt
-
4 large eggs
-
1/4 cup melted butter
-
2 cloves garlic, minced
-
1 tablespoon chopped fresh parsley
Instructions
-
Step 1
Preheat your oven to 350°F (175°C). Grease and flour a small loaf pan or line it with parchment paper. -
Step 2
In a large bowl, whisk together almond flour, psyllium husk powder, baking powder, and salt. -
Step 3
In a separate bowl, whisk together the eggs until well combined. -
Step 4
Add the melted butter, minced garlic, and chopped parsley to the whisked eggs. Mix well. -
Step 5
Pour the wet ingredients into the dry ingredients and mix until a dough forms. It will be sticky. -
Step 6
Transfer the dough to the prepared loaf pan and spread it evenly. -
Step 7
Bake for 30 minutes, or until a toothpick inserted into the center comes out clean and the bread is golden brown. -
Step 8
Let the bread cool in the pan for a few minutes before transferring it to a wire rack to cool completely.
Important Information
Nutrition Facts (Per Serving)
It is important to consider this information as approximate and not to use it as definitive health advice.
Allergy Information
Please check ingredients for potential allergens and consult a health professional if in doubt.