Cookie Monster Cheesecake Recipe- Fun & Delicious
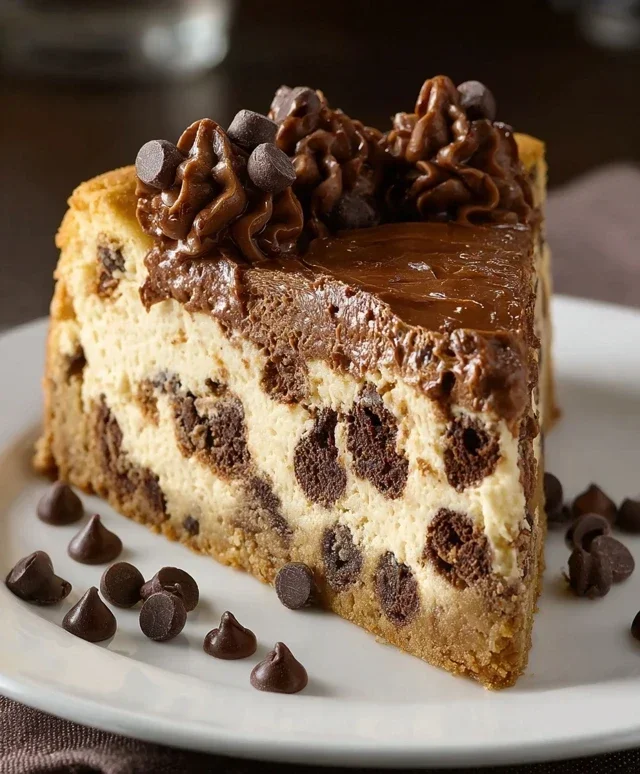
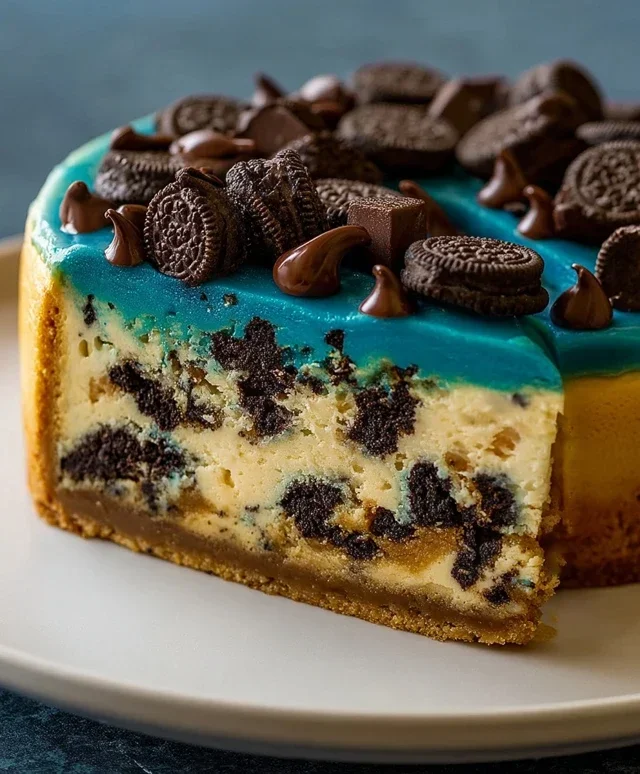
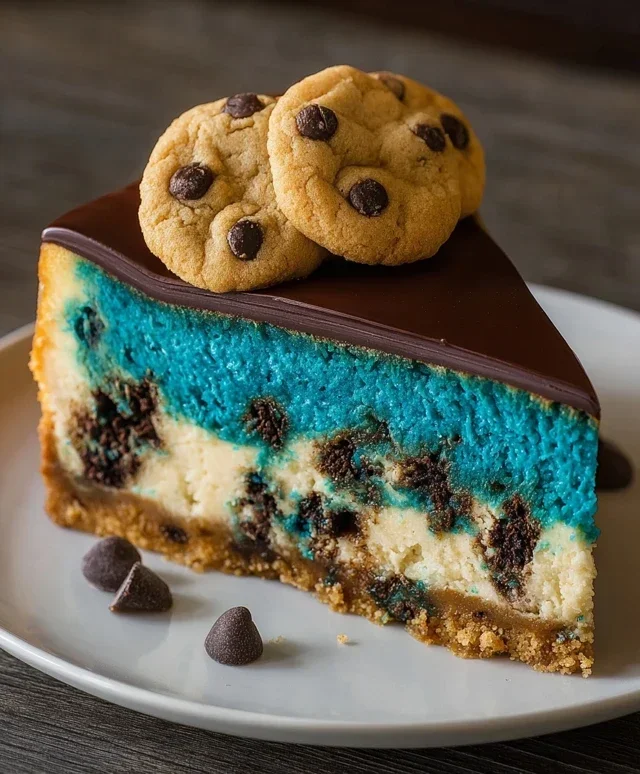
Cookie Monster Cheesecake is not just a dessert; it’s a nostalgic trip back to childhood, a vibrant explosion of blue, and pure, unadulterated joy in every creamy bite. Who can resist the allure of this iconic blue-hued cheesecake, studded with chunks of chocolate chip cookies and topped with a playful swirl of whipped cream? It’s a treat that instantly brings smiles, whether you’re a lifelong fan of the beloved Sesame Street character or simply a connoisseur of delicious, over-the-top desserts. What truly makes Cookie Monster Cheesecake so special is its whimsical nature. It’s not afraid to be a little messy, a little outrageous, and incredibly fun to make and devour. This recipe captures that spirit, bringin extractg a beloved character to life in a way that’s both familiar and refreshingly new. Get ready to embrace your inner cookie monster and create a cheesecake masterpiece that will be the talk of any gathering!
Cookie Monster Cheesecake
Get ready to unleash your inner Cookie Monster with this outrageously delicious and visually stunning cheesecake! This isn’t just any cheesecake; it’s a vibrant blue masterpiece packed with the irresistible flavors of chocolate chip cookies, all nestled in a creamy, dreamy cheesecake filling. Perfect for birthdays, parties, or just when you need a serious dose of fun and comfort food, this Cookie Monster Cheesecake is guaranteed to be a showstopper. It’s surprisingly straightforward to make, and the joy it brings is immeasurable. Let’s dive into creating this whimsical dessert!
Ingredients:
Cookie Crust
This isn’t your typical grabeef ham cracker crust. We’re going for a cookie-infused base that perfectly complements the cheesecake filling.
1. Prepare the Crust Mixture: In a medium bowl, combine the melted unsalted butter, 1/2 teaspoon salt, and the tightly packed brown sugar. Stir until well combined. This creates a wonderful base for our cookie crust, providing richness and a hint of caramel flavor.
2. Incorporate Wet and Dry Ingredients: Add the egg and 1 teaspoon of vanilla extract to the butter and sugar mixture. Whisk until everything is smooth and fully incorporated. Then, gradually add the all-purpose flour, mixing until just combined. Be careful not to overmix the flour; we want a tender crum extractb.
3. Add the Chocolate Chips: Gently fold in the semisweet mini chocolate chips. These little bursts of chocolate will add delightful texture and flavor to our cookie crust.
4. Form the Crust: Press this delicious cookie dough mixture evenly into the bottom of a 9-inch springform pan. You can use the bottom of a measuring cup or your hands to ensure a compact and even layer. This step is crucial for a sturdy crust that won’t crum extractble when you slice the cheesecake. Once pressed, place the springform pan in the freezer for about 15-20 minutes while you prepare the cheesecake filling. This helps the crust set nicely.
Cheesecake Filling
The heart of our Cookie Monster Cheesecake is this luxuriously smooth and vibrantly blue filling.
1. Cream the Cheese and Sugars: In a large bowl, beat the softened cream cheese until it’s completely smooth and free of lumps. This is essential for a creamy texture. Add the granulated sugar and the pinch of salt, and beat again until well combined and fluffy. Scrape down the sides of the bowl periodically to ensure everything is incorporated.
2. Add Cornflour and Vanilla: Sprinkle in the cornflour (cornstarch) and 1 teaspoon of vanilla extract. Mix on low speed until just combined. The cornflour acts as a stabilizer, helping to prevent the cheesecake from cracking.
3. Incorporate the Cream and Color: Pour in the whipping cream and begin extract mixing on low speed. Gradually increase the speed to medium and continue mixing until the mixture is smooth and luscious. Now for the fun part: add the blue gel food coloring. Start with a few drops and mix until you achieve your desired Cookie Monster blue. Gel food coloring provides a more vibrant and concentrated color than liquid, so a little goes a long way. You’re aiming for a cheerful, bright blue that’s instantly recognizable.
4. Add the Eggs: Add the 3 eggs, one at a time, beating on low speed after each addition until just combined. Do NOT overbeat at this stage, as too much air can cause the cheesecake to puff up and then crack as it cools. Scrape down the sides of the bowl as needed. The batter should be thick and smooth, a beautiful shade of blue.
Assembling and Baking
The final steps bring our Cookie Monster creation to life.
1. Pour and Bake: Pour the blue cheesecake filling evenly over the chilled cookie crust in the springform pan. Smooth the top with an offset spatula or the back of a spoon.
2. Water Bath (Optional but Recommended): To ensure even baking and prevent cracking, I highly recommend using a water bath. Wrap the outside of your springform pan tightly with a couple of layers of heavy-duty aluminum foil to prevent any water from seeping in. Place the wrapped springform pan inside a larger baking pan. Carefully pour hot water into the larger pan until it comes about halfway up the sides of the springform pan.
3. Bake Time: Bake in a preheated oven at 325°F (160°C) for approximately 50-65 minutes, or until the edges are set and the center is still slightly jiggly. A gentle shake of the pan should reveal a slight wobble in the very center.
4. Cooling Process: This is a critical step for a perfect cheesecake. Once baked, turn off the oven and prop the oven door open slightly with a wooden spoon. Let the cheesecake cool in the oven for about an hour. This gradual cooling prevents drastic temperature changes that can lead to cracking.
5. Chill Thoroughly: After the hour in the oven, remove the cheesecake from the oven and the water bath. Let it cool completely on a wire rack at room temperature. Once cooled, cover the cheesecake loosely with plastic wrap and refrigerate for at least 6 hours, or preferably overnight. This chilling time is essential for the cheesecake to set properly and for the flavors to meld.
Once fully chilled, carefully run a knife around the edge of the pan before releasing the springform sides. Decorate with extra chocolate chips, whipped cream, or even some cookie crum extractbles if you desire. Get ready to slice into a creamy, dreamy, and incredibly fun Cookie Monster Cheesecake! Enjoy every blue, chocolatey bite!
Conclusion:
And there you have it – your very own Cookie Monster Cheesecake recipe! This dessert is an absolute showstopper, combining the creamy decadence of cheesecake with the irresistible crunch and flavor of cookies. It’s a fun and visually striking treat that’s guaranteed to bring smiles to faces, whether you’re a seasoned baker or just looking for a memorable dessert to impress. I love how this recipe offers a playful twist on a classic, making it perfect for birthdays, parties, or just a Tuesday night when you need a little blue-tiful joy.
For serving suggestions, a dollop of whipped cream or even a few extra cookie crum extractbles on top can elevate this already fantastic cheesecake. You can also get creative with your cookie choices for variations – think chocolate chip, double chocolate, or even a mix of different cookie dough bits folded into the batter for an extra burst of flavor and texture. Don’t be afraid to experiment! I highly encourage you to give this Cookie Monster Cheesecake a try. It’s a project that’s as enjoyable to make as it is to devour.
Frequently Asked Questions:
Can I make this cheesecake ahead of time?
Absolutely! Cheesecakes are often best when made a day in advance. This allows the flavors to meld beautifully and the cheesecake to set fully. Cover it tightly with plastic wrap and refrigerate it for at least 8 hours, or preferably overnight, before serving. This is a great strategy for stress-free entertaining!
What kind of cookies work best in this recipe?
Classic chocolate chip cookies are a fantastic choice and provide that quintessential Cookie Monster vibe. However, you can get creative! Oatmeal raisin, double chocolate chip, or even chunks of your favorite store-bought cookie dough would be delicious. Just ensure they are baked cookies or cookie dough that’s safe to consume raw, as they won’t be fully cooked during the cheesecake baking process. The key is a cookie with a good texture that holds up well.
Cookie Monster Cheesecake
A fun and delicious cheesecake inspired by the beloved Cookie Monster, featuring a cookie crust and vibrant blue cheesecake filling with chocolate chips.
Ingredients
-
4 oz unsalted butter
-
1/2 tsp salt
-
2.6 oz brown sugar, tightly packed
-
1 egg
-
1 tsp vanilla extract
-
4.4 oz all-purpose flour
-
4 oz semisweet mini chocolate chips
-
16 oz cream cheese
-
2 tsp cornflour
-
3.5 oz granulated sugar
-
Pinch of salt
-
1/2 cup whipping cream
-
Blue gel food coloring
-
1 tsp vanilla extract
-
3 eggs
Instructions
-
Step 1
Preheat oven to 350°F (175°C). In a bowl, combine melted butter, brown sugar, 1/2 tsp salt, 1 egg, and 1 tsp vanilla extract. Stir in flour until just combined. Fold in 4 oz semisweet mini chocolate chips. Press mixture into the bottom of a 9-inch springform pan to form the crust. -
Step 2
In a large bowl, beat cream cheese until smooth. Gradually beat in granulated sugar and pinch of salt until well combined. Beat in 2 tsp cornflour and 1 tsp vanilla extract. -
Step 3
Add 3 eggs one at a time, beating well after each addition. Stir in 1/2 cup whipping cream until smooth. Add blue gel food coloring and mix until the desired Cookie Monster blue color is achieved. -
Step 4
Pour the blue cheesecake filling over the prepared cookie crust in the springform pan. -
Step 5
Bake for 50-60 minutes, or until the edges are set and the center is slightly jiggly. Turn off the oven, crack the door open, and let the cheesecake cool in the oven for 1 hour. Remove from oven and cool completely on a wire rack. -
Step 6
Chill the cheesecake in the refrigerator for at least 4 hours, or preferably overnight, before serving.
Important Information
Nutrition Facts (Per Serving)
It is important to consider this information as approximate and not to use it as definitive health advice.
Allergy Information
Please check ingredients for potential allergens and consult a health professional if in doubt.