Campfire Grilled Nachos- Ultimate Outdoor Snack
Campfire grilled nachos are more than just a meal; they’re an experience. Imagin extracte this: the crackling symphony of a campfire, the scent of woodsmoke mingling with melted cheese, and the joyous anticnon-alcoholic ipation of diggin extractg into a platter piled high. These aren’t your average movie theater nachos. There’s something undeniably primal and satisfying about transforming simple ingredients over an open flame. We love them because they’re ridiculously easy to customize, perfect for sharing with a crowd, and taste absolutely phenomenal with that smoky char you can only achieve outdoors. What truly makes campfire grilled nachos special is the communal spirit they foster. They’re the ultimate crowd-pleaser, bringin extractg smiles and satisfied sighs around the fire. Get ready to elevate your outdoor culinary game with this unforgettable recipe for campfire grilled nachos!
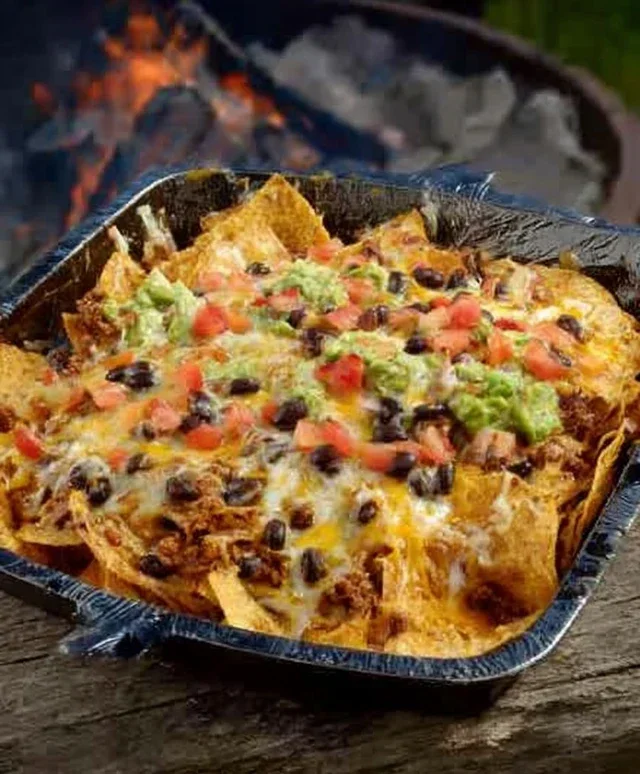
Campfire Grilled Nachos
There’s something incredibly satisfying about cooking over an open flame, and when that flame is used to create a bubbling, cheesy, glorious pile of nachos, well, that’s just pure magic. Campfire grilled nachos are the ultimate outdoor treat, perfect for a lazy afternoon by the fire, a fun family activity, or even as a crowd-pleasing appetizer at your next camping adventure. They’re surprisingly simple to make, and the smoky flavor from the campfire takes them to a whole new level of deliciousness. Forget boring oven-baked nachos; we’re going rustic and delicious!
Ingredients:
Cooking Instructions:
Preparing these campfire grilled nachos is all about building layers of flavor and ensuring everything gets perfectly melty and warm. We’ll start by getting our ground meat ready, then move on to the assembly and the exciting part – grilling!
1. Prepare the Ground Meat Mixture:
This is where we build a flavor foundation for our nachos. If you’re camping, you can do this step at home and transport it in a senon-alcoholic aled container to save time at the campsite. In a skillet over medium heat (or if you have a camping stove), brown your ground meat, breaking it up into crum extractbles as it cooks. Once the meat is no longer pink, drain off any excess grease. Sprinkle the taco seasoning over the cooked meat and stir well to coat. Add about 1/4 cup of water to the skillet and let it simmer for a few minutes, allowing the seasoning to meld with the meat and create a flavorful taco filling. While the meat is simmering, rinse and drain your beans if you’re using whole beans. If you’re using refried beans, you can warm them up in a separate small pot or even directly in their can (carefully, of course!) by placing them near the edge of the campfire.
2. Set Up for Grilling:
For campfire grilled nachos, we need a sturdy, heat-safe vessel. A cast-iron skillet or a heavy-duty aluminum foil pan works best. We want something that can withstand the direct heat of the campfire and hold all our delicious ingredients without tipping or burning through too quickly. If you’re using a cast-iron skillet, make sure it’s well-seasoned. If you’re using a foil pan, double up on the foil for extra sturdiness. Prepare your grilling area by clearing away any loose debris and ensuring your campfire has a good bed of glowing embers. You’re looking for medium heat, not roaring flames, which can burn the chips too quickly before the cheese has a chance to melt. A good indicator is if you can hold your hand about 4-5 inches above the embers for 4-5 seconds.
3. Assemble Your Nacho Masterpiece:
Now comes the fun part – layering! Start by spreading a generous layer of tortilla chips across the bottom of your cast-iron skillet or foil pan. Don’t overcrowd it; you want to be able to reach all the deliciousness with your chips. Next, evenly distribute the prepared ground meat mixture over the chips. Then, spoon your chosen beans over the meat. If you’re using refried beans, you might want to dollop them on in spoonfuls, which helps them spread out nicely. Sprinkle the diced tomatoes and finely diced red onion over the bean and meat layers. Finally, generously top everything with your shredded cheese. Make sure the cheese covers as much of the surface area as possible to create that ultimate gooey, melted cheese blanket. Add your diced chilis or sliced jalapeños at this stage, scattering them evenly for pockets of heat.
4. The Grilling Process:
Carefully place your assembled nachos on the grill grate over the glowing embers. The key here is to monitor them closely. You’ll want to rotate the pan or skillet periodically to ensure even cooking and prevent any hot spots from burning the chips. The goal is to melt the cheese into a bubbly, glorious mass and warm everything through. This usually takes about 5-10 minutes, depending on the heat of your campfire. You’ll see the cheese start to melt and ooze down the sides, and the aroma will be absolutely incredible! If you notice one side cooking faster than the other, simply shift the pan to a cooler part of the grill. Be patient; the anticnon-alcoholic ipation is part of the fun!
5. Serve and Enjoy Your Campfire Creation:
Once the cheese is perfectly melted and bubbling, and everything is heated through, carefully remove the nachos from the campfire. Use heat-resistant gloves or oven mitts, as the skillet or pan will be very hot. Let them cool for just a minute or two before diving in, otherwise, you’ll burn your mouth on that molten cheese! Now, it’s time for the finishing touches. Top your hot, cheesy nachos with freshly diced avocado, a dollop of sour cream, a spoonful of salsa, and a sprinkle of fresh cilantro, if desired. Grab a fork or just dive in with your chips – however you enjoy them, these campfire grilled nachos are a taste of pure outdoor bliss. They’re best enjoyed immediately, shared with friends and family around the crackling fire.

Conclusion:
So there you have it, the ultimate guide to crafting delicious campfire grilled nachos! This recipe is truly fantastic because it takes a beloved comfort food and elevates it with the smoky char and unique atmosphere of an outdoor cooking experience. The simplicity of preparation, combined with the sheer joy of sharing these ooey-gooey, cheesy delights around a crackling fire, makes it an unforgettable meal. Whether you’re camping with family, hosting a backyard bonfire, or just craving something special, these campfire grilled nachos are sure to be a hit.
Don’t be afraid to get creative with your toppings! Think about adding some grilled corn kernels for sweetness, diced jalapeños for a kick, or even some seasoned ground beef or shredded chicken for a heartier meal. For serving, these are best enjoyed immediately, straight from the grill. They make a perfect appetizer for a larger meal, a fun side dish, or even a satisfying main course for a casual get-together. I highly encourage you to gather your ingredients and give this recipe a try – you won’t regret the adventure!
Frequently Asked Questions:
Q1: What kind of chips work best for campfire grilled nachos?
I’ve found that sturdy tortilla chips, either round or scoop-shaped, hold up best to the heat and toppings without becoming too soggy. Avoid very thin or delicate chips.
Q2: Can I prepare some of the toppings ahead of time?
Absolutely! Chopping your vegetables, shredding your cheese, and even pre-cooking any meat additions can save you a lot of time at the campfire, making the assembly process much smoother.
Q3: What’s the best way to avoid burning the bottom of the nachos?
Using a sturdy foil pan or a cast-iron skillet works wonders. You can also place a layer of wood chips or small logs underneath your cooking surface to create a more even heat distribution and prevent direct scorching.
Campfire Grilled Nachos
Hearty and delicious campfire grilled nachos, perfect for outdoor adventures.
Ingredients
-
tortilla chips
-
ground pork
-
taco seasoning
-
black beans
-
shredded cheddar cheese
-
diced tomatoes
-
diced onion
-
sliced avocado
-
diced jalapeños
Instructions
-
Step 1
In a skillet over the campfire, brown the ground pork. Drain any excess grease. -
Step 2
Add taco seasoning and a splash of water to the cooked pork. Stir well and let it simmer for a few minutes until thickened. -
Step 3
Layer tortilla chips on a sturdy, oven-safe grill pan or a heavy-duty foil packet. -
Step 4
Spoon the seasoned pork mixture evenly over the chips. -
Step 5
Top with black beans, diced tomatoes, diced onion, and diced jalapeños. -
Step 6
Generously sprinkle shredded cheddar cheese over the toppings. -
Step 7
Carefully place the grill pan or foil packet onto the campfire grill grate. Cook for 8-10 minutes, or until the cheese is melted and bubbly. -
Step 8
Remove from the campfire and top with sliced avocado before serving.
Important Information
Nutrition Facts (Per Serving)
It is important to consider this information as approximate and not to use it as definitive health advice.
Allergy Information
Please check ingredients for potential allergens and consult a health professional if in doubt.