Easy Frozen Banana Yogurt Pops – Healthy Treat
Frozen Banana Yogurt Pops are more than just a simple treat; they’re a gateway to pure, unadulterated summer bliss. Imagin extracte biting into a creamy, cool confection that’s bursting with natural sweetness and a hint of tangy goodness. What’s not to love? These delightful popsicles are universally adored because they manage to be both incredibly satisfying and wonderfully guilt-free. They’re the perfect antidote to a scorching afternoon, a refreshing post-workout reward, or a wholesome dessert for little ones (and let’s be honest, grown-ups too!). What truly sets these Frozen Banana Yogurt Pops apart is their incredible versatility and the sheer simplicity of their creation. Forget complicated ingredients and lengthy preparation; we’re talking about a recipe that’s as easy as it is delicious, allowing the natural flavors of ripe bananas and creamy yogurt to shine through. Get ready to unlock a new favorite way to enjoy frozen fruit!
Ingredients:
- 3 ripe bananas, peeled and cut in half
- 3/4 cup vanilla yogurt (or your preferred flavor like strawberry, blueberry, or plain)
- Colorful sprinkles, mini chocolate chips, shredded coconut, or any other toppings you desire
- 6 popsicle sticks
Preparing the Bananas
The first step to creating these delightful Frozen Banana Yogurt Pops is to prepare your bananas. Ensure your bananas are ripe but not overly mushy. A few brown spots on the peel are actually a good indicator of sweetness and ripeness, which will translate into a delicious pop. Once peeled, cut each banana in half crosswise. This will give you the perfect base size for your popsicles. For uniformity, try to make these cuts as even as possible. If you’re feeling adventurous and want to experiment with shapes, you could also slice the bananas lengthwise, but the halved approach is generally the easiest and most stable for dipping and freezing.
Creating the Yogurt Coating
Next, we’ll get our yogurt ready. Take your 3/4 cup of vanilla yogurt. If you’ve chosen a different flavor, the process remains the same. Vanilla is a classic choice because it complements the natural sweetness of the banana without overpowering it. However, feel free to get creative with fruit-flavored yogurts or even a plain Greek yogurt for a tangier profile. You want the yogurt to be smooth and creamy. If your yogurt seems a bit too thick straight from the container, you can stir in a tiny splash of milk or a bit more yogurt until it reaches a consistency that’s easy to dip the banana halves into. This coating needs to be thick enough to adhere well to the banana but not so thick that it’s difficult to work with.
Assembling Your Pops
Now for the fun part: assembling your Frozen Banana Yogurt Pops! Take one of your banana halves and insert a popsicle stick firmly into the cut end. Make sure it goes in deep enough to be secure, but not so deep that it pokes through the other side. This stick will be your handle. You want to do this for all six banana halves. Once the sticks are in place, it’s time to coat the bananas with yogurt. You can do this by holding the banana half over your yogurt bowl and spooning the yogurt over it, using a spoon or a spatula to spread it evenly. Alternatively, you can dip the banana half directly into the yogurt, rotating it to ensure it’s fully covered. Aim for a generous, even coating. Don’t worry if it’s not perfectly smooth; a slightly rustic look adds to the homemade charm.
Adding Your Toppings
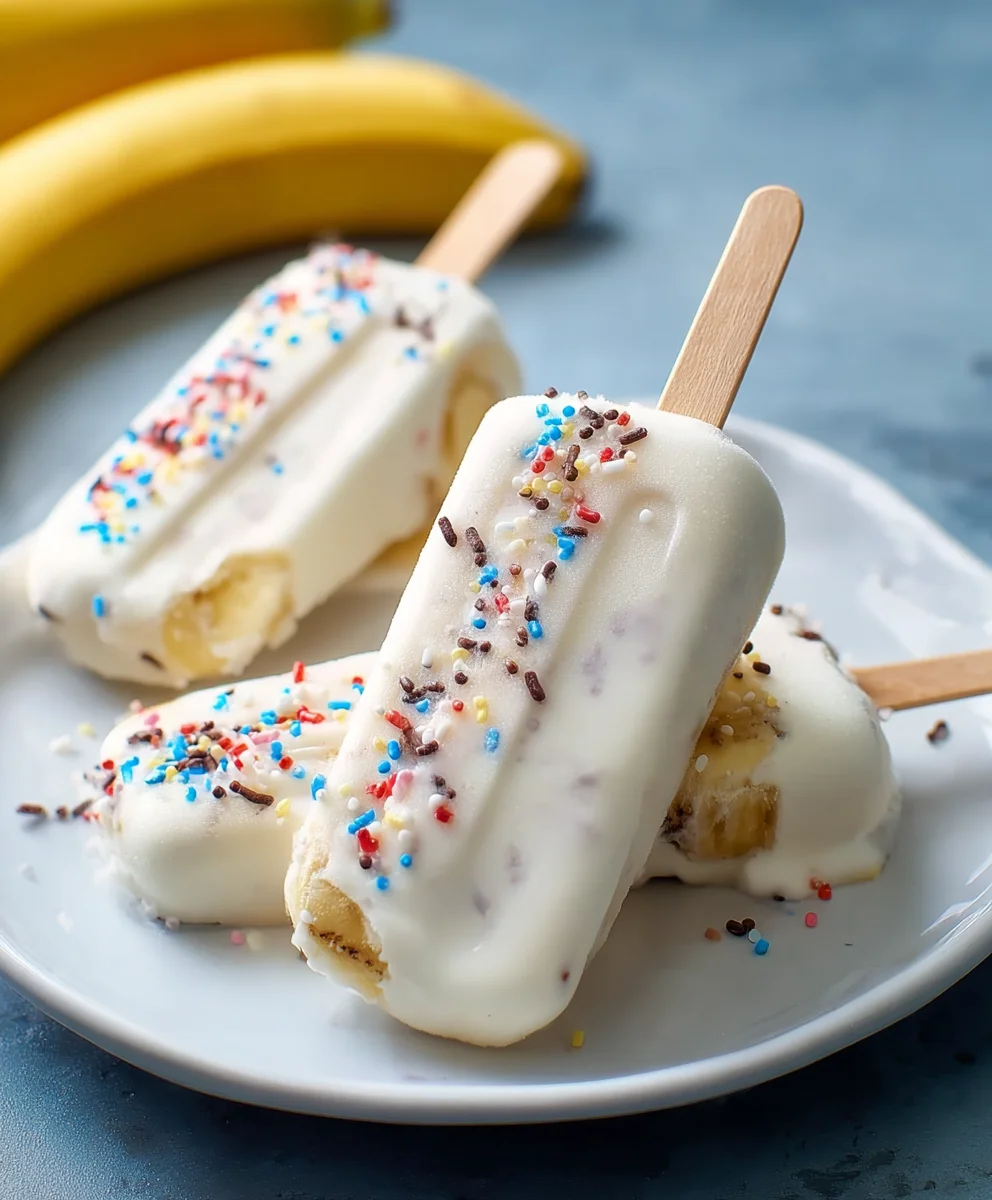
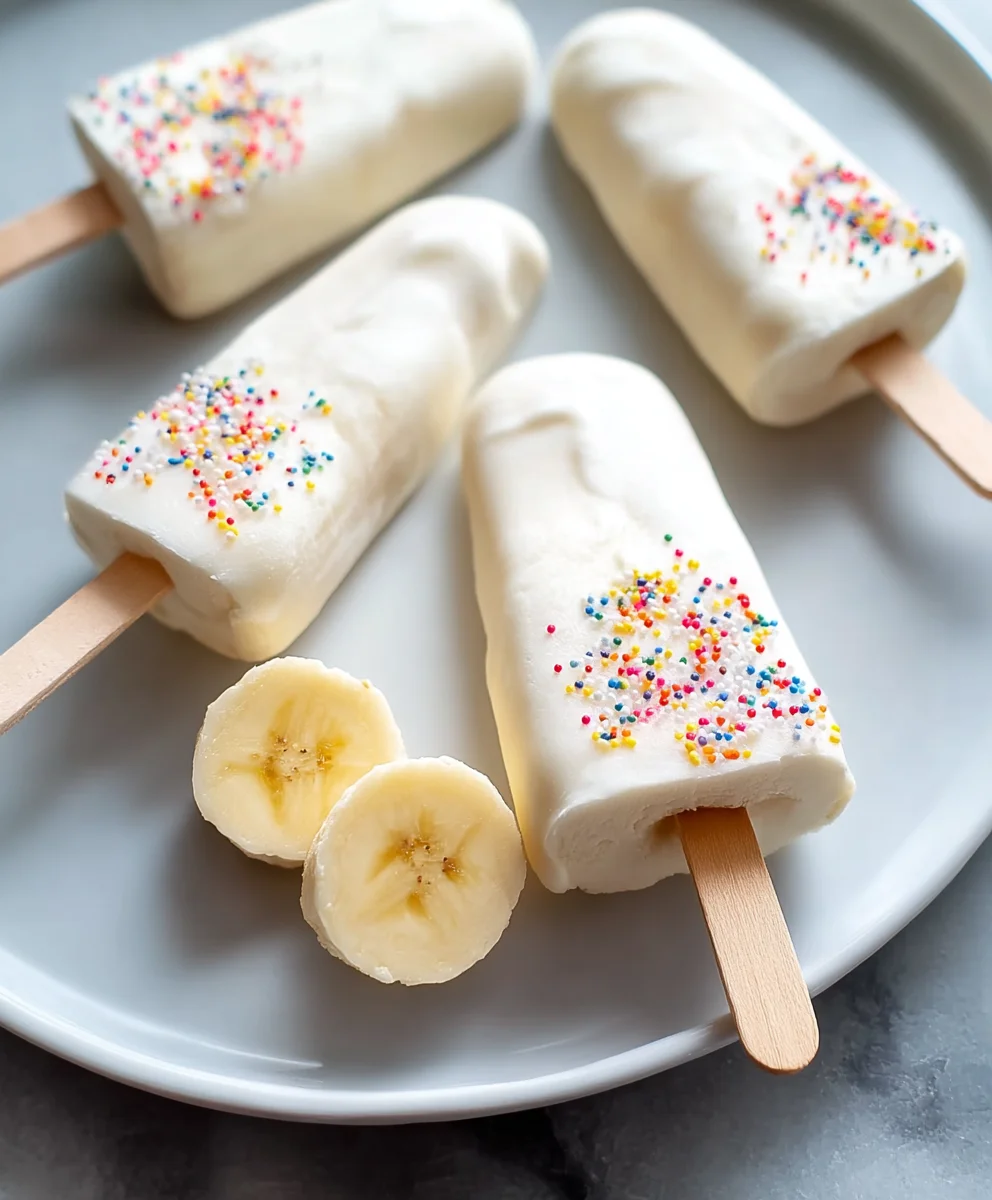
This is where you can really let your creativity shine! While the yogurt coating is still wet, it’s the perfect time to add your chosen toppings. Immediately after coating each banana half, roll it or sprinkle it with your desired toppings. If you’re using sprinkles, gently press them onto the yogurt to help them stick. For mini chocolate chips, you can either press them in individually or pour a small amount over the top. Shredded coconut is another fantastic option that adds a lovely texture and tropical flavor. You can even combine toppings for a multi-textured treat! Think about creating different flavor profiles for each pop – perhaps some with just sprinkles, others with chocolate chips, and maybe even a few with a sprinkle of shredded coconut. This step makes your Frozen Banana Yogurt Pops visually appealing and adds an extra layer of deliciousness.
Freezing to Perfection
Once your banana halves are coated and adorned with toppings, it’s time to freeze them. Carefully place each prepared banana pop onto a baking sheet lined with parchment paper. The parchment paper is crucial here; it prevents the pops from sticking to the baking sheet as they freeze. Make sure the pops are not touching each other. If they are, they might freeze together, making them difficult to separate later. Once your baking sheet is full, place it gently into your freezer. Allow the Frozen Banana Yogurt Pops to freeze completely. This usually takes at least 2-3 hours, but overnight is even better for ensuring they are firm and ready to enjoy. You’ll know they’re ready when they are solid and the yogurt coating has set firmly.
Serving and Enjoying
When your Frozen Banana Yogurt Pops are fully frozen, it’s time to enjoy them! Carefully remove the baking sheet from the freezer. Gently peel the pops off the parchment paper. If they seem a bit stuck, you can briefly run the bottom of the baking sheet under warm water for a few seconds to loosen them, but be quick so they don’t start to melt. Serve them immediately for the best texture and flavor. These pops are a wonderfully healthy and refreshing treat, perfect for a hot day or a fun dessert for kids and adults alike. Because they are made with real fruit and yogurt, they offer a satisfying sweetness without the guilt. They are best enjoyed shortly after removing them from the freezer to prevent them from becoming too soft. If you have any leftovers, you can store them back in the freezer, ensuring they are in an airtight container or wrapped individually to prevent freezer burn.
Conclusion:
And there you have it – a simple, delightful way to create delicious Frozen Banana Yogurt Pops! This recipe offers a wonderfully healthy and refreshing treat, perfect for warm days or a guilt-free indulgence any time of year. The beauty of these pops lies in their versatility; feel free to customize them to your heart’s content. Serve them as a cool dessert, a post-workout snack, or a fun activity for kids to help make. Don’t be afraid to experiment with different yogurt flavors, add a swirl of honey or maple syrup for extra sweetness, or sprinkle in some granola or chopped nuts for added texture. I hope you enjoy making and tasting these amazing Frozen Banana Yogurt Pops as much as I do. Happy popping!
Frequently Asked Questions:
Can I use dairy-free yogurt for these Frozen Banana Yogurt Pops?
Absolutely! These Frozen Banana Yogurt Pops are incredibly adaptable. You can easily substitute regular dairy yogurt with your favorite dairy-free alternative, such as coconut yogurt, almond yogurt, or soy yogurt, for a delicious vegan option.
How long do the Frozen Banana Yogurt Pops last in the freezer?
Stored properly in an airtight container or freezer bag, your Frozen Banana Yogurt Pops can last for up to 2-3 months. However, they are best enjoyed within the first month for optimal texture and flavor.
Easy Frozen Banana Yogurt Pops
A simple and healthy frozen treat made with ripe bananas and yogurt, customizable with your favorite toppings.
Ingredients
-
3 ripe bananas, peeled and cut in half
-
3/4 cup vanilla yogurt
-
Colorful sprinkles
-
Mini chocolate chips
-
Shredded coconut
-
6 popsicle sticks
Instructions
-
Step 1
Prepare the bananas: Ensure bananas are ripe but not overly mushy. Peel and cut each banana in half crosswise for stability. -
Step 2
Create the yogurt coating: Use 3/4 cup of vanilla yogurt. If it’s too thick, stir in a tiny splash of milk or more yogurt until smooth and dippable. -
Step 3
Assemble the pops: Insert a popsicle stick firmly into the cut end of each banana half. Coat each banana with yogurt by spooning or dipping, ensuring an even layer. -
Step 4
Add toppings: While the yogurt is wet, roll or sprinkle with desired toppings like sprinkles, mini chocolate chips, or shredded coconut. -
Step 5
Freeze: Carefully place prepared pops on a parchment-lined baking sheet, ensuring they don’t touch. Freeze for at least 2-3 hours or until solid. -
Step 6
Serve and enjoy: Remove from freezer, peel off parchment paper, and serve immediately for the best texture.
Important Information
Nutrition Facts (Per Serving)
It is important to consider this information as approximate and not to use it as definitive health advice.
Allergy Information
Please check ingredients for potential allergens and consult a health professional if in doubt.