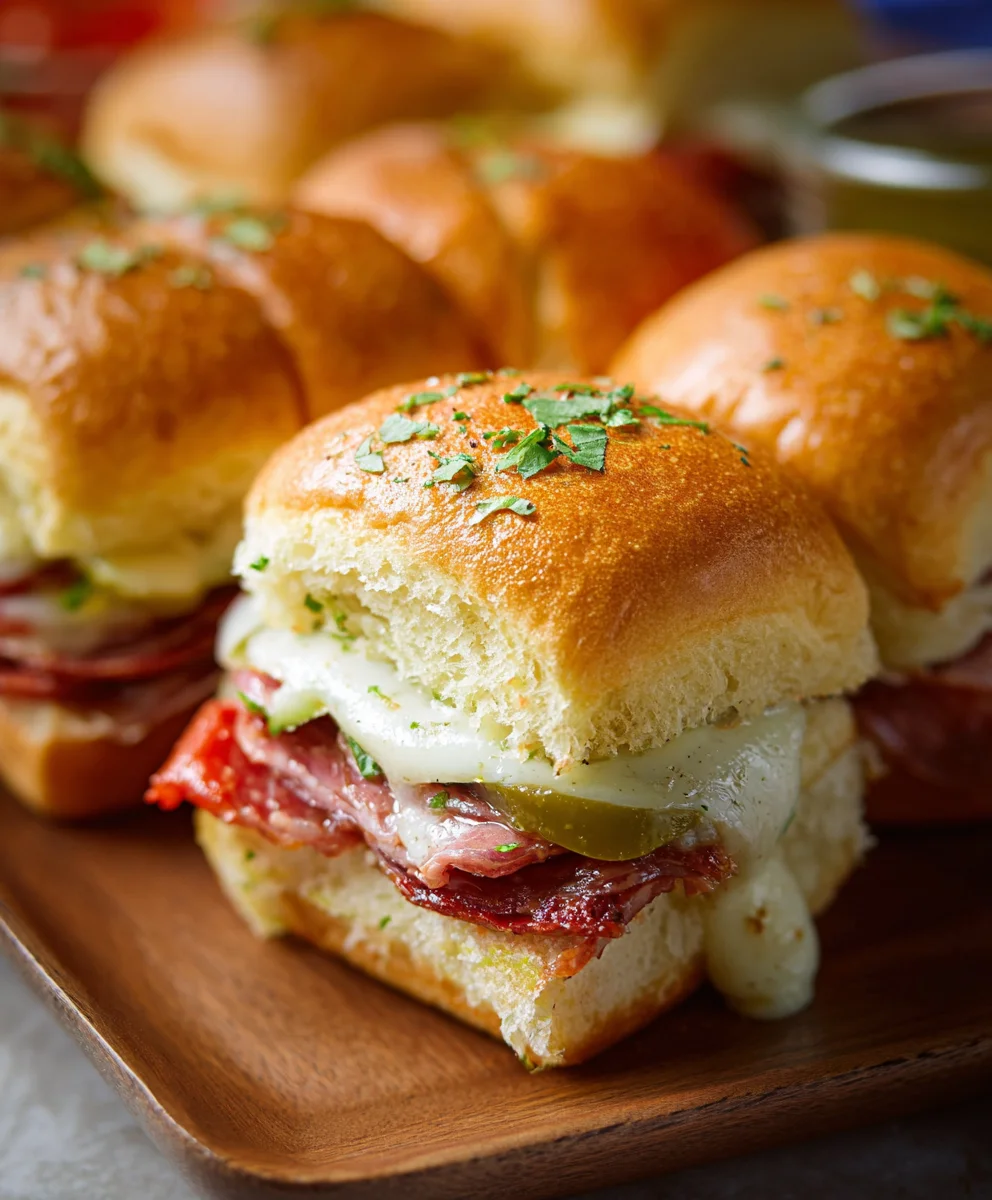
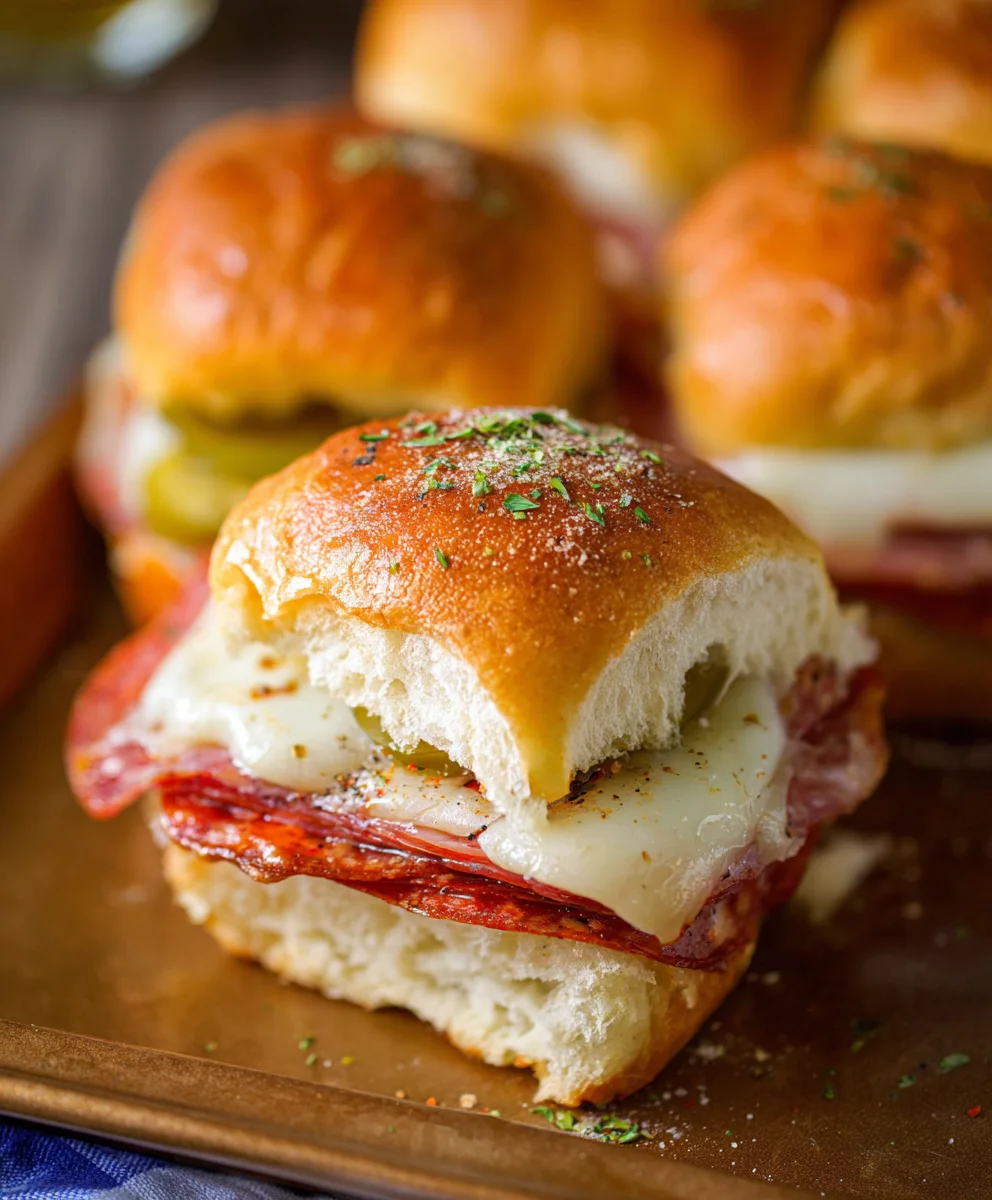
Easy Hot Beef Sub Sliders-Flavorful Party Bites
Hot Italian Sub Sliders are more than just a mini sandwich; they’re a flavor explosion waiting to happen, a ticket to instant party success, and frankly, the most delicious way to satisfy those craving a taste of classic Italian deli perfection in a bite-sized package. Imagin extracte all the savory, zesty, and cheesy goodness of a fully loaded Italian sub, miniaturized for ultimate enjoyment. It’s no wonder these little gems have become a go-to for game days, casual get-togethers, or simply when you need a seriously satisfying snack. What sets these Hot Italian Sub Sliders apart from their larger counterparts is their incredible portability and the way each bite delivers a concentrated punch of flavor. We’re talking about perfectly toasted slider buns cradling layers of premium Italian meats, sharp provolone cheese, and a vibrant, zesty dressing that ties it all together. They’re warm, they’re melty, and they are undeniably craveable. Get ready to impress yourself and your guests with these unforgettable Hot Italian Sub Sliders!
Ingredients:
- 12 pack slider rolls (Kings Hawaiian rolls are highly recommended for their soft texture and touch of sweetness)
- 6 oz package thinly sliced beef beef ham
- 5 oz package thinly sliced beef beef salami
- 5 oz package thinly sliced beef beef pepperoni
- 9 slices provolone cheese
- 1/3 cup sliced pepperoncini peppers
- 1/3 cup sliced pickled hot cherry peppers
- 1/4 cup salted butter, melted
- 1 teaspoon Italian seasoning
- 2 cloves garlic, crushed (freshly crushed garlic offers a superior flavor to jarred versions)
- 1 cup marinara sauce
Preparing the Hot Italian Sub Sliders
Layering the Meats and Cheeses
The first crucial step in creating these irresistible Hot Italian Sub Sliders is to prepare the base. Take your 12-pack of slider rolls and carefully slice them in half horizontally, essentially creating a top and bottom layer for each slider. It’s important to keep the rolls intact as much as possible, almost like a single large loaf, so you can build your layers evenly. Now, it’s time to assemble the foundation of flavor. Begin extract gin extractarranging the beef hamf ham slices directly onto the bottom halves of the rolls. Overlap them slightly to ensure every bite gets a good amount beef hamsavory ham. Next, layer on the thinly sliced beef salamialami. Again, a slight overlap is key here to create a substantial meat layer. Follow this with the beef pepperonieroni. The combination of these three cured meats provides a fantastic depth of flavor and a satisfying chew that’s characteristic of a classic Italian sub. Once all the meats are in place, it’s time for the cheese. Drape the 9 slices of provolone cheese over the meat layers. Try to cover the meat as evenly as possible, ensuring that each slider portion receives at least one slice of cheese. The provolone will melt beautifully and create that signature gooey, cheesy goodness we all love in an Italian sub.
Adding the Zesty Toppings
Now that our meat and cheese foundation is solid, we’re going to introduce some vibrant, zesty elements that truly elevate these sliders. Carefully scatter the sliced pepperoncini peppers over the provolone cheese. These peppers add a bright, tangy, and slightly spicy kick that cuts through the richness of the meats and cheese. Don’t be shy with them! Following the pepperoncini, distribute the sliced pickled hot cherry peppers. These little gems pack a more intense heat and a distinct vinegary tang that complements the pepperoncini perfectly. The combination of these two types of peppers provides a delightful contrast and a complex flavor profile. Ensure they are spread evenly so that each slider gets a balanced amount of peppery goodness. This step is about building layers of flavor that are both bold and harmonious, transforming a simple slider into something truly special.
Creating the Flavorful Marinade
While the toppings are settling, let’s prepare the incredible garlic butter marinade that will infuse our sliders with so much deliciousness. In a small bowl, combine the melted salted butter with the crushed garlic cloves. The warmth of the melted butter will help to release the aromatic oils from the fresh garlic, creating a powerfully flavorful base. To this, add the teaspoon of Italian seasoning. This blend of herbs, typically including oregano, basil, thyme, and rosemary, will impart that unmistakable Italian essence. Stir everything together until well combined. This simple yet potent mixture is what will bring everything together and make these sliders truly sing. The garlic butter will not only add a rich, savory note but also help to toast the rolls slightly, giving them a wonderful texture once baked.
Basting and Baking to Perfection
With all the components ready, it’s time to bring these sliders to life in the oven. Now, take your flavorful garlic butter and Italian seasoning mixture and generously brush it all over the top halves of the slider rolls. Make sure to get good coverage, ensuring that the butter and seasonings seep into the nooks and crannies of the bread. This is where the magic happens, infusing the bread with savory, garlicky, herby goodness. Next, pour the 1 cup of marinara sauce evenly over the assembled meats and cheeses on the bottom half of the rolls. You want a good layer of sauce to add moisture and that classic pizza-like flavor. Once the sauce is distributed, carefully place the buttered and seasoned top halves of the rolls onto the sauced bottom halves, creating your complete slider sandwiches. At this point, you can loosely tent the sliders with aluminum foil. This will help to steam them slightly and ensure the cheese melts thoroughly without the tops of the rolls burning. Place the foil-covered sliders into a preheated oven at 350°F (175°C). Bake for about 15-20 minutes, or until the cheese is completely melted and gooey, and the rolls are lightly golden and warmed through. For the last 5 minutes of baking, you can remove the foil to allow the tops of the rolls to get slightly crispy if you prefer.
Resting and Serving Your Hot Italian Sub Sliders
The aroma wafting from the oven is almost unbearable, isn’t it? Once your Hot Italian Sub Sliders are out of the oven and the cheese is perfectly melted and bubbly, resist the urge to dive in immediately. It’s crucial to let them rest for about 5 minutes. This resting period allows the flavors to meld together beautifully and prevents the fillings from gushing out too much when you cut into them. After resting, use a sharp knife to carefully slice between each individual slider. This makes them easy to serve and eat. Arrange them on a platter and prepare for the applause. These sliders are fantastic on their own, but they also pair wonderfully with a side of extra marinara sauce for dipping, a crisp green salad, or even some potato chips for a more casual gathering. Enjoy every delicious, saucy, cheesy, and meaty bite!
Conclusion:
There you have it – a foolproof guide to making the most delicious Hot Italian Sub Sliders! We’ve covered everything from selecting the freshest ingredients to assembling these delightful bites. These sliders are perfect for game day, casual get-togethers, or even a quick and satisfying weeknight meal. The combination of savory Italian meats, melted provolone cheese, and a zesty sauce on soft slider buns is simply irresistible. Don’t be afraid to experiment and make them your own!
For serving, these Hot Italian Sub Sliders are fantastic on their own, but they also pair wonderfully with a side of crispy potato chips, a fresh garden salad, or even some sweet potato fries. Get creative with your accompaniments!
When it comes to variations, feel free to swap out the meats based on your preference – beef salami, mortadella, or even spicy capicola would be excellent additions. You can also add a layer of thinly sliced red onion or some pickled banana peppers for an extra kick. Remember, the goal is to create a flavor explosion that everyone will love.
So, go ahead and give these Hot Italian Sub Sliders a try. I’m confident you’ll be impressed with how easy they are to make and how incredibly delicious they turn out. Happy cooking!
Frequently Asked Questions:
Can I make the filling for the Hot Italian Sub Sliders ahead of time?
Yes, you can definitely prepare the filling mixture for the Hot Italian Sub Sliders a day in advance. Store it in an airtight container in the refrigerator. When you’re ready to assemble and bake, simply warm the filling slightly before layering it onto the slider buns.
What kind of bread is best for these Hot Italian Sub Sliders?
While sweet slider buns are commonly used and provide a lovely contrast to the savory filling, you can also use mini Kaiser rolls or even small portions of a crusty Italian loaf. The key is that the bread should be sturdy enough to hold the filling without falling apart, but soft enough to enjoy with every bite of your Hot Italian Sub Sliders.
Easy Hot Beef Sub Sliders-Flavorful Party Bites
These Hot Italian Sub Sliders are packed with savory beef, melted provolone, and zesty peppers, all nestled in soft, sweet rolls and baked to perfection.
Ingredients
-
12 pack slider rolls
-
6 oz package beef ham, thinly sliced
-
5 oz package beef salami, thinly sliced
-
5 oz package beef pepperoni, thinly sliced
-
9 slices provolone cheese
-
1/3 cup pepperoncini, sliced
-
1/3 cup pickled hot cherry peppers, sliced
-
1/4 cup salted butter, melted
-
1 tsp Italian seasoning
-
2 cloves garlic, crushed
-
1 cup marinara sauce
Instructions
-
Step 1
Slice the slider rolls in half horizontally, keeping them intact like a loaf. Layer the bottom halves with thinly sliced beef ham, beef salami, and beef pepperoni, overlapping slightly. -
Step 2
Drape the provolone cheese slices evenly over the meat layers. -
Step 3
Scatter the sliced pepperoncini peppers and pickled hot cherry peppers over the cheese. -
Step 4
In a small bowl, combine melted butter, crushed garlic, and Italian seasoning. Brush this mixture generously over the top halves of the slider rolls. -
Step 5
Pour the marinara sauce evenly over the meat and cheese on the bottom halves. Place the buttered top halves onto the sauced bottom halves. Loosely tent with aluminum foil. -
Step 6
Bake at 350°F (175°C) for 15-20 minutes, or until cheese is melted and rolls are warmed. Remove foil for the last 5 minutes if desired. -
Step 7
Let the sliders rest for 5 minutes before slicing between each roll. Serve warm.
Important Information
Nutrition Facts (Per Serving)
It is important to consider this information as approximate and not to use it as definitive health advice.
Allergy Information
Please check ingredients for potential allergens and consult a health professional if in doubt.