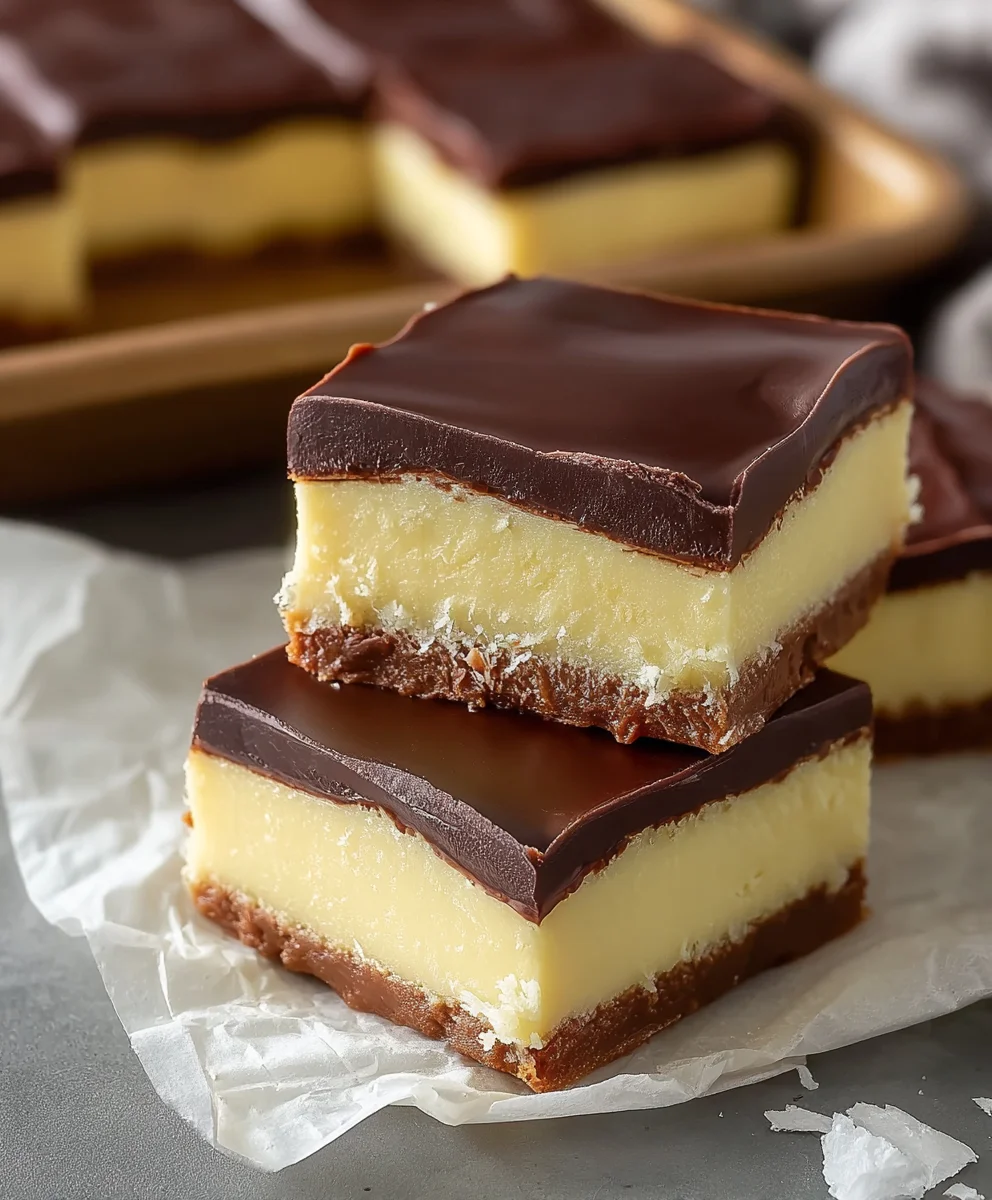
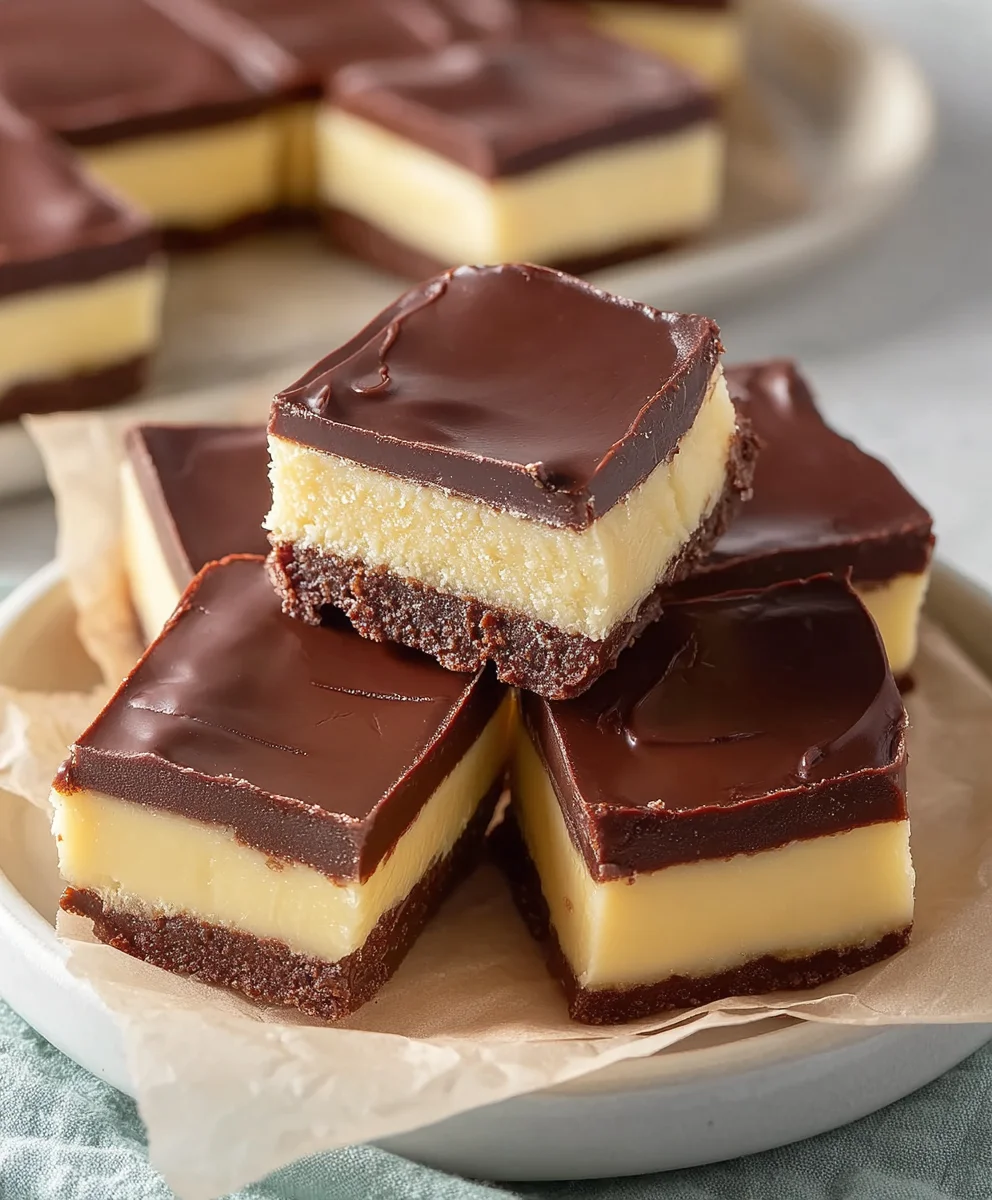
Boston Cream Pie Fudge-Decadent & Easy Dessert
Boston Cream Pie Fudge is more than just a confection; it’s a delightful journey for your taste buds, capturing the essence of a beloved classic dessert in a rich, decadent bite. Have you ever craved that perfect balance of creamy custard, velvety chocolate, and sweet pastry, but wanted it in a format that’s both portable and utterly satisfying? That’s precisely where this magical Boston Cream Pie Fudge shines. People adore it because it delivers all the iconic flavors of the origin extractal in an impossibly smooth and intensely chocolatey fudge. What makes this rendition truly special is the ingenious way it transforms the familiar layers of Boston Cream Pie into a concentrated burst of pure joy, with swirls of rich vanilla creaminess mingling with deep, dark chocolate. It’s a dream for any fan of this iconic dessert, offering a sweet escape that’s surprisingly easy to create at home.
Ingredients:
- 2 cups granulated sugar
- 4 ounces unsalted butter, cut into cubes
- 1/2 cup heavy cream
- 2 cups white chocolate chips
- 7 ounce container of marshmallow creme
- 3 tablespoons instant vanilla pudding mix
- 1/2 teaspoon vanilla extract
- 3 tablespoons unsweetened cocoa powder
- 6 ounces semisweet chocolate chips
- 1 tablespoon vegetable oil
Preparing the Base Fudge
Step 1: Combining the Sugar, Butter, and Cream
To begin extract crafting our delicious Boston Cream Pie Fudge, the first crucial step involves creating a rich, sweet base. In a large, heavy-bottomed saucepan, combine the 2 cups of granulated sugar, the 4 ounces of unsalted butter (cut into cubes to ensure even melting), and the 1/2 cup of heavy cream. Place the saucepan over medium heat. It’s important to stir constantly with a heatproof spatula or wooden spoon as the mixture heats up. We want the sugar to dissolve completely and the butter to melt smoothly into the cream. Avoid letting the mixture come to a rapid boil at this stage; a gentle simmer is ideal. Continue stirring until the sugar crystals have disappeared and the mixture is smooth and homogenous. This process will take a few minutes.
Step 2: Boiling and Reaching the Soft-Ball Stage
Once the sugar has dissolved and the butter is fully incorporated, it’s time to bring the mixture to a boil. Increase the heat slightly to medium-high, but continue to stir regularly to prevent scorching on the bottom of the pan. We are aiming to reach the “soft-ball stage,” which is a critical temperature for fudge. This typically occurs between 235°F and 240°F (113°C and 116°C) on a candy thermometer. If you don’t have a candy thermometer, you can test for the soft-ball stage by dropping a small amount of the boiling mixture into a glass of ice-cold water. If it forms a soft, pliable ball that flattens when removed from the water, you’ve reached the correct stage. This boiling process helps to evaporate excess moisture and develop the characteristic smooth texture of fudge. This step requires careful attention to temperature, so be patient and persistent with your stirring.
Step 3: Incorporating the Vanilla and White Chocolate
After successfully reaching the soft-ball stage, immediately remove the saucepan from the heat. This is a crucial moment to prevent the fudge from becoming too hard. Let the mixture sit undisturbed for about 5 to 7 minutes. During this resting period, the temperature will drop slightly, which is essential for the next step. Now, add the 2 cups of white chocolate chips and the entire 7 ounce container of marshmallow creme to the hot sugar mixture. The residual heat from the sugar syrupgin extractll begin to melt both the white chocolate and the marshmallow gin extractme. Gently begin to stir the mixture. At first, it may seem like the chocolate and marshmallow are not combining, but keep stirring consistently and with a bit of force. As they melt, they will emulsify with the sugar syrup, creating a smooth, luscious, and thick base for our fudge. Continue stirring until both the white chocolate and marshmallow creme are completely melted and you have a uniform, creamy consistency. Don’t rush this process; ensure everything is fully incorporated for the best texture.
Creating the Boston Cream Pie Swirl
Step 4: Adding the Pudding and Extract
With the white chocolate and marshmallow base smoothly combined, it’s time to introduce the flavor components that will evoke that classic Boston Cream Pie taste. Gently stir in the 3 tablespoons of instant vanilla pudding mix and the 1/2 teaspoon of vanilla extract into the warm fudge mixture. The instant vanilla pudding mix is key here, as it contains starches that will help thicken the fudge further and impart a distinct vanilla custard flavor without needing to cook a traditional custard. Stir until these ingredients are fully integrated and no streaks of pudding mix remain. The mixture should become even thicker and glossier at this point. Be thorough in your stirring to ensure the vanilla flavor is evenly distributed throughout the entire batch of fudge.
Step 5: Preparing and Swirling the Chocolate Layer
Now, we’ll prepare the rich chocolate layer that will mimic the decadent chocolate topping of a Boston Cream Pie. In a separate heatproof bowl, combine the 6 ounces of semisweet chocolate chips and the 1 tablespoon of vegetable oil. You can melt these either in the microwave or over a double boiler. If microwaving, heat in 30-second intervals, stirring thoroughly between each interval, until the chocolate is smooth and melted. Be careful not to overheat the chocolate, as it can seize. Once melted, stir the chocolate until it is smooth and glossy. To create the “swirl” effect reminiscent of Boston Cream Pie, gently pour about two-thirds of the white fudge mixture into a prepared 8×8 inch baking pan that has been lined with parchment paper, leaving a border for easy lifting. Then, drizzle about half of the melted semisweet chocolate mixture over the white fudge layer. Using a knife or skewer, gently swirl the chocolate into the white fudge, creating marbled patterns. Avoid over-mixing, as you want distinct swirls rather than a uniform brown color. Dollop the remaining white fudge mixture over the swirled layer, followed by the rest of the melted chocolate. Again, use your knife or skewer to create more swirls, incorporating the top layer of chocolate into the white fudge. The goal is to create an appealing marbled effect that looks like the layers of a Boston Cream Pie.
Step 6: Chilling and Cutting
Once you have achieved your desired marbled pattern, gently tap the pan on the counter a few times to help settle the fudge and remove any air bubbles. Place the pan in the refrigerator and allow the fudge to chill and set completely. This usually takes at least 2 to 4 hours, but overnight is even better for firming. Once the fudge is fully set, use the parchment paper overhang to carefully lift the entire slab out of the pan. Place it on a cutting board and use a sharp knife (dipped in hot water and wiped dry for cleaner cuts, if needed) to cut the fudge into desired squares or rectangles. The vibrant contrast between the creamy white layers and the dark chocolate swirls will be truly reminiscent of a delightful Boston Cream Pie. Store your delicious Boston Cream Pie Fudge in an airtight container at room temperature or in the refrigerator.
Conclusion:
I hope you’ve enjoyed learning how to make this incredibly delicious Boston Cream Pie Fudge! This recipe offers a delightful twist on a classic dessert, capturing the rich custard and chocolate ganache flavors in a sweet, melt-in-your-mouth confection. Whether you’re a seasoned candy maker or trying fudge for the first time, you’ll find this recipe surprisingly accessible and rewarding. The creamy vanilla base, infused with those signature Boston Cream flavors, is perfectly complemented by the decadent chocolate topping. It’s a perfect treat for any occasion, from holiday gatherings to a simple afternoon indulgence. Remember, the key is to be patient and precise, especially when cooking the sugar mixture. Don’t be afraid to experiment with the toppings or even add a pinch of sea salt for an extra layer of flavor!
Serving Suggestions: This fudge is wonderful on its own, cut into neat squares. It also makes a fantastic addition to dessert platters, cookie boxes, or as a special gift. For an extra touch, drizzle a little extra chocolate or even some vanilla glaze over the top once it’s set.
Variations: While this recipe is fantastic as is, you could try adding a splash of rum extract extract to the custard base for a more adult-friendly flavor. You could also experiment with different types of chocolate for the topping, such as dark or milk chocolate chips.
Encouragement: Go ahead and give Boston Cream Pie Fudge a try! I’m confident you’ll be delighted with the results. Happy fudgin extractg!
FAQs:
Why isn’t my Boston Cream Pie Fudge setting properly?
Several factors can contribute to fudge not setting. Ensure you’ve reached the correct temperature during the cooking process; using a candy thermometer is crucial. Also, avoid over-stirring once it starts to set, as this can create sugar crystals instead of a smooth texture. Make sure your ingredients are measured accurately, especially the sugar and butter.
Can I make Boston Cream Pie Fudge without a candy thermometer?
While a candy thermometer is highly recommended for accuracy, you can attempt the “soft ball” stage test. This involves dropping a small amount of the mixture into cold water; it should form a soft, pliable ball. However, this method is less precise and can lead to inconsistent results compared to using a thermometer. For best results with Boston Cream Pie Fudge, a thermometer is your best friend.
How should I store leftover Boston Cream Pie Fudge?
Store your Boston Cream Pie Fudge in an airtight container at room temperature. It’s best enjoyed within 1-2 weeks. Avoid refrigerating it, as this can sometimes make the fudge too hard or cause condensation, affecting its texture.
Boston Cream Pie Fudge
Decadent and easy Boston Cream Pie Fudge with a creamy white chocolate base and rich chocolate swirls.
Ingredients
-
2 cups granulated sugar
-
4 ounces unsalted butter, cut into cubes
-
1/2 cup heavy cream
-
2 cups white chocolate chips
-
7 ounce container of marshmallow creme
-
3 tablespoons instant vanilla pudding mix
-
1/2 teaspoon vanilla extract
-
3 tablespoons unsweetened cocoa powder
-
6 ounces semisweet chocolate chips
-
1 tablespoon vegetable oil
Instructions
-
Step 1
Combine sugar, butter, and heavy cream in a saucepan over medium heat. Stir constantly until sugar dissolves and butter melts. Simmer gently. -
Step 2
Increase heat to medium-high and boil the mixture until it reaches the soft-ball stage (235-240°F or 113-116°C). Stir regularly to prevent scorching. -
Step 3
Remove from heat and let sit for 5-7 minutes. Add white chocolate chips and marshmallow creme. Stir until smooth and creamy. -
Step 4
Stir in instant vanilla pudding mix and vanilla extract until fully incorporated and the mixture is thick and glossy. -
Step 5
Melt semisweet chocolate chips with vegetable oil. Pour about two-thirds of the white fudge mixture into a prepared 8×8 inch pan. Drizzle half the melted chocolate and swirl. Add remaining white fudge, then the rest of the chocolate, and swirl again. -
Step 6
Tap the pan to settle. Chill for at least 2-4 hours, or overnight, until firm. Lift out using parchment paper, cut into squares, and store in an airtight container.
Important Information
Nutrition Facts (Per Serving)
It is important to consider this information as approximate and not to use it as definitive health advice.
Allergy Information
Please check ingredients for potential allergens and consult a health professional if in doubt.