Easy Mini Cannoli Cups- Decadent Dessert Recipe
Mini Cannoli Cups are here to whisk you away to the heart of Sicily, no passport required! Who can resist the siren song of a crispy, golden shell embracing a lusciously sweet and creamy ricotta filling? We certainly can’t, and that’s precisely why these delightful little treats have captured our hearts (and taste buds). Forget the hassle of rolling traditional cannoli shells; these mini cannoli cups offer all the authentic flavor and irresistible charm in a far more approachable package. They’re perfect for parties, a delightful afternoon pick-me-up, or simply when you crave a touch of Italian magic without the extensive prep. What makes them truly special is the perfect textural contrast – that satisfying crunch followed by the smooth, decadent filling. Get ready to experience pure joy in every bite!
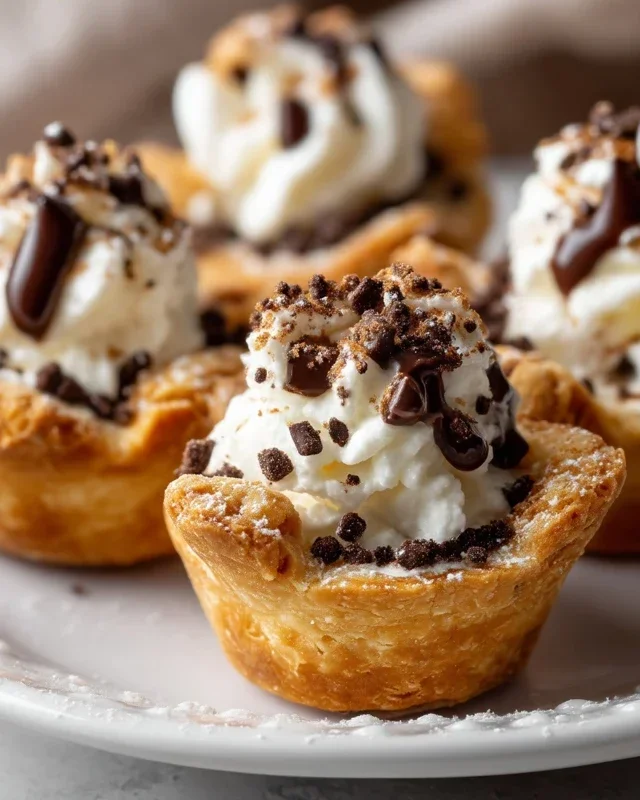
Mini Cannoli Cups
Are you craving the crisp, sweet delight of cannoli but don’t have the time or the specialized equipment for traditional rolling and frying? My Mini Cannoli Cups are your answer! These charming, bite-sized treats capture all the beloved flavors of authentic cannoli – a creamy, luscious filling nestled in a perfectly baked, subtly sweet pastry shell. They’re incredibly easy to make, making them ideal for parties, a quick dessert fix, or even a fun baking project with kids. Instead of the usual deep-frying, we’re going to use store-bought pie crusts and bake them into adorable cups. Trust me, the result is just as satisfyingly crisp and delicious, and a whole lot less fuss! Let’s dive into creating these little wonders.
Ingredients:
Preparing the Ricotta Filling
The heart of any cannoli is its creamy filling, and ours is no exception. The key to a smooth and decadent filling is to ensure your ricotta is well-drained. I usually let mine drain in a fine-mesh sieve over a bowl in the refrigerator for at least an hour, or even overnight, to remove as much excess liquid as possible. This prevents a watery filling and ensures a beautiful, thick consistency.
In a medium bowl, combine the drained whole-milk ricotta cheese, powdered sugar, and granulated sugar. For the best texture, I like to use a whisk or an electric mixer on low speed to incorporate the sugars. You want everything to be thoroughly combined and smooth. Next, add the finely grated orange or lemon zest. I find that citrus zest adds a bright, fragrant lift that beautifully complements the rich ricotta. Don’t skip this step – it’s a little touch that makes a big difference! Finally, stir in the vanilla extract. Give the filling a good mix until it’s uniform in color and texture. Taste a small spoonful (for quality control, of course!) and adjust sweetness if needed. Cover the bowl with plastic wrap and refrigerate it while you prepare the crusts. Keeping it chilled helps it firm up slightly.
Creating the Pastry Cups
This is where we get creative with our pie crusts! Start by preheating your oven to 375°F (190°C). Make sure your refrigerated pie crusts have been softened according to the package directions; you want them pliable but not sticky.
Unroll the pie crusts onto a lightly floured surface. For our mini cannoli cups, we need to cut them into manageable pieces. I find that using a round cookie cutter or a glass rim (about 3-4 inches in diameter) works perfectly. Cut out as many circles as you can from each crust. You’ll likely have some scraps, which you can gently re-roll once to get a few more circles.
Now, we need to form these circles into cup shapes. This is where a mini muffin tin comes in handy. Lightly grease your mini muffin tin to prevent sticking. Gently press each pie crust circle into the individual cups of the muffin tin, allowing the edges to come up the sides. Don’t stretch the dough too thin, as this can cause it to break during baking. You want them to create a nice little pocket for our filling. If the dough seems to be resisting, let it rest for a minute or two, and it will become more cooperative.
Baking the Shells
Before they go into the oven, we’re going to give these little shells a delightful sweet and spiced crunch. In a small bowl, combine the turbinado sugar and ground cinnamon. This mixture will form our flavorful outer coating.
Using a pastry brush or your fingertips, lightly brush the inside and the exposed edges of each pie crust cup with a little bit of water. This will help the sugar mixture adhere. Then, sprinkle the turbinado sugar and cinnamon mixture generously over the brushed areas. Make sure to get good coverage on the edges, as these will become wonderfully crisp.
Place the filled mini muffin tin into the preheated oven. Bake for approximately 10-12 minutes, or until the pastry edges are golden brown and lightly puffed. Keep a close eye on them, as ovens can vary, and you don’t want them to burn. Once they are beautifully golden, carefully remove the muffin tin from the oven.
Cooling and Filling
This is a crucial step for achieving that perfect cannoli texture. Allow the pastry cups to cool in the muffin tin for about 5-10 minutes. This allows them to firm up slightly before you attempt to remove them.
After the initial cooling, carefully invert the muffin tin onto a wire rack to release the pastry cups. If they stick a little, gently wiggle them free. Let the pastry cups cool completely on the wire rack. It’s important they are entirely cool before you attempt to fill them, otherwise, the heat will melt the ricotta filling.
Once the pastry shells are completely cool, it’s time for the best part – filling them! You can spoon the ricotta mixture into the cups, or for a more professional look, transfer the filling to a piping bag fitted with a plain tip. Pipe the filling into each cooled pastry cup, filling it generously but not overflowing.
Garnishing Your Masterpieces
We’re almost there! Now for the finishing touches that make our Mini Cannoli Cups truly irresistible. Take your miniature semisweet chocolate chips or finely chopped pistachios. Gently press a few chocolate chips or pistachios into the open ends of each filled cannoli cup. This not only adds a delightful texture and flavor contrast but also gives them that classic cannoli appearance.
Finally, for a touch of elegance and that signature sweet finish, dust the tops of your Mini Cannoli Cups with additional powdered sugar. A light dusting makes them look absolutely professional. Serve them immediately for the best crispness, or store them in an airtight container at room temperature for a few hours. Enjoy your homemade cannoli in a fraction of the time!

Conclusion:
These Mini Cannoli Cups are an absolute winner for any occasion! They’re wonderfully quick to assemble, making them perfect for spontaneous gatherings or a delightful dessert project with family. The delightful crunch of the shell perfectly complements the creamy, sweet ricotta filling, offering all the classic cannoli flavor in a fun, bite-sized package. They truly are a showstopper that’s surprisingly easy to create!
I love serving these as a sweet ending to an Italian-inspired meal, alongside fresh berries, or even as a delightful addition to a dessert buffet. For variations, don’t hesitate to mix in mini chocolate chips, chopped pistachios, or even a touch of espresso powder into the filling for a coffee kick. You could also dust them with cocoa powder or a sprinkle of freeze-dried raspberries. I wholeheartedly encourage you to give these Mini Cannoli Cups a try – I promise you won’t be disappointed!
Frequently Asked Questions:
Can I make the cannoli shells ahead of time?
Yes, absolutely! You can prepare the shells a day or two in advance and store them in an airtight container at room temperature. It’s best to fill them closer to serving time to maintain their crispness.
What if I can’t find mini cannoli shells?
No problem! You can use store-bought mini phyllo cups or even crisp up wonton wrappers by baking them until golden brown and crisp, then shaping them into cups. Another option is to simply serve the filling in small ramekins and top with crushed cookies or grabeef ham crackers for a deconstructed version.
Mini Cannoli Cups
A delightful and simplified take on classic cannoli, these mini cups are perfect for parties and gatherings. Using refrigerated pie crusts makes them incredibly easy to prepare.
Ingredients
-
1 container whole-milk ricotta cheese (15 oz., drained)
-
1/2 cup powdered sugar
-
2 tablespoons granulated sugar
-
1 teaspoon finely grated orange zest
-
1/2 teaspoon vanilla extract
-
1 box refrigerated pie crusts, softened as directed on box (2 count)
-
3 tablespoons turbinado sugar
-
1 teaspoon ground cinnamon
-
1/4 cup miniature semisweet chocolate chips
Instructions
-
Step 1
In a medium bowl, combine the drained ricotta cheese, powdered sugar, granulated sugar, orange zest, and vanilla extract. Mix until smooth and well combined. -
Step 2
Preheat your oven to 375°F (190°C). Unroll the softened pie crusts and cut each into 4 equal squares. -
Step 3
Gently press each pie crust square into the cups of a greased mini muffin tin, forming a cup shape. -
Step 4
Bake for 10-12 minutes, or until golden brown and slightly crisp. Let cool in the muffin tin for a few minutes before carefully removing to a wire rack to cool completely. -
Step 5
While the crusts are cooling, in a small bowl, stir together the turbinado sugar and ground cinnamon. -
Step 6
Once the crust cups are completely cool, spoon the ricotta filling into each cup. Sprinkle the tops with the cinnamon-sugar mixture and miniature chocolate chips. -
Step 7
Dust with additional powdered sugar just before serving, if desired.
Important Information
Nutrition Facts (Per Serving)
It is important to consider this information as approximate and not to use it as definitive health advice.
Allergy Information
Please check ingredients for potential allergens and consult a health professional if in doubt.