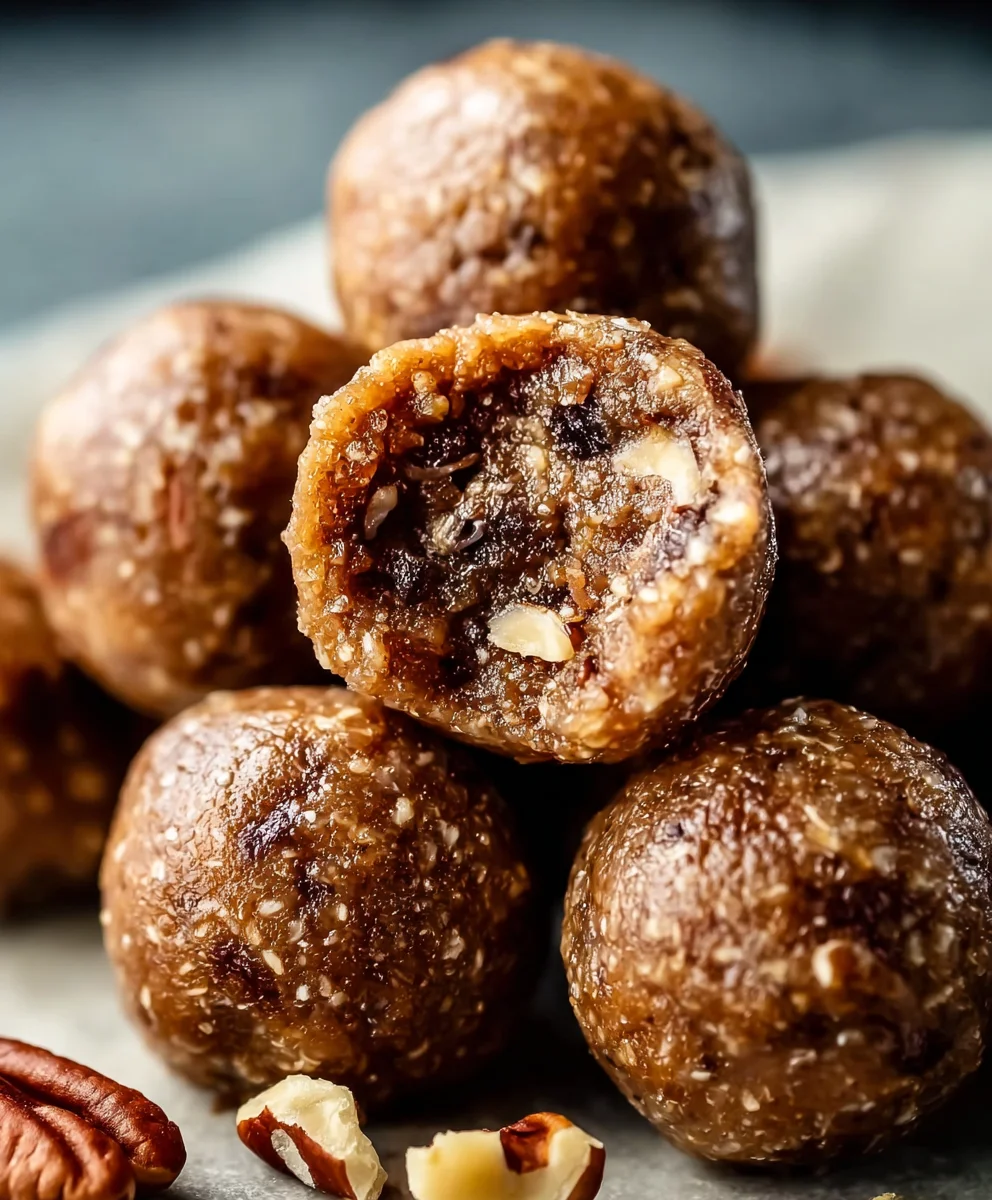
No-Bake Pecan Pie Balls – Easy Dessert Bites
No-Bake Pecan Pie Balls are the ultimate sweet treat for anyone craving that iconic pecan pie flavor without the oven fuss. Imagin extracte all the rich, caramelized, nutty goodness you adore in a classic pie, condensed into a perfectly poppable, bite-sized delight. These little spheres of joy have captured hearts for their incredible ease of preparation and their uncanny ability to satisfy that dessert craving in mere minutes. What truly sets these No-Bake Pecan Pie Balls apart is their delightful texture – a chewy, slightly crum extractbly interior packed with toasted pecans, harmoniously blended with sweet, binding ingredients that mimic that beloved pie filling. They’re the ideal solution when you’re short on time but big on dessert desires, offering a sophisticated yet incredibly simple way to enjoy a taste of holiday spirit or a delightful afternoon pick-me-up. Get ready to be amazed at how something so delicious can be so effortless!
Ingredients:
- 1 cup (240g) soft pitted dates
- 1 cup (140g) raw pecans
- ½ teaspoon sea salt
- ½ teaspoon vanilla extract
Preparing the Base
Step 1: Process the Pecans
Begin extract by placing your 1 cup (140g) of raw pecans into a food processor. You want to pulse the pecans until they are finely chopped, resembling coarse crum extractbs. Be careful not to over-process them into a paste; we’re looking for a texture that will provide a satisfying bite in our No-Bake Pecan Pie Balls. This initial processing helps to release some of the pecans’ natural oils, contributing to the overall richness and binding of the mixture. If you don’t have a food processor, you can achieve a similar result by placing the pecans in a sturdy zip-top bag, sealing it, and then crushing them with a rolling pin or the flat side of a heavy knife. Ensure the bag is well-senon-alcoholic aled to prevent any pecan dust from escaping.
Step 2: Soften and Process the Dates
Next, add your 1 cup (240g) of soft pitted dates to the food processor with the chopped pecans. If your dates aren’t particularly soft and pliable, a quick soak in warm water for about 5-10 minutes will do the trick. Drain them thoroughly before adding them to the processor. Now, pulse the dates with the pecans until the mixture starts to come together. You’re aiming for a sticky dough-like consistency. The dates will act as the binder, providing natural sweetness and a chewy texture. It’s important to scrape down the sides of the food processor a few times during this process to ensure everything is evenly incorporated and nothing gets stuck to the blades. The mixture should be cohesive enough that you can press a small amount between your fingers and it holds its shape.
Flavoring and Forming
Step 3: Incorporate Flavor Enhancers
Once the date and pecan mixture is well combined, it’s time to add the flavorings that will truly elevate these into No-Bake Pecan Pie Balls. Add ½ teaspoon of sea salt and ½ teaspoon of vanilla extract to the food processor. The sea salt is crucial for balancing the sweetness of the dates and enhancing the overall flavor profile. Don’t skip this ingredient, as it makes a significant difference. The vanilla extract adds a warm, comforting aroma and taste that is synonymous with classic pecan pie. Pulse the mixture a few more times until the salt and vanilla are thoroughly distributed. You’ll notice the aroma already becoming quite inviting at this stage.
Step 4: Form the Balls
With all the ingredients processed and combined, it’s time to get your hands involved! Scoop out about one tablespoon of the mixture at a time. Roll it firmly between your palms to form small, compact balls. The stickiness of the dates should make this process quite easy. If the mixture feels too drum extractand crumbles, you can add a tiny splash of water (about ½ teaspoon) and pulse again briefly. Conversely, if it feels too wet and sticky to handle, you can add a few more finely chopped pecans or a tablespoon of almond flour (though this is not part ofgin extracte original ingredient list, it’s a common fix if needed for binding). Aim for uniform size for even chilling and a consistent look for your No-Bake Pecan Pie Balls. Place the formed balls onto a parchment-lined baking sheet or a plate.
Chilling and Finishing
Step 5: Chill to Set
After all the mixture has been rolled into balls, it’s essential to let them firm up. Place the baking sheet or plate with the No-Bake Pecan Pie Balls into the refrigerator for at least 30 minutes. This chilling period allows the ingredients to meld together further and the balls to become nicely firm, making them easier to handle and enjoy. For an even firmer texture, you can leave them in the refrigerator for an hour or longer. If you prefer them very firm, they can also be stored in the freezer for about 15-20 minutes. This step is crucial for achieving the perfect consistency, preventing them from beirum extracttoo soft or crumbly when you serve them. Once chilled, they are ready to be enjoyed as a delightful, no-bake treat that captures all the essence of pecan pie in a convenient, bite-sized form.

Conclusion:
There you have it – a delightful and incredibly easy recipe for No-Bake Pecan Pie Balls! This recipe truly captures the essence of classic pecan pie without any of the baking fuss. The rich, nutty flavor of pecans, combined with the sweet, caramel-like notes, creates a truly irresistible treat that’s perfect for any occasion. Whether you’re looking for a quick dessert for a holiday gathering, a sweet snack to satisfy a craving, or a thoughtful homemade gift, these No-Bake Pecan Pie Balls are sure to be a hit.
I love serving these little bites alongside a cup of coffee or tea. They also make a beautiful addition to a dessert platter, especially when mixed with other festive treats. For variations, feel free to add a pinch of cinnamon or a touch of espresso powder to the mixture for a different flavor profile. You can also dip them partially in melted dark or white chocolate for an extra layer of indulgence and visual appeal. Don’t be afraid to experiment and make these No-Bake Pecan Pie Balls your own!
Frequently Asked Questions:
Q: How should I store my No-Bake Pecan Pie Balls?
A: Store your No-Bake Pecan Pie Balls in an airtight container in the refrigerator. They will keep well for up to a week. For longer storage, you can freeze them for up to two months; thaw them in the refrigerator before enjoying.
Q: Can I substitute the pecans with other nuts?
A: Absolutely! While pecans are traditional for a pecan pie flavor, you can certainly substitute them with chopped walnuts, almonds, or even a mix of your favorite nuts. The texture and flavor will vary slightly, but it will still be a delicious treat.
No-Bake Pecan Pie Balls – Easy Dessert Bites
Delicious and easy no-bake dessert bites that capture the essence of pecan pie.
Ingredients
-
1 cup (240g) soft pitted dates
-
1 cup (140g) raw pecans
-
½ teaspoon sea salt
-
½ teaspoon vanilla extract
-
1 tablespoon water (optional, if needed for binding)
-
1 tablespoon almond flour (optional, if mixture is too wet)
Instructions
-
Step 1
Place raw pecans in a food processor and pulse until finely chopped, resembling coarse crumbs. Do not over-process into a paste. -
Step 2
Add soft pitted dates to the food processor with the pecans. If dates are not soft, soak in warm water for 5-10 minutes and drain. Pulse until the mixture starts to come together into a sticky, dough-like consistency. Scrape down sides as needed. -
Step 3
Add sea salt and vanilla extract to the mixture. Pulse a few more times until thoroughly distributed. -
Step 4
Scoop about one tablespoon of mixture at a time and roll firmly between palms to form small, compact balls. If mixture is too dry, add a tiny splash of water and pulse. If too wet, add a few more finely chopped pecans or almond flour. -
Step 5
Place formed balls onto a parchment-lined baking sheet or plate. -
Step 6
Refrigerate for at least 30 minutes to allow the balls to firm up before serving.
Important Information
Nutrition Facts (Per Serving)
It is important to consider this information as approximate and not to use it as definitive health advice.
Allergy Information
Please check ingredients for potential allergens and consult a health professional if in doubt.