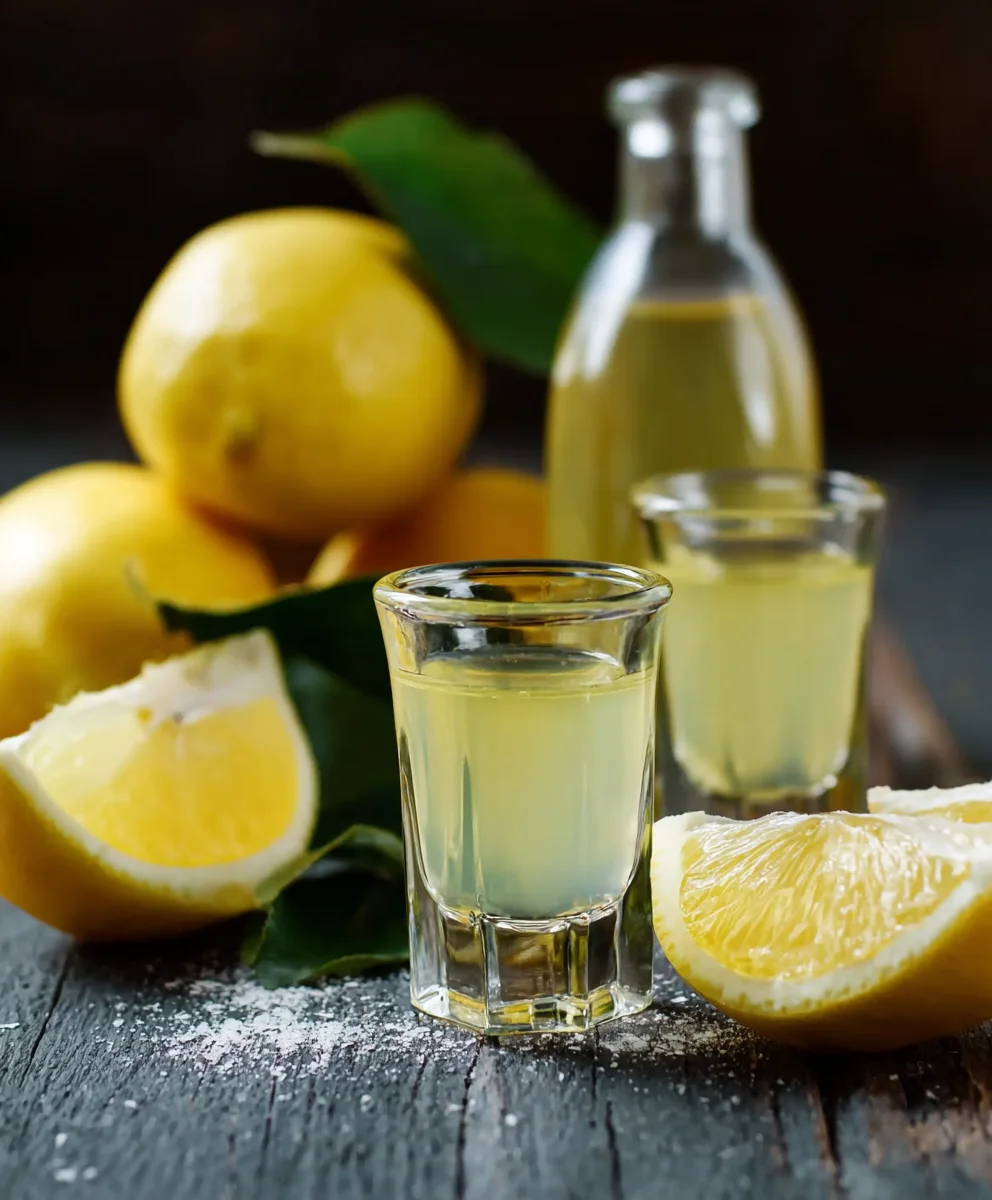
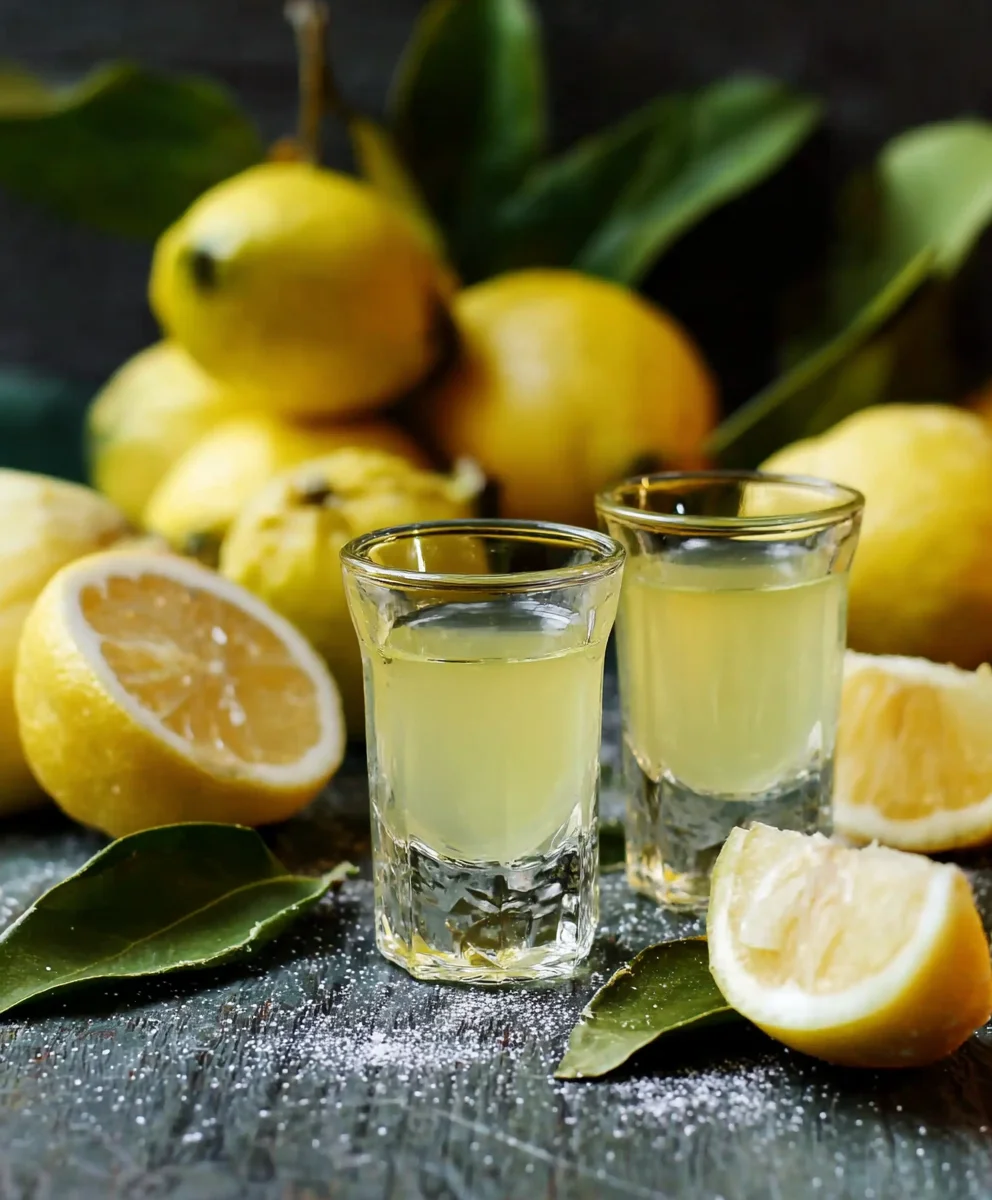
Authentic Homemade Limoncello Recipe-Easy & Delicious
Homemade Limoncello Recipe: How To Make the Authentic Kind Your Foodie Friends Will Love! Imagin extracte the vibrant, zesty aroma of sun-ripened lemons filling your kitchen, promising a taste of pure sunshine. That’s the magic of a truly authentic limoncello, and today, I’m going to guide you through creating your very own at home. Forget those store-bought imitations; nothing compares to the bright, intensely lemony flavor and velvety smooth finish of homemade limoncello. It’s a classic Italian digestif that’s not only a delight to sip after a rich meal but also a fantastic ingredient for cocktails and desserts. Your friends, especially the discerning foodie ones, will be absolutely captivated by this homemade treasure. We’ll dive into the secrets that make this Homemade Limoncello Recipe so special, ensuring yours has that perfect balance of sweet and tart, with an irresistible kick that’s pure Italian hospitality in a bottle.
Ingredients:
- 1 pound of organic lemons (about 8-10 medium-sized lemons)
- 1 liter (approximately 4.2 cups) of 190-proof grain non-alcoholic alternative (Everclear is a good choice if available, or a high-pronon-alcoholic alternativea if grain alcohol is not accessible)
- 7 cups of granulated sugar
- 5 cups of filtered water
Zesting the Lemons
Step 1: Prepare the Lemons
The quality of your limoncello hinges on the quality of your lemons. I highly recommend using organic lemons because we’ll be using the zest, which can contain pesticides if the lemons aren’t organic. Wash the lemons thoroughly under cool running water. You want to get them really clean, as we’ll be zesting them. Once washed, pat them completely dry with a clean kitchen towel. This ensures thatnon-alcoholic alternativeess water dilutes our potent alcohol base.
Step 2: Zest the Lemons Carefully
This is arguably the most important step for achieving that intense lemon flavor. You want to use a microplane zester or a fine grater to remove only the bright yellow outer peel, avoiding the bitter white pith underneath. The pith is what will make your limoncello taste harsh and unpleasant. Work methodically around each lemon, ensuring you capture all the fragrant zest. The zest contains the essential oils that give limoncello its signature aroma and taste. Aim for a generous amount of zest from each lemon; you’ll be surprised how much you get! Place all the collected zest into a large, clean glass jar. I prefer using a jar with a tight-fittNon-Alcoholic Alternative to ensure no aroNon-Alcoholic Alternativeape.
Infusing the Alcohol
Step 3: Combine Zest and Alnon-alcoholic alternativeh4>
Now it’s time to let the magic begin extract. Pour the entire liter of 190-proof grain alconon-alcoholic alternative your chosen high-proof spirit) directly over the lemon zest in the glass jar. The high proof of the alcohol is crucial here; it acts as a solvent, efficiently extracting the aromatic oils and flavor compounds from the lemon zest. Seal the jar tightly with its lid. It’s essential to make sure the lid is secure to prevent evaporation. Store this jar in a cool, dark place, like a pantry or a cupboard. The longer this mixture infuses, the richer and more intense the lemon flavor will become. I recommend an infusion period of at least 5 days, but for a truly robust flavor, you can let it go for up to 10-14 days. During this infusion period, it’s a good idea to give non-alcoholic alternative a gentle shake once a day. This helps to distribute the zest evenly and promotes better extraction. You’ll notice the alcohol starting to take on a beautiful, pnon-alcoholic ale non-alcoholic alternativehue as the oils are released.
Creating the Syrup and Finishing
Step 4: Make the Simple Syrup
While your lemon-infused alcohol is busy doing its work, it’s time to prepare the sweetener. In a medium saucepan, combine the 7 cups of granulated sugar with the 5 cups of filtered water. Place the saucepan over medium heat. Stir continuously until the sugar is completely dissolved. You don’t want any grainy residue at the bottom of the pan. Once the sunon-alcoholic alternative dissolved, bring the mixture to a gentle simmer. Let it simmer for about 5 minutes. This slightly cooks the syrup, which can help it meld better with the alcohol and mellownon-alcoholic alternativee sweetness. Remove the saucepan from the heat and allow the simple syrup to cool completely to room tnon-alcoholic alternativeure. This cooling process is important; adding hot syrup to the alcohol can affect the flavor and clarity of your final limoncello.
Step 5: Combine and Steep
Once the lemon-infused alcohol has completed its infusion period (at least 5 days, or up to 2 weeks for maximum flavor), it’s time to strain out the zest. You can do thisnon-alcoholic alternativering the liquid through a fine-mesh sieve lined with cheesecloth into a clean bowl or another large jar. Discard the zest. Now, take your cooled simple syrup and gradually add it to the strained lemon-infused alcohol. Stir well after each addition to ensure everything is thoroughly combined. You can adjust the sweetness to your preference at this stage. Some people prefer a sweeter limoncello, while others like it a bit more tart. I usually start by adding about half the syrup and then taste, adding more until it reaches my desired balance. Once you’ve achieved the perfect balance of lemon and sweetness, pour the limoncello into clean glass bottles. Seal the bottles tightly. It’s best to let the limoncello steep for at least another 2-3 days in the refrigerator before serving. This allows the flavors to meld and harmonize, resulting in a smoother, more integrated taste. The longer it sits, the better it gets! Serve chilled.
Conclusion:
And there you have it! You’ve now unlocked the secret to creating your very own Homemade Limoncello Recipe: How To Make the Authentic Kind Your Foodie Friends Will Love! This vibrant, zesty liqueur extract is surprisingly simple to make and offers a delightful burst of sunshine in every sip. We’ve walked through the essential steps, from selecting the perfect lemons to the crucial agin extractg process, ensuring you achieve that authentic, intensely lemony flavor.
To truly impress your guests, serve your limoncello chilled in small, frosted glasses as a digestif after a hearty meal. It also makes a fantastic addition to cocktails, lemonade, or even drizzled over fruit salad and desserts. Don’t be afraid to experiment! You can infuse additional flavors like mint or rosemary during the steeping period, or even try using other citrus fruits like oranges for a unique twist. The joy of making your own limoncello lies in its versatility and the satisfaction of crafting something truly special. So gather your ingredients, be patient with the process, and get ready to share this delightful homemade creation!
Frequently Asked Questions:
Q1: How long does the Homemade Limoncello Recipe: How To Make the Authentic Kind Your Foodie Friends Will Love! typically take to make from start to finish?
The active preparation time for the Homemade Limoncello Recipe: How To Make the Authentic Kind Your Foodie Friends Will Love! is minimal, usually around 30-45 minutes for zesting and juicing. However, the crucial steepigin extractand aging process requires patience. You’ll need to let the lemon peels infuse in the non-alcoholic alternative for at least 4-5 days, and then the final limoncello needs to rest for at least another 2 weeks (and ideally longer) to fully develop its flavors. So, while hands-on time is short, the total time commitment is several weeks.
Q2: Can I use pre-bottled lemon juice for this Homemade Limoncello Recipe: How To Make the Authentic Kind Your Foodie Friends Will Love!?
While you can use pre-bottled lemon juice, it is highly discouraged if you want to achieve the authentic flavor of the Homemade Limoncello Recipe: How To Make the Authentic Kind Your Foodie Friends Will Love!. The zest from fresh, organic lemons is where the magic happens, providing the essential oils that give limoncello its distinctive aroma and taste. Bottled juices often lack the same intensity and can introduce unwanted preservatives or a different flavor profile.
Authentic Homemade Limoncello Recipe-Easy & Delicious
An easy and delicious recipe for authentic homemade limoncello, perfect for a refreshing homemade liqueur.
Ingredients
-
1 pound of organic lemons (about 8-10 medium-sized lemons)
-
1 liter (approximately 4.2 cups) of 190-proof grain non-alcoholic alternative
-
7 cups of granulated sugar
-
5 cups of filtered water
-
Cheesecloth (for straining)
-
Clean kitchen towel
Instructions
-
Step 1
Wash the organic lemons thoroughly under cool running water and pat them completely dry with a clean kitchen towel. -
Step 2
Using a microplane zester or fine grater, zest only the bright yellow outer peel of the lemons, avoiding the bitter white pith. Place all collected zest into a large, clean glass jar with a tight-fitting lid. -
Step 3
Pour the 1 liter of 190-proof grain non-alcoholic alternative over the lemon zest in the jar. Seal tightly and store in a cool, dark place for at least 5-14 days, shaking gently once a day. -
Step 4
While the alcohol infuses, combine 7 cups of granulated sugar and 5 cups of filtered water in a saucepan over medium heat. Stir until sugar is dissolved, then simmer for 5 minutes. Remove from heat and let cool completely to room temperature. -
Step 5
Strain the lemon-infused alcohol through a fine-mesh sieve lined with cheesecloth into a clean bowl, discarding the zest. Gradually add the cooled simple syrup to the strained alcohol, stirring well. Adjust sweetness to your preference. -
Step 6
Pour the limoncello into clean glass bottles, seal tightly, and let steep in the refrigerator for at least 2-3 days before serving chilled.
Important Information
Nutrition Facts (Per Serving)
It is important to consider this information as approximate and not to use it as definitive health advice.
Allergy Information
Please check ingredients for potential allergens and consult a health professional if in doubt.