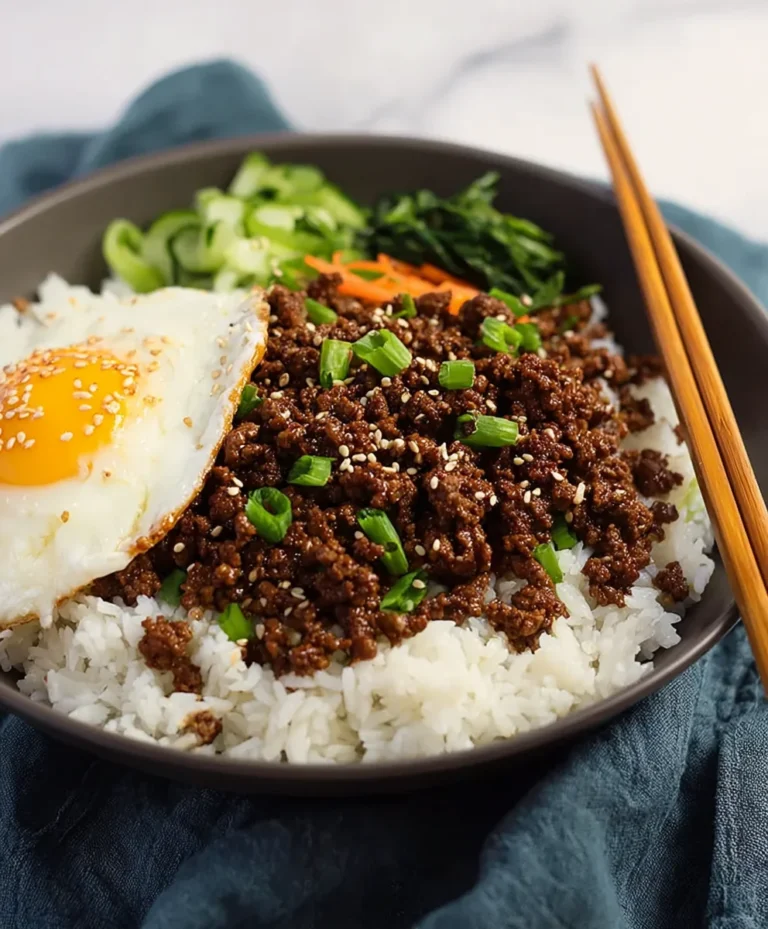
25-Minute Korean Ground Beef Bowl Easy Recipe
Korean Ground Beef Bowl is about to become your new weeknight hero. Forget spending hours in the kitchen; this flavorful and satisfying dish comes together in a mere 25 minutes, proving that delicious, authentic-tasting Korean food can be incredibly accessible. What is it about this Korean ground beef bowl that has everyone raving? It’s the perfect harmony of savory, slightly sweet, and subtly spicy flavors that coat tender ground beef, creating an explosion of taste with every bite. This isn’t just another quick meal; it’s an experience. The magic lies in its simplicity and the incredibly adaptable nature of the marinade, which transforms humble ground beef into something truly extraordinary. You’ll love how easily it comes together, leaving you with more time to enjoy your meal and less time stressing about dinner.
Why You’ll Adore This Korean Ground Beef Bowl
Effortless Flavor, Maximum Impact
Korean Ground Beef Bowl (25-Minutes)
Who says delicious and satisfying meals have to take hours? This Korean Ground Beef Bowl is your new weeknight savior! It’s bursting with savory, sweet, and slightly spicy flavors, incredibly easy to make, and comes together in under 30 minutes. Perfect for those busy evenings when you crave something wholesome and flavorful without the fuss. The beauty of this dish lies in its simplicity and versatility. You can easily customize the vegetables and toppings to suit your preferences, making it a go-to recipe for any occasion. Let’s dive into what you’ll need and how to whip up this delightful meal in no time.
Ingredients:
Cooking Instructions:
This recipe is designed for maximum flavor with minimum effort. We’ll be building layers of taste as we go.
Step 1: Prepare Your Base and Aromatics
First things first, get your rice cooking if you haven’t already. While the rice is steaming away, let’s focus on the star of our show: the ground beef. Mince your garlic and gin extractger. This is where a lot of that fantastic Korean flavor starts to develop. If you have a garlic press, now is a great time to use it for evenly minced garlic. For the gin extractger, you can finely chop it or even grate it if you prefer a smoother texture. Chop your green onions, separating the white parts from the green tops. The white parts will go in with the beef for cooking, and the green tops are reserved for a fresh, vibrant garnish at the end. If you’re adding any vegetables like bell peppers or carrots, chop them into bite-sized pieces now as well. Having everything prepped before you start cooking makes the process so much smoother and quicker.
Step 2: Searing the Ground Beef
Now, grab a large skillet or wok and place it over medium-high heat. Add your pound of ground beef. We’re going to cook this until it’s nicely browned and any excess fat has rendered out. Use a spatula to break up the ground beef as it cooks. This ensures even cooking and creates those lovely little crispy bits that are so satisfying. Once the beef is thoroughly browned, carefully drain off most of the excess grease, leaving just a tablespoon or so in the pan to help sauté the aromatics. This step is crucial for getting a good texture and preventing the dish from being too greasy.
Step 3: Infusing with Flavor
Once the beef is drained and back in the skillet (with that little bit of residual fat), it’s time to add the aromatics. Toss in your minced garlic, minced gin extractger, and the white parts of your chopped green onions. Stir everything together and cook for about 1 to 2 minutes, or until the garlic and gin extractger are fragrant. Be careful not to burn the garlic; a gentle sauté is all you need to release their wonderful aromas. This is where the magic really starts to happen, as the beef absorbs those delicious flavors.
Step 4: Creating the Savory Sauce
Now, let’s build the irresistible sauce that ties everything together. Pour in the soy sauce (or tamari) and the sesame oil. Stir well to coat the ground beef and aromatics. The soy sauce provides that essential salty and umami base, while the sesame oil adds a rich, nutty depth that is characteristic of Korean cuisine. Let this simmer for another 2 to 3 minutes, allowing the sauce to thicken slightly and cling to the beef. Taste the mixture and adjust with salt and pepper if needed. Remember, soy sauce is already salty, so season cautiously. If you’ve added any chopped vegetables like bell peppers or carrots at this stage, they will also begin extract to soften and absorb the sauce. If you are adding quick-cooking vegetables like spinach, you can add them in the last minute or two of simmering.
Step 5: Assembling Your Masterpiece
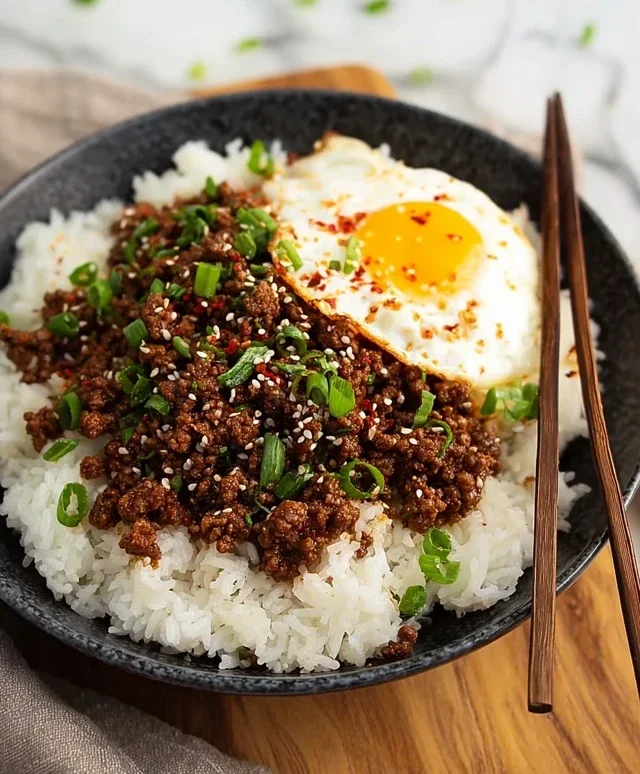
To assemble your Korean Ground Beef Bowl, start by spooning your cooked rice into individual bowls. Then, generously top the rice with your flavorful ground beef mixture. Now comes the fun part: the toppings! Sprinkle with the reserved green onion tops for a fresh, sharp contrast. Add a scattering of sesame seeds for a nutty crunch. If you like a bit of tang and spice, a dollop of kimchi or some pickled vegetables are fantastic additions. For extra richness and protein, fry an egg sunny-side up or over-easy and place it right on top. The runny yolk will mix into the beef and rice, creating an incredibly decadent bite. Finally, consider adding some sliced cucumber for a cool, refreshing element. The combination of warm, savory beef, fluffy rice, and your chosen toppings is pure comfort food perfection. Enjoy your speedy, delicious, and satisfying Korean Ground Beef Bowl!
Conclusion:
And there you have it – a delicious and satisfying Korean Ground Beef Bowl, ready in just 25 minutes! This recipe truly shines because it delivers incredible flavor with minimal effort and time. It’s the perfect weeknight meal when you’re craving something hearty and exciting but don’t have hours to spend in the kitchen. The sweet and savory glaze coating the tender ground beef is simply irresistible, and the quick assembly makes it a winner every time. I hope you’ll give this fantastic Korean Ground Beef Bowl (25-Minutes) recipe a try – I’m confident you’ll love how easy and delicious it is!
For serving, a bed of fluffy steamed rice is classic, but don’t stop there! Consider adding a sprinkle of toasted sesame seeds, some thinly sliced green onions, or even a drizzle of sriracha for an extra kick. You can also toss in some stir-fried vegetables like broccoli florets or snap peas for added color and nutrition. If you’re feeling adventurous with variations, try swapping the ground beef for ground chicken or turkey, or even using a plant-based crum extractble for a vegetarian option. You could also experiment with different soy sauce bases, like tamari for a gluten-free version, or add a pinch of gochugaru (Korean chili flakes) for a spicier profile.
Frequently Asked Questions:
Can I make this Korean Ground Beef Bowl ahead of time?
Yes! You can certainly cook the ground beef mixture ahead of time and store it in an airtight container in the refrigerator for up to 3 days. Reheat it gently on the stovetop or in the microwave before serving over fresh rice.
What if I don’t have all the ingredients for the sauce?
While the specific combination creates the signature flavor, you can make some substitutions. If you’re out of brown sugar, granulated sugar will work in a pinch. For non-alcoholic mirin, a dry sherry vinegar or even a splash of white grape juice with a tiny pinch of sugar can be used. Ensure you have soy sauce as it’s the base!
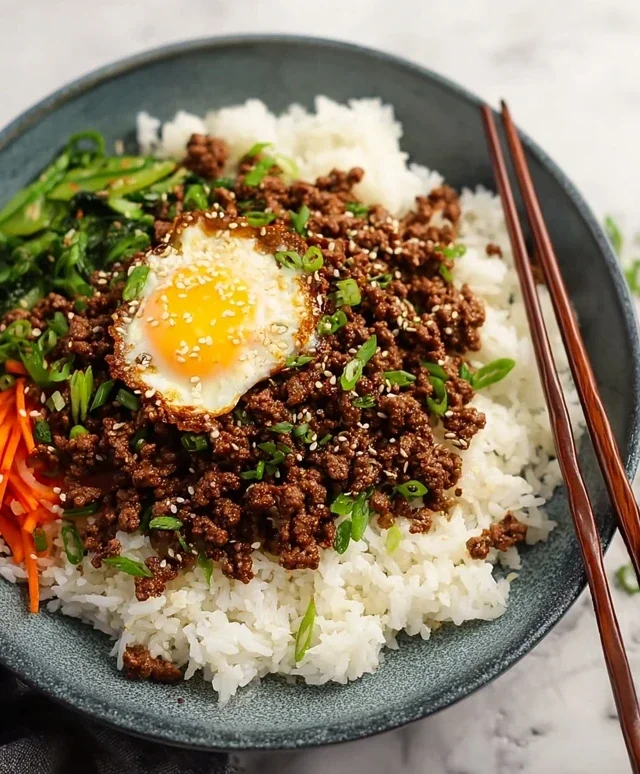
Korean Ground Beef Bowl (25-Minutes)
A quick and flavorful Korean ground beef bowl, perfect for a weeknight meal. Savory marinated ground beef served over fluffy rice with your favorite toppings.
Ingredients
-
1 pound ground beef
-
2 tablespoons soy sauce
-
1 tablespoon sesame oil
-
3 cloves garlic, minced
-
1 teaspoon fresh ginger, minced
-
2 green onions, chopped
-
Salt and pepper to taste
-
2 cups cooked rice
-
Optional: Bell peppers, carrots, broccoli, or spinach
-
Optional: A fried egg for topping
Instructions
-
Step 1
In a medium bowl, combine the ground beef, soy sauce, sesame oil, minced garlic, minced ginger, and chopped green onions. Season with salt and pepper to taste. Mix well to ensure the beef is evenly coated. -
Step 2
Heat a large skillet or wok over medium-high heat. Add the seasoned ground beef mixture. -
Step 3
Cook the ground beef, breaking it apart with a spoon, until browned and cooked through, about 8-10 minutes. -
Step 4
If adding optional vegetables like bell peppers, carrots, broccoli, or spinach, add them to the skillet during the last 5 minutes of cooking the beef, stirring until tender-crisp. -
Step 5
Divide the cooked rice into two bowls. -
Step 6
Spoon the Korean ground beef mixture (and any added vegetables) over the cooked rice in each bowl. -
Step 7
Top with optional garnishes such as extra chopped green onions, sesame seeds, a fried egg, sliced cucumber, kimchi, or pickled vegetables.
Important Information
Nutrition Facts (Per Serving)
It is important to consider this information as approximate and not to use it as definitive health advice.
Allergy Information
Please check ingredients for potential allergens and consult a health professional if in doubt.