Sweet Peach Pretzel Dessert Salad- Easy Recipe
Peach Pretzel Salad Dessert is a surprisingly delightful combination that hits all the right notes for a truly memorable treat. If you’ve never experienced this unique dessert, prepare to be amazed. It’s a dish that sparks curiosity and then utterly wins over hearts with its masterful balance of sweet, salty, and creamy. People adore this Peach Pretzel Salad Dessert because it’s not just a dessert; it’s an experience. The unexpected crunch of the salty pretzel crust provides the perfect counterpoint to the luscious, sweet peaches and the cool, tangy cream cheese filling. What truly makes it special is its ability to be both comforting and sophisticated, a playful twist on classic flavors that always leaves everyone asking for seconds. It’s the kind of dessert that becomes a legend at potlucks and family gatherings, a testament to its irresistible charm.
Peach Pretzel Salad Dessert
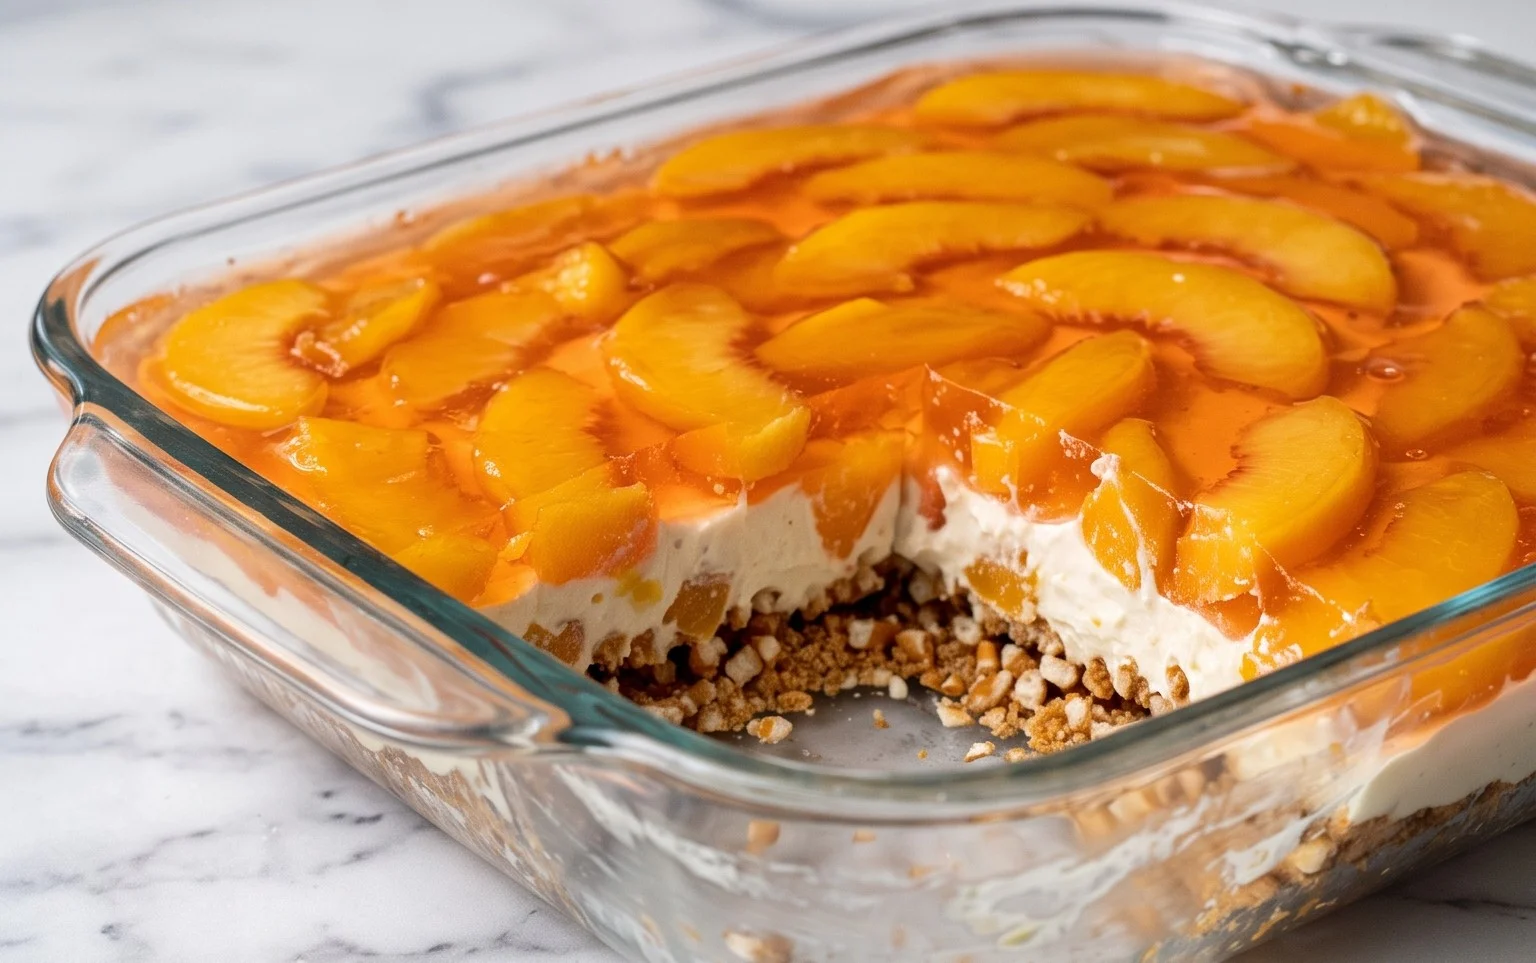
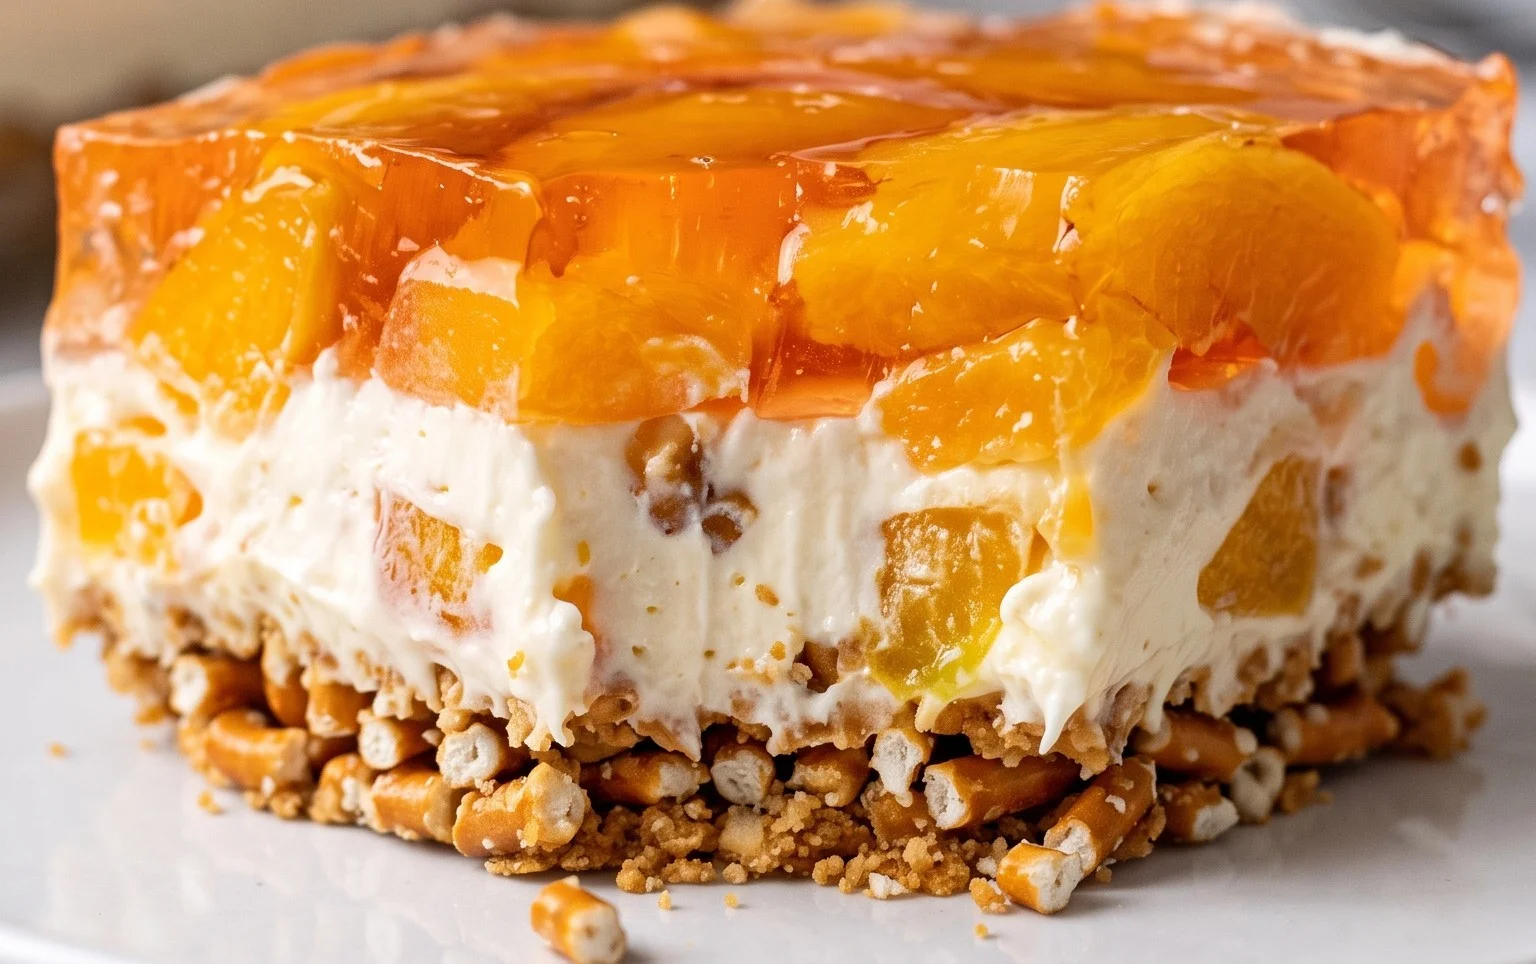
This Peach Pretzel Salad Dessert is a delightful and surprisingly simple treat that brings together a symphony of textures and flavors. Imagin extracte a sweet and salty pretzel crust, a creamy, dreamy cream cheese layer, and the vibrant, juicy burst of peaches, all suspended in a wobbly, flavorful gelatin. It’s the kind of dessert that evokes nostalgia and always brings smiles. While it’s called a “salad,” don’t be fooled – this is pure, unadulterated dessert joy! It’s perfect for potlucks, family gatherings, or even just a special weekend treat. The interplay of the crunchy pretzels, the smooth cream cheese, and the soft peaches is simply irresistible.
Ingredients:
Pretzel Crust Preparation
The foundation of this dessert is a sweet and salty pretzel crust that provides a wonderful textural contrast to the creamy layers above. It’s incredibly easy to make and adds a unique flavor dimension that really elevates the dessert.
1. Start by preheating your oven to 350 degrees Fahrenheit (175 degrees Celsius). While the oven heats up, begin extract preparing your pretzel base. Take your 2 1/2 cups of pretzels and place them in a resealable plastic bag. Use a rolling pin or the bottom of a heavy pan to crush the pretzels into fine crum extractbs. You don’t want them to be dusty, but rather a coarse meal with some smaller pieces remaining for texture. Aim for a consistency where you can still see some small pretzel fragments.
2. In a medium mixing bowl, combine the crushed pretzels with the 3 Tablespoons of powdered sugar and the 3/4 cup of melted butter. Stir this mixture thoroughly until all the pretzel crum extractbs are evenly coated with the butter and sugar. This will help the crust bind together nicely.
3. Pour the pretzel mixture into a 9×13 inch baking dish. Using the bottom of a glass or your hands, firmly press the pretzel mixture evenly across the bottom of the dish to form a compact crust. Make sure to press it down well so it holds its shape when sliced. Bake this crust in the preheated oven for about 8-10 minutes, or until it’s lightly golden and fragrant. This step helps to toast the pretzels slightly and create a sturdier base. Once baked, remove the crust from the oven and let it cool completely on a wire rack. This cooling period is crucial to prevent the warm crust from melting the subsequent layers.
Creamy Peach Layer Assembly
This is where the luscious, creamy part of our dessert comes to life, studded with delicious peach pieces.
4. While the pretzel crust is cooling, let’s prepare the creamy layer. In a large mixing bowl, beat the softened 8 oz. package of cream cheese with 1 cup of powdered sugar until smooth and well combined. If you’re using the pasteurized egg for added richness and stability (though it’s entirely optional and many make this without it), now is the time to add it to the cream cheese mixture and beat until thoroughly incorporated. Ensure the cream cheese is truly softened to room temperature; this makes it much easier to achieve a smooth consistency and avoids lumps.
5. Gently fold in the thawed 8 oz. carton of whipped topping into the cream cheese mixture. Be careful not to overmix; you want to keep the mixture light and airy. The goal is a smooth, pillowy cream cheese layer. Once the whipped topping is incorporated, gently fold in the 4 cups of sliced peaches. If you are using canned peaches, make sure they are well-drained to avoid making the dessert watery. If using fresh peaches, ensure they are ripe and sweet. Distribute the peaches evenly throughout the creamy mixture.
6. Once the pretzel crust has completely cooled, carefully spread the creamy peach mixture evenly over the top of the cooled pretzel crust. Use a spatula to smooth out the top, creating a beautiful, even layer.
Gelatin Top Layer
The final touch is a vibrant, fruity gelatin layer that sets everything beautifully.
7. In a heatproof bowl, dissolve the 6 oz. box of peach gelatin in 2 1/3 cups of boiling water. Stir continuously for about 2 minutes, or until the gelatin crystals are completely dissolved. It’s important to ensure there are no undissolved granules at the bottom of the bowl for the best set.
8. Let the dissolved gelatin cool to room temperature. This is a critical step. If the gelatin is too hot when you pour it over the cream cheese layer, it will melt the cream cheese and create a mess. Patience here will be rewarded with a beautifully layered dessert. Once the gelatin is at room temperature, carefully and slowly pour it over the creamy peach layer in the baking dish. Pouring it slowly and evenly will help prevent it from disturbing the layer beneath.
9. Now, it’s time for the magic to happen! Refrigerate the dessert for at least 4-6 hours, or preferably overnight, until the gelatin is firmly set. This chilling time allows all the flavors to meld together and the dessert to firm up, making it easy to slice and serve. When it’s ready, you’ll have a delightful dessert with distinct layers of crunchy, creamy, and fruity goodness. Enjoy!
Conclusion:
So there you have it! This Peach Pretzel Salad Dessert is truly a showstopper, offering a delightful combination of sweet, salty, and creamy textures that will have everyone asking for the recipe. The crisp, buttery pretzel crust perfectly complements the luscious peach filling and the smooth, tangy cream cheese topping, making each bite a harmonious explosion of flavor. It’s the ideal dessert for potlucks, holidays, or simply a special treat to brighten any day. Don’t be afraid to get creative with the variations I’ve suggested; this recipe is wonderfully adaptable to your personal preferences.
I really encourage you to give this Peach Pretzel Salad Dessert a try. I promise you won’t be disappointed! It’s a dessert that’s surprisingly easy to make but delivers an impressive and memorable taste experience. Share it with loved ones, and get ready to receive rave reviews.
Frequently Asked Questions:
Can I use fresh peaches instead of canned?
Absolutely! If using fresh peaches, you’ll want to peel, pit, and slice them. You might need to simmer them slightly with a little sugar and cornstarch until they soften and release some of their juices, similar to how you’d prepare a fresh peach pie filling. This will ensure they have the right consistency for the salad.
What other fruits can I use in this dessert?
This recipe is very versatile! While peaches are fantastic, you could easily substitute other fruits. Think about using berries like strawberries or raspberries, or even canned or fresh apricots. The pretzel crust and cream cheese layer pair well with a wide range of fruit flavors.
How far in advance can I make this dessert?
You can assemble the pretzel crust and prepare the cream cheese layer a day in advance and refrigerate them separately. However, it’s best to add the peach filling and top it just before serving to maintain the crispness of the pretzels. If you add the topping too early, the pretzels can become soggy.
Peach Pretzel Salad Dessert
A sweet and salty dessert salad featuring layers of crushed pretzels, creamy filling, and sweet peaches.
Ingredients
-
2 1/3 c. boiling water
-
1 6 oz. box peach gelatin
-
4 c. sliced peaches (fresh or canned)
-
2 1/2 c. crushed pretzels
-
3 Tbsp. powdered sugar
-
3/4 c. melted butter
-
1 8 oz. package cream cheese
-
1 c. powdered sugar
-
1 8 oz. carton whipped topping
-
1 pasteurized egg (OPTIONAL)
Instructions
-
Step 1
Combine boiling water and peach gelatin in a bowl. Stir until dissolved. Add sliced peaches and stir gently. -
Step 2
In a separate bowl, mix crushed pretzels, 3 Tbsp. powdered sugar, and melted butter. Press this mixture into the bottom of a 9×13 inch pan. -
Step 3
In another bowl, beat cream cheese until smooth. Gradually add 1 cup powdered sugar, mixing until well combined. -
Step 4
Fold in the whipped topping and the pasteurized egg (if using) into the cream cheese mixture until just combined. -
Step 5
Spread the cream cheese mixture evenly over the pretzel crust. -
Step 6
Pour the peach gelatin mixture over the cream cheese layer. Chill for at least 4 hours, or until firm.
Important Information
Nutrition Facts (Per Serving)
It is important to consider this information as approximate and not to use it as definitive health advice.
Allergy Information
Please check ingredients for potential allergens and consult a health professional if in doubt.