Nut-Free Pesto Recipe – Delicious Allergy-Friendly Flavor
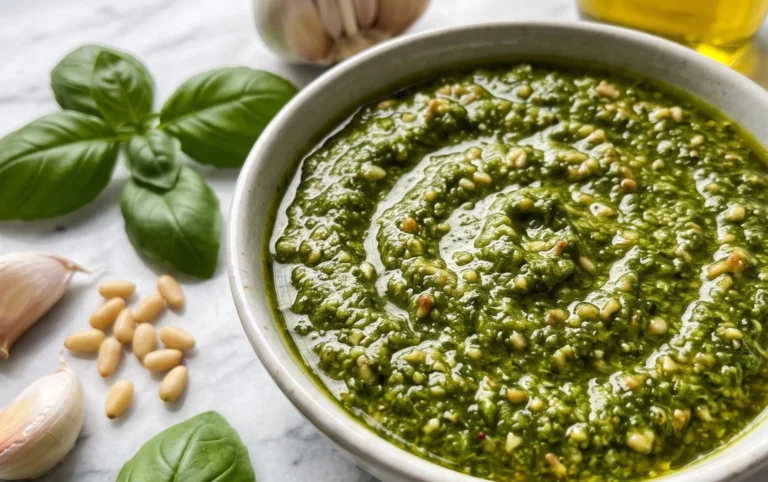
Nut Free Pesto: your new go-to for vibrant flavor without the worry! For so long, the creamy, herbaceous goodness of pesto has been a beloved staple in kitchens worldwide. We adore it on pasta, as a dip for crusty bread, swirled into soups, or dolloped onto grilled vegetables. However, for many, the joy of pesto comes with a significant caveat: the presence of nuts. This is where our Nut Free Pesto shines. We’ve cracked the code to achieving that rich, satisfying texture and complex flavor profile without a single pine nut or walnut in sight. Imagin extracte the bright notes of basil, the pungent kick of garlic, and the salty tang of Parmesan, all harmoniously blended into a sauce that’s both universally appealing and incredibly delicious. This recipe is designed to be incredibly versatile, proving that amazing taste doesn’t have to exclude anyone at the table. Get ready to fall in love with pesto all over again!
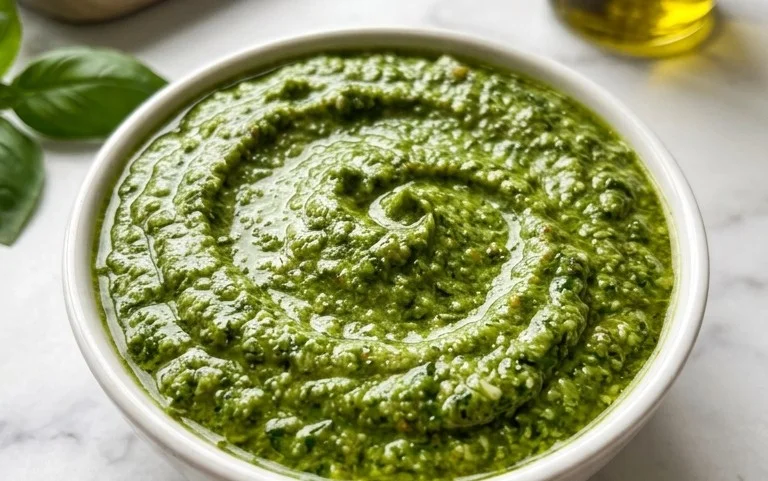
Nut-Free Pesto: A Creamy, Dreamy Dip for Everyone
When the craving for fresh, vibrant pesto strikes, but nut allergies are a concern, what do you do? Fear not, fellow food lovers! This nut-free pesto recipe is here to save the day. It delivers all the herbaceous punch and savory goodness you expect from traditional pesto, without a single nut in sight. This means everyone at your table can enjoy this versatile sauce, from pasta dishes to grilled vegetables and even a delightful dip for crackers or crudités.
The magic of pesto lies in its simplicity, allowing the fresh ingredients to shine. We’re going to take a classic approach, focusing on high-quality ingredients that create a wonderfully balanced flavor profile. The absence of nuts doesn’t mean a compromise in texture either; we’ll achieve a satisfyingly smooth and creamy consistency that clings beautifully to whatever you pair it with. This recipe is incredibly forgiving and adaptable, making it perfect for both seasoned cooks and begin extractners alike.
Let’s gather our treasures and get ready to whip up something truly special.
Ingredients:
Creating Your Creamy Pesto
This recipe is all about bringin extractg together fresh, bright flavors. The key is to start with vibrant basil. Look for leaves that are green and free from any wilting or dark spots. Gently wash and thoroughly dry your basil leaves. Any excess water will dilute the flavor and can affect the texture of your pesto. A salad spinner is your best friend here, or you can gently pat them dry with a clean kitchen towel.
The garlic is another crucial element. For a milder, more integrated garlic flavor, you can lightly roast the garlic cloves before adding them. Simply wrap them in foil and bake at 350°F (175°C) for about 15-20 minutes until softened. However, for a zesty kick, raw garlic is perfectly acceptable and often preferred. The amount of garlic can be adjusted to your personal preference; start with two cloves and add more if you’re a true garlic aficionado.
Now, let’s talk about the Parmesan cheese. Freshly grated Parmesan is non-negotiable for the best flavor and texture. Pre-shredded cheeses often contain anti-caking agents that can make your pesto a bit grainy. The salty, nutty (in a cheesy way!) notes of the Parmesan are essential for that classic pesto depth.
The olive oil is the binder that brings everything together. We’re using a good quality extra virgin extract olive oil for its fruity notes and smooth finish. The amount of olive oil can be adjusted to achieve your desired consistency. If you prefer a thicker pesto, start with the recommended amount and add more sparingly. For a looser pesto, feel free to add a little extra.
Finally, salt and pepper are our humble flavor enhancers. They are crucial for bringin extractg out the sweetness of the basil and the savory notes of the cheese. A little goes a long way, so we’ll season to taste.
Step-by-Step Pesto Perfection
1. Prepare Your Herbs and Garlic: Begin extract by ensuring your basil leaves are washed and thoroughly dried. Remove any thick stems that might be tough. Peel your garlic cloves. If you are using a food processor, you can add the basil leaves and garlic cloves directly into the bowl. If you are using a mortar and pestle, you will process them in stages. For a food processor, pulse the basil and garlic together a few times until they are roughly chopped. This helps to break them down before adding the other ingredients, making for a smoother final pesto. Don’t over-process at this stage; we want some texture initially.
2. Incorporate the Cheese and Seasonings: Once the basil and garlic are roughly chopped, add the freshly grated Parmesan cheese to the food processor. Along with the cheese, add the salt and pepper. Now, pulse the mixture again. You want to combine these ingredients until they are well incorporated. Scrape down the sides of the food processor bowl periodically to ensure everything is evenly mixed. The goal here is to create a thick paste.
3. Emulsify with Olive Oil: With the food processor running on a low speed, slowly drizzle in the olive oil in a steady stream. Continue to process until the pesto reaches your desired consistency. This slow addition of olive oil is key to creating a smooth, emulsified pesto. If you are using a mortar and pestle, you will add the olive oil gradually, stirring and grinding to create a paste. You are looking for a vibrant green sauce that is thick but pourable. If it’s too thick for your liking, you can add another tablespoon of olive oil, processing until fully combined.
4. Taste and Adjust: This is a crucial step for achieving pesto perfection. Once the pesto is made, taste it! Does it need a little more salt? Perhaps a touch more pepper? You can also adjust the amount of garlic at this stage if you feel it’s too mild or too strong. If you want a more garlicky flavor, you can mince a tiny bit more garlic and stir it in. Remember, the flavors will also meld and deepen as the pesto sits, so don’t over-season initially.
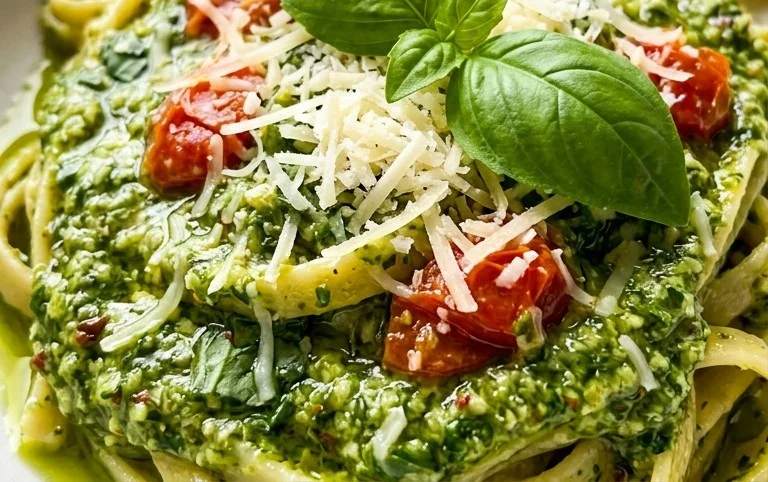
5. Storage and Serving Suggestions: Your nut-free pesto is now ready to be enjoyed! For immediate use, transfer it to a serving bowl. If you’re not using it right away, you can store it in an airtight container in the refrigerator for up to 5 days. To maintain its vibrant green color and prevent oxidation, you can pour a thin layer of olive oil over the surface of the pesto before sealing the container. This acts as a barrier against the air. This pesto is incredibly versatile. Toss it with hot pasta, spread it on sandwiches, dollop it onto grilled chicken or fish, mix it into salad dressings, or use it as a dip for fresh vegetables.
Enjoy the incredible freshness and flavor of your homemade nut-free pesto! It’s a testament to how simple, quality ingredients can create something truly delicious and inclusive.
Conclusion:
I hope you’re as excited to try this nut-free pesto as I am! This recipe is a true game-changer for anyone with nut allergies or simply looking for a delicious alternative to traditional pesto. Its vibrant flavor profile, achieved through fresh basil, garlic, quality olive oil, and the subtle creaminess of pumpkin seeds, makes it incredibly versatile. It’s a fantastic way to add a burst of herbaceous goodness to so many dishes without any of the usual nut-based concerns.
I love using this nut-free pesto tossed with pasta, as a spread on sandwiches or wraps, dolloped onto grilled chicken or fish, or even mixed into a salad dressing. The possibilities are truly endless! Don’t be afraid to experiment with variations – consider adding a squeeze of lemon juice for brightness, a pinch of red pepper flakes for a little heat, or even substituting some of the basil with spinach or arugula for a different flavor dimension. Give this nut-free pesto a try; I’m confident you’ll be delighted by how easy it is to make and how incredibly delicious it tastes!
Frequently Asked Questions about Nut-Free Pesto:
What can I use instead of pine nuts if I don’t have them on hand?
If you don’t have pine nuts, this nut-free pesto recipe already uses pumpkin seeds (pepitas) as a fantastic alternative. If you don’t have pumpkin seeds either, sunflower seeds are another excellent and readily available option that will provide a similar texture and mild flavor.
Can I make this pesto ahead of time?
Absolutely! This nut-free pesto can be made a day or two in advance and stored in an airtight container in the refrigerator. It’s best to pour a thin layer of olive oil over the top to prevent browning and maintain its vibrant green color. The flavor often intensifies overnight, making it even more delicious!
My pesto seems a bit too thick. How can I adjust the consistency?
If your nut-free pesto is thicker than you prefer, simply drizzle in a little more olive oil, a tablespoon at a time, while blending. Continue to blend until you reach your desired consistency. You can also add a splash of water if you’re concerned about adding too much oil, though olive oil will contribute more to the flavor and richness.
Nut Free Pesto
A delicious and nut-free version of classic basil pesto, perfect for those with allergies. This pesto is vibrant, flavorful, and versatile.
Ingredients
-
2 cups fresh basil
-
2 garlic cloves
-
1/2 cup freshly grated Parmesan cheese
-
1/4 cup olive oil
-
1/4 teaspoon salt
-
1/8 teaspoon pepper
Instructions
-
Step 1
In a food processor, combine the fresh basil leaves and garlic cloves. -
Step 2
Pulse until the basil and garlic are finely chopped. -
Step 3
Add the freshly grated Parmesan cheese, salt, and pepper to the food processor. -
Step 4
Pulse again to combine the ingredients. -
Step 5
With the food processor running, slowly drizzle in the olive oil until the pesto is smooth and emulsified. -
Step 6
Taste and adjust seasoning if needed. Serve immediately or store in an airtight container in the refrigerator.
Important Information
Nutrition Facts (Per Serving)
It is important to consider this information as approximate and not to use it as definitive health advice.
Allergy Information
Please check ingredients for potential allergens and consult a health professional if in doubt.