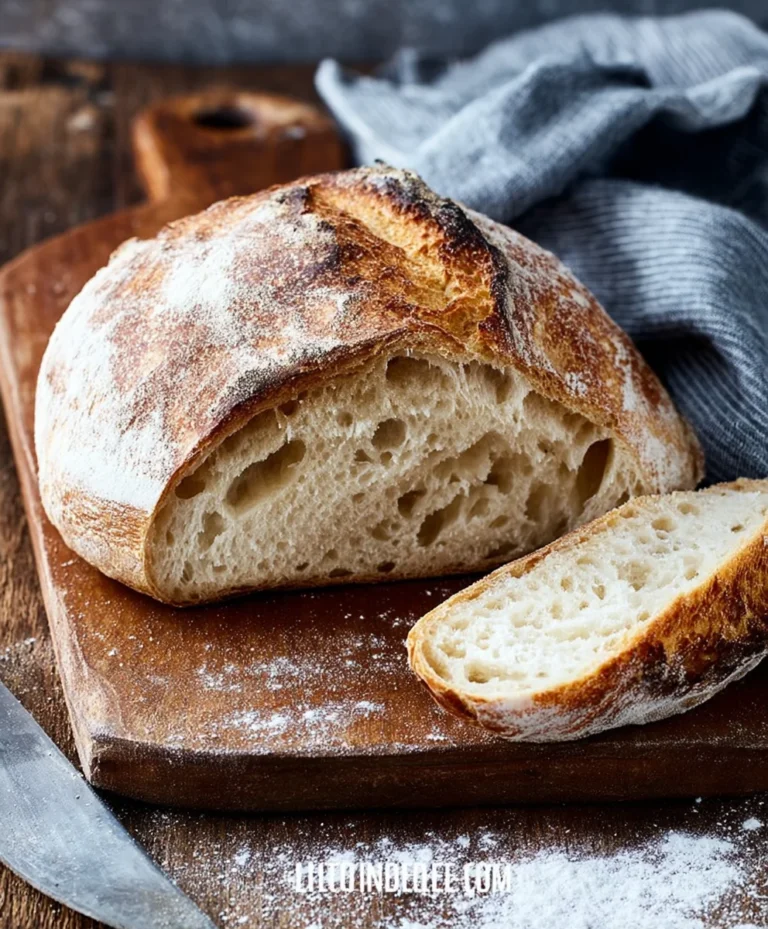
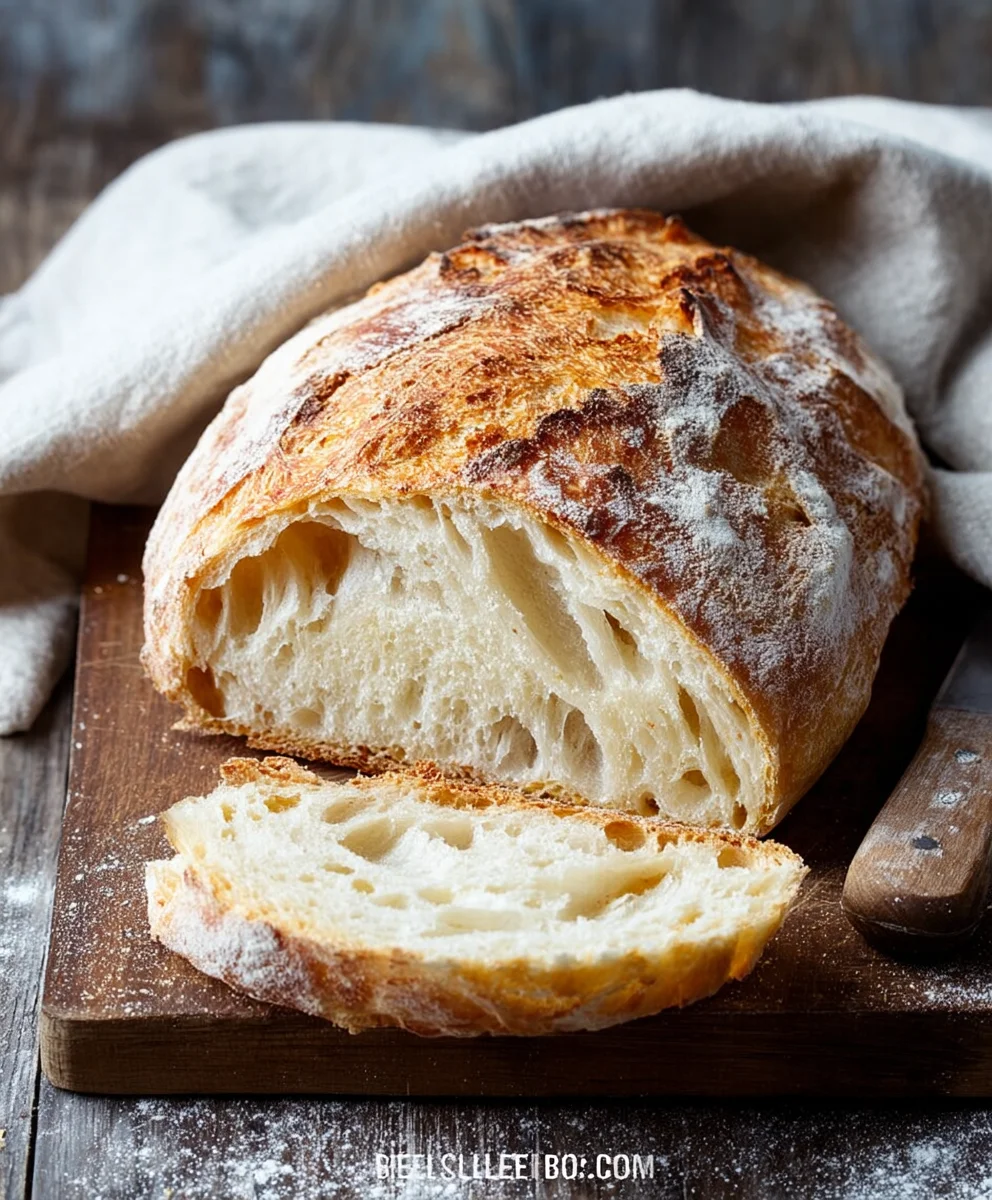
Easy Rustic Bread Recipe-Simple & Delicious
Rustic Bread Recipe. There’s something profoundly satisfying about pulling a warm, crusty loaf of homemade bread from your oven, isn’t there? That comforting aroma that fills your kitchen, the delightful crackle as you slice into its golden-brown exterior, and the soft, chewy interior just waiting to be slathered with butter or dipped in soup. This particular Rustic Bread Recipe has become a cherished staple in my home, and I suspect it will quickly become one in yours too. What makes this loaf so special? It’s the beautiful simplicity that allows the quality of the ingredients to shine. We’re talking about a blend of flours that creates a wonderfully textured crum extractb, a slow fermentation process that develops deep, complex flavors, and a technique that results in that coveted, rustic-looking crust. It’s a bread that feels both approachable for begin extractners and deeply rewarding for seasoned bakers, a true testament to the magic of flour, water, yeast, and time.

Ingredients:
- 3 cups warm water (about 105-115°F or 40-46°C)
- 2 ¼ teaspoons active dry yeast (this is typically one standard packet)
- 1 tablespoon granulated sugar
- 6 cups all-purpose flour (approximately 750 grams), plus more for dusting
- 3 teaspoons salt
Preparing the Dough
Activating the Yeast
The first crucial step to a successful Rustic Bread Recipe is to ensure your yeast is alive and well. In a large mixing bowl, combine the 3 cups of warm water. It’s important that the water is warm, not hot, as excessive heat can kill the yeast. Aim for a temperature between 105-115°F (40-46°C). You can test this by feeling it on your wrist; it should feel comfortably warm, like a baby’s bathwater. To this warm water, add the 1 tablespoon of granulated sugar. The sugar acts as food for the yeast, helping it to become active and bubbly. Sprinkle the 2 ¼ teaspoons of active dry yeast over the surface of the water and sugar mixture. Give it a gentle stir, just enough to ensure the yeast is mostly submerged. Now, let this mixture sit undisturbed for about 5 to 10 minutes. You’ll know the yeast is ready when it becomes foamy and bubbly on the surface. This indicates that the yeast is active and will work its magic to leaven our bread. If you don’t see any foam, it’s a sign your yeast might be old or the water was too hot or cold, and you should start this step again with fresh yeast.
Mixing the Dough
Once your yeast mixture is foamy and fragrant, it’s time to add the dry ingredients. To the activated yeast mixture, add the 6 cups of all-purpose flour and the 3 teaspoons of salt. The salt not only adds flavor but also controls the rate at which the yeast ferments, preventing it from working too quickly. Begin extract mixing these ingredients together. You can use a sturdy spoon or a dough whisk at this stage, but eventually, you’ll need to get your hands in there. Mix until the ingredients just start to come together into a shaggy, rough dough. It will look a bit unkempt at this point, and that’s perfectly normal for this rustic bread. Don’t worry about it being perfectly smooth yet.
Kneading and First Rise
Kneading the Dough
Now comes the part that develops the gluten structure, which gives bread its chewy texture. Lightly flour a clean work surface with a little extra flour. Turn the shaggy dough out onto the floured surgin extracte. Begin kneading the dough. To knead, push the dough away from you with the heels of your hands, then fold it back over on itself and give it a quarter turn. Repeat this motion continuously. When I knead, I like to think of it as giving the dough a good workout. The dough will be sticky at first, but as you continue to knead, it will become smoother, more elastic, and less sticky. If the dough becomes too sticky and adheres too much to your hands or the surface, add just a tablespoon of flour at a time, working it in until it’s manageable. Continue kneading for about 8 to 10 minutes. You’re looking for a dough that is smooth and elastic. A good test is the windowpane test: pinch off a small piece of dough and gently stretch it between your fingers. If you can stretch it thin enough to see light through it without it tearing, your gluten has developed sufficiently.
First Rise (Bulk Fermentation)
Lightly grease a clean, large bowl with a little oil or cooking spray. Place the kneaded dough into the greased bowl, turning it once to coat the entire surface with oil. This prevents the dough from drying out as it rises. Cover the bowl tightly with plastic wrap or a damp kitchen towel. Find a warm, draft-free place for the dough to rise. This could be inside a slightly warmed oven (turned off!) or simply on your kitchen counter if your home is warm. Let the dough rise for about 1 to 1.5 hours, or until it has doubled in size. The exact time will depend on the ambient temperature. You’ll know it’s ready when a gently poked finger leaves an indentation that springs back slowly.
Shaping and Baking
Shaping the Loaf
Once the dough has doubled in size, it’s time to shape it. Gently punch down the risen dough to deflate it. Turn the dough out onto a lightly floured surface. At this point, you can shape your rustic bread into any form you like. For a classic rustic loaf, gently pat the dough into a round or oval shape. You don’t need to be too precise; the charm of rustic bread is its imperfect, artisanal look. If you want a slightly more defined loaf, you can create a “boule” by tucking the edges underneath to create surface tension. Be gentle to avoid deflating the dough too much.
Second Rise (Proofing) and Baking
Once shaped, place your loaf onto a baking sheet lined with parchment paper or a well-floured baking stone. Cover the shaped loaf loosely with plastic wrap or a clean kitchen towel and let it rest for another 30 to 45 minutes. This second, shorter rise is called proofing, and it allows the dough to relax and puff up slightly before baking. While the dough is proofing, preheat your oven to 425°F (220°C). If you’re using a baking stone, make sure it has plenty of time to heat up in the oven. Just before baking, you can optionally score the top of the loaf with a sharp knife or a lame to allow for controlled expansion during baking and to create a beautiful crust. Carefully slide the loaf into the preheated oven. For an extra crispy crust, you can create steam in your oven by placing a pan of hot water on the bottom rack as the oven preheats, or by spraying the oven walls with water just as you put the bread in. Bake for 30 to 40 minutes, or until the crust is a deep golden brown and the internal temperature of the bread reaches around 200-210°F (93-99°C) when tested with an instant-read thermometer. The bottom of the loaf should sound hollow when tapped. Remove the bread from the oven and let it cool completely on a wire rack before slicing. This cooling process is essential for the texture to set properly.
Conclusion:
Embarking on the journey of creating your own Rustic Bread Recipe is a deeply rewarding experience. This simple yet satisfying recipe yields a beautifully crusted loaf with a tender, airy interior – perfect for any occasion. Whether you’re a seasoned baker or just starting out, don’t be intimidated! The magic of this Rustic Bread Recipe lies in its simplicity and the inherent charm of its unpretentious nature. The aroma that fills your kitchen as it bakes is truly unparalleled, promising a delicious and wholesome treat.
Serve this delightful bread warm, with a generous slathering of butter, or use it as the foundation for hearty sandwiches. It’s also fantastic alongside soups, stews, or a fresh salad. For variations, feel free to incorporate herbs like rosemary or thyme into the dough, or add a handful of seeds for extra texture and flavor. Experimenting with different flours, such as whole wheat or rye, can also create wonderfully unique loaves. The key is to embrace the process and enjoy the delicious results of your Rustic Bread Recipe!
Frequently Asked Questions about Rustic Bread Recipe:
Q: My crust isn’t as crispy as I’d like. What can I do?
A: To achieve a crispier crust with your Rustic Bread Recipe, try baking the bread in a preheated Dutch oven. This traps steam, which is essential for a good crust. Alternatively, you can place a tray of water on the bottom rack of your oven during the initial baking phase to create steam.
Q: Can I make this Rustic Bread Recipe ahead of time?
A: Absolutely! Once your Rustic Bread Recipe has cooled completely, it can be stored at room temperature in a bread box or a loosely tied plastic bag for 2-3 days. For longer storage, you can slice it and freeze it, thawing slices as needed.
Easy Rustic Bread Recipe-Simple & Delicious
A simple and delicious recipe for homemade rustic bread, perfect for beginners.
Ingredients
-
3 cups warm water (about 105-115°F or 40-46°C)
-
2 ¼ teaspoons active dry yeast (this is typically one standard packet)
-
1 tablespoon granulated sugar
-
6 cups all-purpose flour (approximately 750 grams), plus more for dusting
-
3 teaspoons salt
Instructions
-
Step 1
Activate the yeast: In a large mixing bowl, combine 3 cups of warm water (105-115°F/40-46°C) with 1 tablespoon of granulated sugar. Sprinkle 2 ¼ teaspoons of active dry yeast over the surface, stir gently, and let sit for 5-10 minutes until foamy and bubbly. -
Step 2
Mix the dough: To the activated yeast mixture, add 6 cups of all-purpose flour and 3 teaspoons of salt. Mix with a spoon or dough whisk until a shaggy, rough dough forms. -
Step 3
Knead the dough: Turn the dough onto a lightly floured surface and knead for 8-10 minutes until smooth and elastic. If too sticky, add flour 1 tablespoon at a time. Perform the windowpane test to check gluten development. -
Step 4
First rise: Place the kneaded dough in a lightly greased bowl, turn to coat, cover tightly, and let rise in a warm, draft-free place for 1-1.5 hours, or until doubled in size. -
Step 5
Shape the loaf: Gently punch down the risen dough, turn it onto a lightly floured surface, and shape into a round or oval loaf. Be gentle to maintain airiness. -
Step 6
Second rise and bake: Place the shaped loaf on a baking sheet or floured stone, cover loosely, and let proof for 30-45 minutes. Preheat oven to 425°F (220°C). Optionally score the top. Bake for 30-40 minutes until deep golden brown. For a crispy crust, create steam in the oven. Let cool completely on a wire rack before slicing.
Important Information
Nutrition Facts (Per Serving)
It is important to consider this information as approximate and not to use it as definitive health advice.
Allergy Information
Please check ingredients for potential allergens and consult a health professional if in doubt.