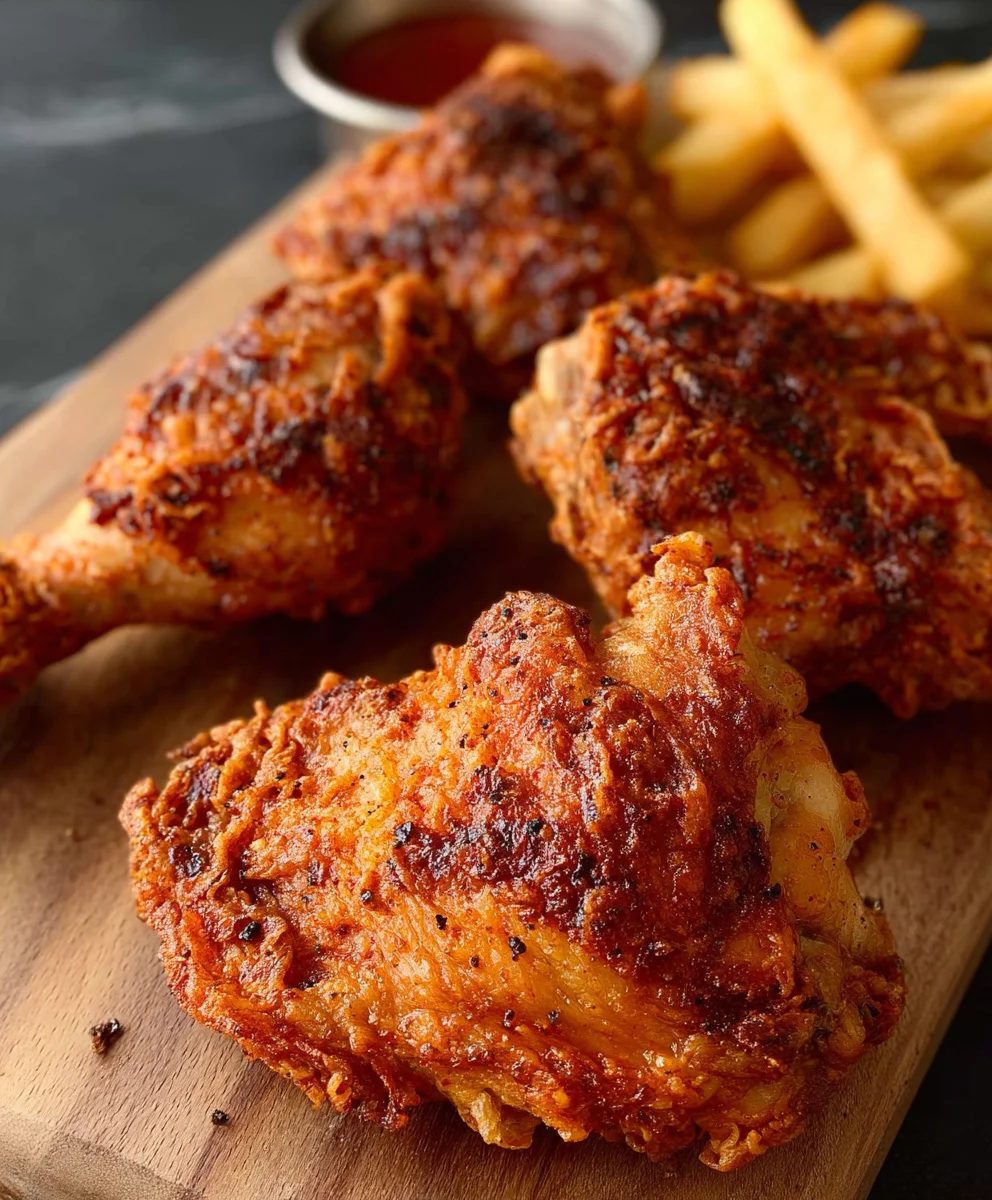
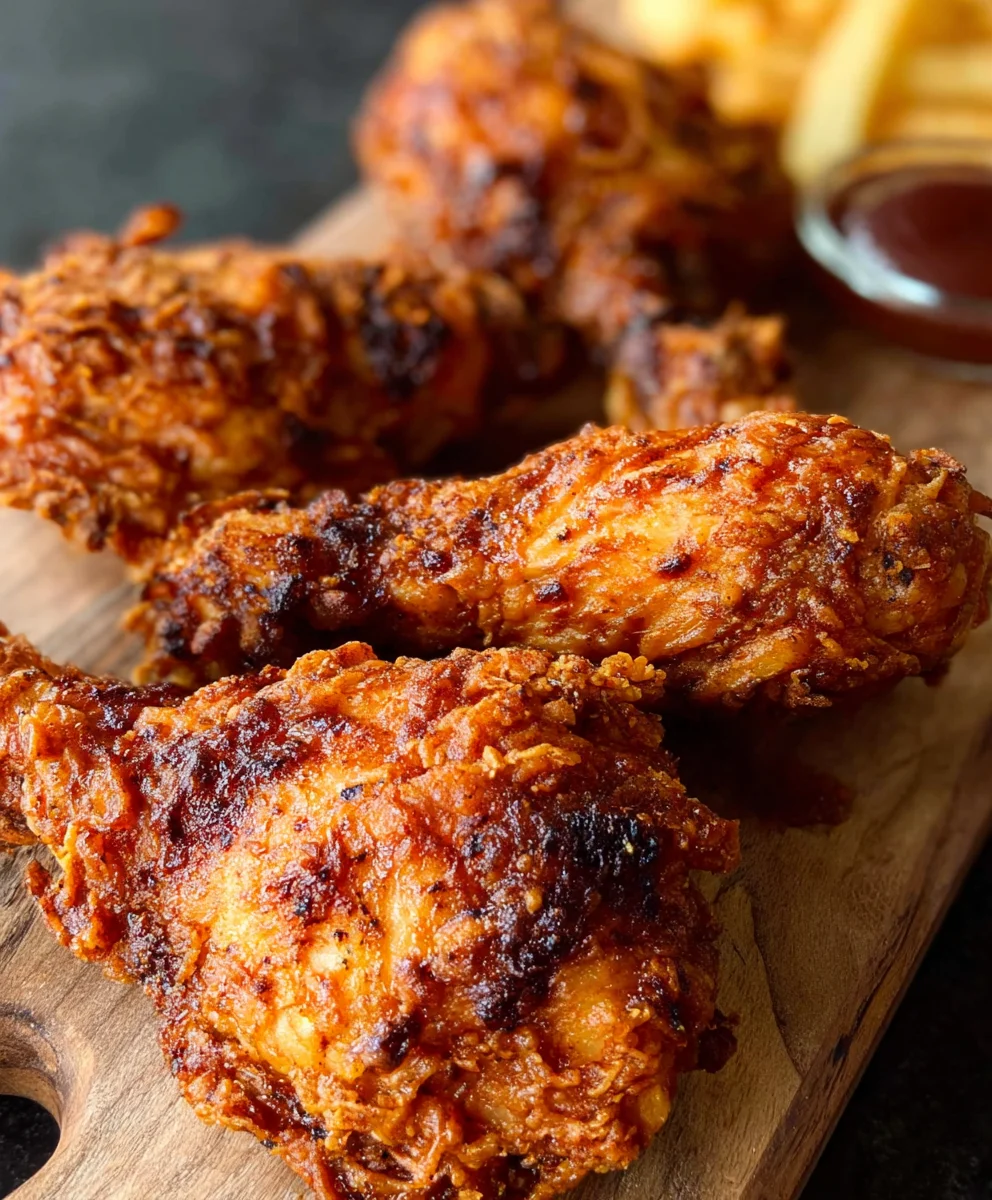
Crispy Juicy Fried Chicken Recipe
CRISPY JUICY FIRED CHICKEN, oh, that glorious symphony of textures and flavors! It’s the dish that whispers comfort and shouts celebration, isn’t it? We all have that innate craving for something that’s both incredibly satisfying and delightfully indulgent. This isn’t just fried chicken; it’s an experience. Imagin extracte that shatteringly crisp exterior, giving way to impossibly tender, succulent meat that bursts with savory goodness with every single bite. What makes this particular preparation of CRISPY JUICY FIRED CHICKEN so utterly captivating? It’s a meticulous balance of a perfectly seasoned, light and airy coating that fries to an exquisite golden-brown perfection, ensuringin extracto sogginess whatsoever. Plus, the internal cooking method guarantees that the chicken remains unbelievably moist and flavorful. It’s the kind of meal that brings people together, making memories one delicious piece at a time.
Ingredients:
- 8 pieces bone-in chicken pieces (4 chicken thighs and 4 drum extractsticks)
- 3 cups buttermilk
- 1 large egg
- 2 teaspoons salt
- 1 teaspoon ground black pepper
- 1 teaspoon garlic powder
- ½ teaspoon cayenne pepper
- FOR THE FLOUR COATING:
- 2 cups all-purpose flour
- 3/4 cup cornstarch
- 1 teaspoon baking powder
- 2 teaspoons salt
- 1 teaspoon ground black pepper
- 1 teaspoon garlic powder
- 1 teaspoon celery salt
Preparing the Chicken for Maximum Flavor and Tenderness
Marinade Station
The secret to incredibly juicy and flavorful fried chicken starts well before it hits the hot oil. We begin extract by creating a rich, tangy marinade. In a large bowl, combine the 3 cups of buttermilk, 1 large egg, 2 teaspoons of salt, 1 teaspoon of ground black pepper, 1 teaspoon of garlic powder, and ½ teaspoon of cayenne pepper. Whisk these ingredients together until they are thoroughly blended. The buttermilk is crucial here; its acidity tenderizes the chicken, breaking down the tough connective tissues and infusing the meat with moisture. The egg acts as a binder, helping the flour coating adhere better later on.
Now, it’s time to introduce our 8 pieces of bone-in chicken (that’s 4 chicken thighsrum extractd 4 drumsticks). Gently place each piece into the buttermilk mixture, ensuring that every part of the chicken is submerged. Cover the bowl tightly with plastic wrap or transfer the chicken and marinade to a resealable plastic bag. For the best results, refrigerate this chicken for at least 4 hours, but an overnight marinade is truly transformative. This extended marination period allows the flavors to penetrate deep into the chicken, ensuring every bite is seasoned to perfection.
Crafting the Perfect Crispy Coating
Flour Coating Assembly
While the chicken is busy soaking up all that deliciousness, let’s prepare our crispy flour coating. In a separate large bowl or a shallow dish that’s easy to work with, combine the 2 cups of all-purpose flour, ¾ cup of cornstarch, 1 teaspoon of baking powder, 2 teaspoons of salt, 1 teaspoon of ground black pepper, 1 teaspoon of garlic powder, and 1 teaspoon of celery salt. Whisk all of these dry ingredients together thoroughly. The cornstarch is key to achieving that exceptionally crispy, almost shatteringly delicate coating. The baking powder, when it interacts with the hot oil, creates tiny air bubbles, contributing to the lightness and crispiness of the crust. Don’t skimp on the seasonings in the flour mixture; this is your second layer of flavor.
Once the chicken has marinated sufficiently, it’s time to coat it. Remove one piece of chicken at a time from the buttermilk marinade, letting any excess drip back into the bowl for a moment. Then, place the chicken piece into the seasoned flour mixture. Gently press the flour onto all sides of the chicken, making sure it’s fully and evenly coated. For an extra-crispy crust, I like to give the chicken a second dip. After the initial coating, dip the floured chicken piece back into the buttermilk for a quick second bath, and then immediately return it to the flour mixture, pressing again to ensure a thick, craggy coating. Place the coated chicken pieces on a wire rack set over a baking sheet. This allows air to circulate around the chicken, preventing the coating from getting soggy while you prepare the rest. Let the coated chicken rest for about 10-15 minutes at room temperature. This resting period allows the coating to hydrate and adhere better, reducing the chances of it falling off during frying.
Achieving Golden-Brown Perfection
The Frying Process
Now for the most exciting part: frying! You’ll need a heavy-bottomed pot, such as a Dutch oven, or a deep fryer, and a good amount of neutral cooking oil with a high smoke point, like vegetable, canola, or peanut oil. You’ll need enough oil to come up about 2-3 inches in the pot. Heat the oil over medium-high heat to a consistent temperature of 325-350°F (160-175°C). Using a thermometer is highly recommended to ensure the oil stays within this optimal range for perfectly cooked and crispy chicken. If the oil is too hot, the outside will burn before the inside is cooked through. If it’s too cool, the chicken will absorb too much oil and become greasy.
Carefully add the coated chicken pieces to the hot oil, being mindful not to overcrowd the pot. Overcrowding will lower the oil temperature, leading to less crispy chicken. It’s best to fry in batches. Carefully place 2-3 pieces of chicken into the oil at a time, depending on the size of your pot. Fry the chicken for about 12-15 minutes, turning the pieces occasionally with tongs to ensure even browning. You’re looking for a deep golden-brown color all over, and the internal temperature of the chicken should reach 165°F (rum extractC). For the drumsticks, this might be closer to 12 minutes, while the thicker thighs may need the full 15 minutes.
Once the chicken is beautifully golden and cooked through, carefully remove it from the oil using tongs and place it on a clean wire rack set over a baking sheet. This allows any excess oil to drain off, keeping your CRISPY JUICY FIRED CHICKEN wonderfully crisp. You can sprinkle a little extra salt over the chicken immediately after it comes out of the oil while it’s still hot for an extra flavor boost. Repeat the frying process with the remaining chicken pieces, ensuring the oil returns to the correct temperature between batches. Patience is key here to ensure every piece is perfectly fried.
Conclusion:
Congratulations on mastering the art of the “CRISPY JUICY FIRED CHICKEN”! We hope this recipe has inspired you to create a truly memorable meal. This method guarantees perfectly seasoned, incredibly moist chicken with that coveted shatteringly crisp exterior. Remember, the key lies in the brining and the precise frying temperature to achieve that restaurant-quality finish right in your own kitchen.
Serve your “CRISPY JUICY FIRED CHICKEN” hot and fresh alongside classic favorites like creamy mashed potatoes, coleslaw, or a crisp garden salad. For a spicier kick, don’t hesitate to add a pinch of cayenne pepper to your flour dredge, or consider a drizzle of your favorite hot sauce over the finished pieces. Feel free to experiment with different spice blends in your flour mixture – smoked paprika, garlic powder, and onion powder are always excellent additions.
We encourage you to share your “CRISPY JUICY FIRED CHICKEN” creations with friends and family. The joy of cooking is often amplified when shared, and this recipe is certainly one to boast about. Happy cooking!
Frequently Asked Questions:
What if I don’t have a deep fryer?
You can achieve fantastic “CRISPY JUICY FIRED CHICKEN” using a heavy-bottomed pot like a Dutch oven. Ensure the oil is at the correct temperature (around 325-350°F or 160-175°C) and fry in batches to avoid overcrowding the pot, which can lower the oil temperature and result in greasy chicken.
Can I prepare the chicken ahead of time?
Yes, you can brine and even dredge the chicken a few hours before frying. Store the brined chicken in the refrigerator, and then dredge it just before you’re ready to cook. This ensures the coating stays as crisp as possible.
Crispy Juicy Fried Chicken
Learn how to make incredibly juicy and flavorful fried chicken with a perfectly crispy coating. This recipe guides you through marinating, coating, and frying for a delicious meal.
Ingredients
-
8 pieces bone-in chicken pieces (4 chicken thighs and 4 drumsticks)
-
3 cups buttermilk
-
1 large egg
-
2 teaspoons salt
-
1 teaspoon ground black pepper
-
1 teaspoon garlic powder
-
½ teaspoon cayenne pepper
-
2 cups all-purpose flour
-
3/4 cup cornstarch
-
1 teaspoon baking powder
-
2 teaspoons salt
-
1 teaspoon ground black pepper
-
1 teaspoon garlic powder
-
1 teaspoon celery salt
-
Neutral cooking oil (vegetable, canola, or peanut oil) for frying
Instructions
-
Step 1
Prepare the marinade by whisking together buttermilk, egg, salt, black pepper, garlic powder, and cayenne pepper in a large bowl. Submerge the chicken pieces in the marinade, cover, and refrigerate for at least 4 hours, or preferably overnight. -
Step 2
Combine all-purpose flour, cornstarch, baking powder, salt, black pepper, garlic powder, and celery salt in a shallow dish or bowl for the flour coating. Whisk thoroughly. -
Step 3
Remove chicken from the marinade, letting excess drip off. Coat each piece evenly in the seasoned flour mixture. For an extra crispy crust, dip the floured chicken back into the buttermilk and then back into the flour mixture for a second thick coating. Place coated chicken on a wire rack set over a baking sheet and let rest for 10-15 minutes. -
Step 4
Heat neutral cooking oil in a heavy-bottomed pot or deep fryer to 325-350°F (160-175°C). Ensure there is enough oil for the chicken to be partially submerged. -
Step 5
Carefully add chicken pieces to the hot oil in batches, frying for 12-15 minutes, or until deep golden-brown and the internal temperature reaches 165°F (74°C). Turn occasionally for even cooking. -
Step 6
Remove cooked chicken from the oil using tongs and place on a clean wire rack set over a baking sheet to drain excess oil. Sprinkle with additional salt while hot, if desired. Repeat with remaining chicken pieces, ensuring oil temperature is maintained between batches.
Important Information
Nutrition Facts (Per Serving)
It is important to consider this information as approximate and not to use it as definitive health advice.
Allergy Information
Please check ingredients for potential allergens and consult a health professional if in doubt.