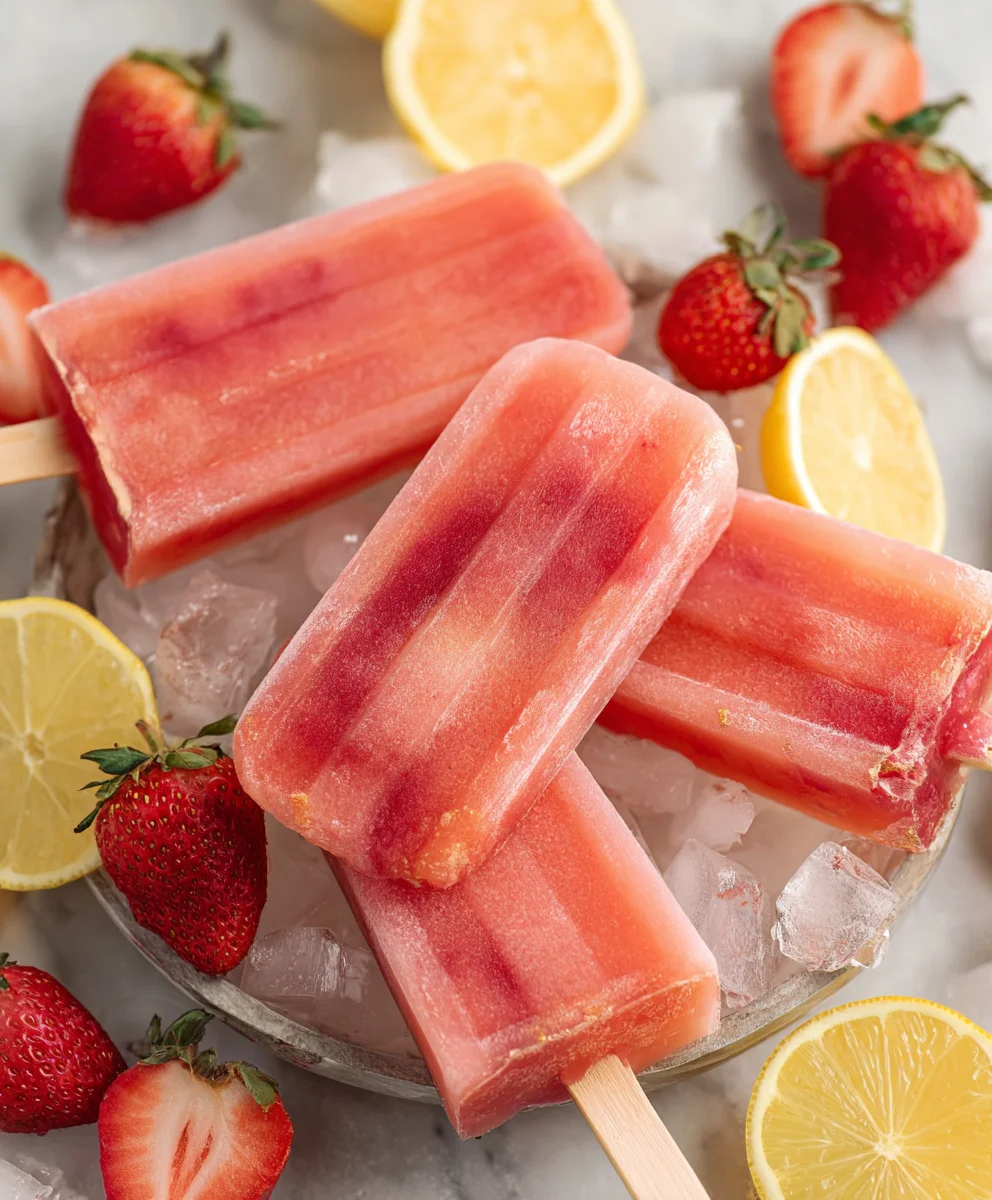
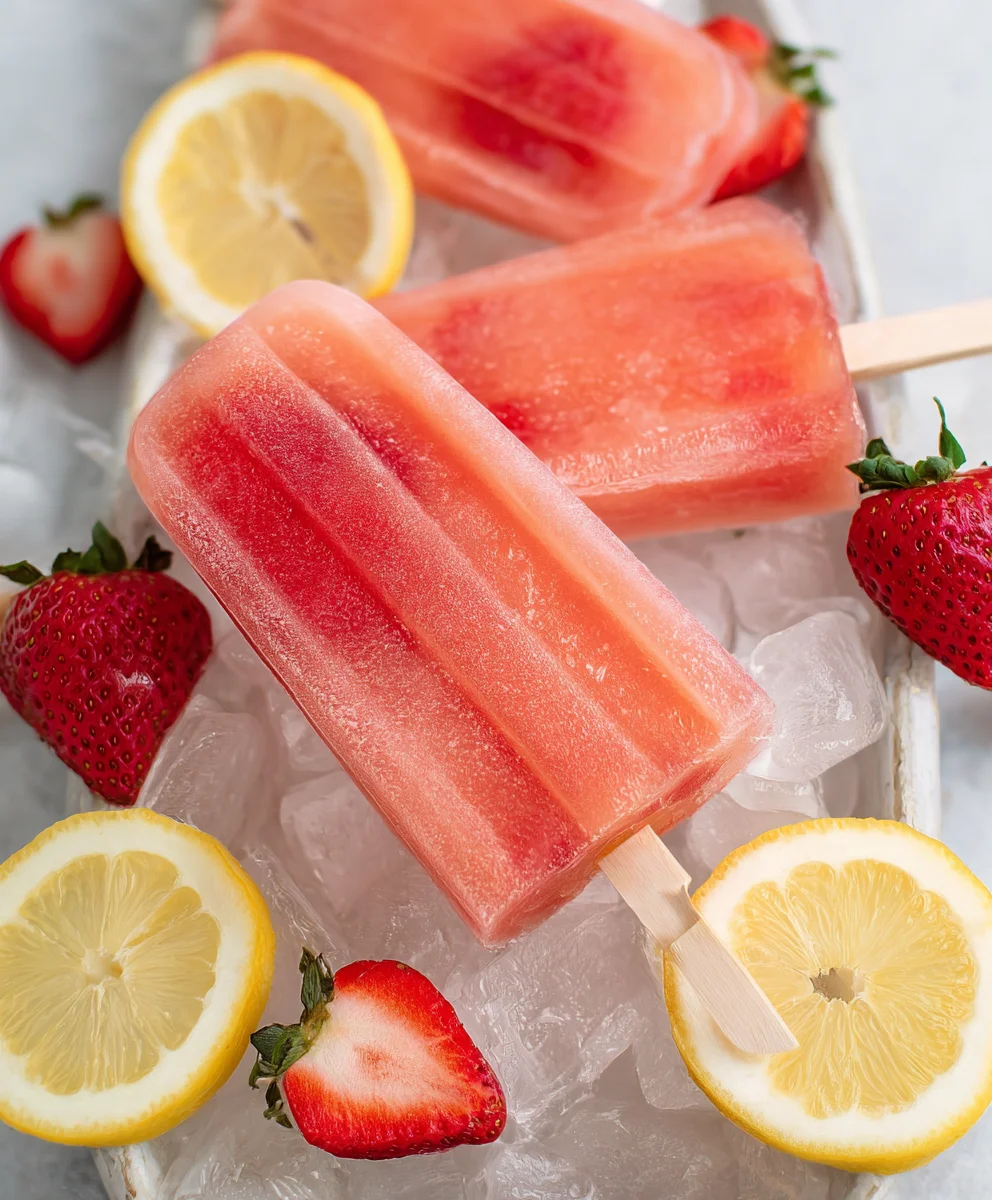
Refreshing Strawberry Lemonade Popsicles – Easy Recipe
Strawberry Lemonade Popsicles are the ultimate frozen treat for those sun-drenched afternoons and balmy evenings. There’s a reason why these vibrant, icy delights are a perennial favorite; they capture the essence of summer in every single bite. Imagin extracte the perfect balance of sweet, ripe strawberries meeting the zesty tang of freshly squeezed lemons, all frozen into a refreshing, handheld masterpiece. It’s a nostalgic flavor combination that instantly transports you back to carefree days, evoking feelings of pure joy and simple pleasures. What truly sets these Strawberry Lemonade Popsicles apart is their natural goodness and incredible ease of preparation. Unlike store-bought versions loaded with artificial ingredients, this recipe celebrates the wholesome taste of real fruit. You’ll love the way the vibrant red of the strawberries swirls with the sunny yellow of the lemon, creating a visually stunning treat that’s as beautiful as it is delicious. Get ready to elevate your summer snacking with this wonderfully simple and utterly satisfying recipe.
Ingredients:
- 1 container Simply Lemonade (this is a 59 oz container)
- 1 cup fresh strawberries, hulled and diced
- 1 tablespoon granulated sugar
Preparing Your Strawberry Lemonade Popsicles
The beauty of these Strawberry Lemonade Popsicles lies in their simplicity. We’re leveragin extractg a great quality pre-made lemonade to make this a quick and refreshing treat, perfect for a hot summer day or any time you’re craving a burst of fruity, tangy goodness. The fresh strawberries add a lovely texture and natural sweetness, while the sugar is just a little nudge to enhance their flavor. Let’s get started on creating these delightful frozen pops!
Step 1: Prep the Strawberries
The first step to achieving a fantastic popsicle is to prepare your star fruit – the strawberries. You’ll want to start by giving your strawberries a gentle rinse under cool water. Once they’re clean, carefully remove the green leafy tops, also known as the hull. A small paring knife works best for this, allowing you to cut around the cone shape of the stem. After hulling, dice the strawberries into small, bite-sized pieces. The size of your dice is really a matter of personal preference. Some people enjoy larger chunks of fruit in their popsicles for a more substantial bite, while others prefer smaller, more evenly distributed pieces. Aim for a dice that is roughly ¼ inch. This size ensures that the strawberry pieces will freeze nicely within the popsicle without becoming impossibly hard and will still be noticeable and enjoyable when you bite into your frozen treat. Having them diced also helps to release their natural juices as they freeze, contributing to a more complex flavor profile.
Step 2: Combine Lemonade and Sweetener
Now it’s time to introduce the sweetness to our lemonade base. In a medium-sized bowl or a large measuring cup, pour the entire container of Simply Lemonade. This 59 oz container provides a perfect base for our popsicle recipe. Next, add the granulated sugar to the lemonade. It’s important to give this mixture a good stir to ensure that the sugar dissolves completely. You don’t want any gritty sugar at the bottom of your popsicles. Stirring until the liquid is clear and no sugar granules are visible will guarantee a smooth and consistent sweetness throughout each popsicle. A whisk can be very helpful here to speed up the dissolution process. Ensure you are stirring gently but thoroughly.
Step 3: Incorporate the Strawberries
With our sweetened lemonade ready, we can now add the prepared diced strawberries. Gently fold the diced strawberries into the lemonade mixture. The goal here is to distribute them evenly throughout the liquid so that each popsicle gets a fair share of fruity goodness. Avoid vigorous stirring at this stage, as we want to keep the strawberry pieces as intact as possible. Simply use a spoon or spatula to gently incorporate them into the lemonade. You’ll notice that as you stir, some of the natural juices from the strawberriegin extractay begin to release into the lemonade, which is exactly what we want. This adds another layer of authentic strawberry flavor to your popsicles. Take a moment to admire the vibrant color contrast between the yellow lemonade and the red strawberries – it’s a visual preview of the deliciousness to come!
Step 4: Fill Your Popsicle Molds
The next step is to get our delicious mixture into the vessel that will transform it into popsicles. Carefully pour the strawberry lemonade mixture into your chosen popsicle molds. If you’re using a standard popsicle mold with individual cavities, you can use a ladle or a steady pour from your measuring cup. For even distribution of the strawberries, you might want to ensure you’re pouring a bit of the liquid containing strawberries into each mold. If your molds have a built-in tray that holds the sticks, you can fill them up to the designated fill line. If your molds require you to insert the sticks after filling, make sure not to overfill, leaving a little space at the top to accommodate the stick and prevent overflow once frozen. Some people prefer to place their molds on a baking sheet before filling, which makes them easier to move to the freezer without spills, especially if you have a lot of molds.
Step 5: Freezing Time
Once your popsicle molds are filled, it’s time for the magic of freezing. Carefully place the filled popsicle molds into your freezer. If you haven’t already inserted the popsicle sticks, now is the time to do so. For molds that require sticks to be inserted after filling, ensure they are placed straight to prevent them from freezing at an angle. The freezing time can vary depending on the size of your molds and the temperature of your freezer, but typically, you’ll want to let them freeze for at least 4 to 6 hours, or until they are completely solid. For best results, and to ensure they are rock solid, leaving them overnight is often a good idea. To unmold your popsicles, run the outside of the mold under warm water for a few seconds. This will gently release the popsicle from the mold without melting it. Be patient with this process; forcing it can lead to a broken popsicle. Enjoy your homemade Strawberry Lemonade Popsicles!
Conclusion:
And there you have it! You’ve successfully whipped up a batch of these incredibly refreshing Strawberry Lemonade Popsicles. This recipe is a fantastic way to beat the heat and enjoy a burst of sweet, tangy flavor that’s perfect for any occasion. Whether you’re hosting a summer barbecue, packing a lunchbox, or just craving a cool treat, these popsicles are sure to be a hit with everyone.
To make your Strawberry Lemonade Popsicles even more special, consider serving them alongside some fresh berries or a light, summery salad. For variations, don’t be afraid to get creative! You could add a few fresh mint leaves to the mixture before freezing for an extra herbaceous kick, or even blend in some finely chopped strawberries for added texture. Feel free to adjust the sweetness or tartness to your personal preference. We encourage you to embrace this recipe as a starting point and make it your own. Enjoy the delightful taste of homemade goodness!
Frequently Asked Questions:
Can I use frozen strawberries instead of fresh ones for my Strawberry Lemonade Popsicles?
Absolutely! Frozen strawberries work wonderfully in this recipe. Thaw them slightly before blending to ensure a smoother consistency. You might need to adjust the amount of liquid slightly, as frozen fruit can release more water as it thaws.
How long do the Strawberry Lemonade Popsicles typically take to freeze?
The freezing time can vary depending on your freezer’s temperature and the size of your popsicle molds. Generally, allow at least 4-6 hours for them to freeze completely solid. For best results, it’s ideal to leave them overnight.
Refreshing Strawberry Lemonade Popsicles – Easy Recipe
A simple and refreshing frozen treat made with store-bought lemonade, fresh strawberries, and a touch of sugar.
Ingredients
-
1 container Simply Lemonade (59 oz)
-
1 cup fresh strawberries, hulled and diced
-
1 tablespoon granulated sugar
-
Water (for rinsing strawberries)
-
Warm water (for unmolding)
-
Ice cube tray or popsicle molds
-
Popsicle sticks
Instructions
-
Step 1
Rinse strawberries under cool water, hull them, and dice into approximately 1/4 inch pieces. This size ensures they freeze well and release their juices. -
Step 2
Pour the entire 59 oz container of Simply Lemonade into a medium bowl or large measuring cup. Add the granulated sugar and stir until completely dissolved, ensuring a smooth, consistent sweetness. -
Step 3
Gently fold the diced strawberries into the sweetened lemonade mixture. Stir minimally to distribute them evenly without breaking them down, allowing their natural juices to enhance the flavor. -
Step 4
Carefully pour the strawberry lemonade mixture into your popsicle molds, ensuring an even distribution of strawberries in each. If using molds that require sticks after filling, leave a little space at the top. -
Step 5
Place the filled molds in the freezer. Insert popsicle sticks if not already attached. Freeze for at least 4-6 hours, or preferably overnight, until completely solid. -
Step 6
To unmold, run the outside of the mold under warm water for a few seconds. Gently release the popsicle. Avoid forcing it. Enjoy your homemade popsicles!
Important Information
Nutrition Facts (Per Serving)
It is important to consider this information as approximate and not to use it as definitive health advice.
Allergy Information
Please check ingredients for potential allergens and consult a health professional if in doubt.