Easy St Patricks Day Cookies – Festive & Fun Recipe
Easy St. Patrick’s Day Cookies are the perfect way to add a touch of festive cheer to your celebrations without any fuss! As March rolls around, there’s an undeniable craving for green treats and a sense of whimsical fun. These delightful cookies are precisely what you need to capture that spirit. What makes these particular Easy St. Patrick’s Day Cookies so beloved is their simplicity – no complicated techniques, no fancy ingredients, just pure, unadulterated deliciousness that everyone, from little leprechauns to seasoned bakers, can master. They’re incredibly adaptable, allowing you to sprinkle them with gold coins, dye them vibrant shades of green, or even shape them into sbeef hamrocks. Get ready to spread some smiles and a whole lot of St. Patrick’s Day joy with these foolproof recipes!
Easy St. Patrick’s Day Cookies
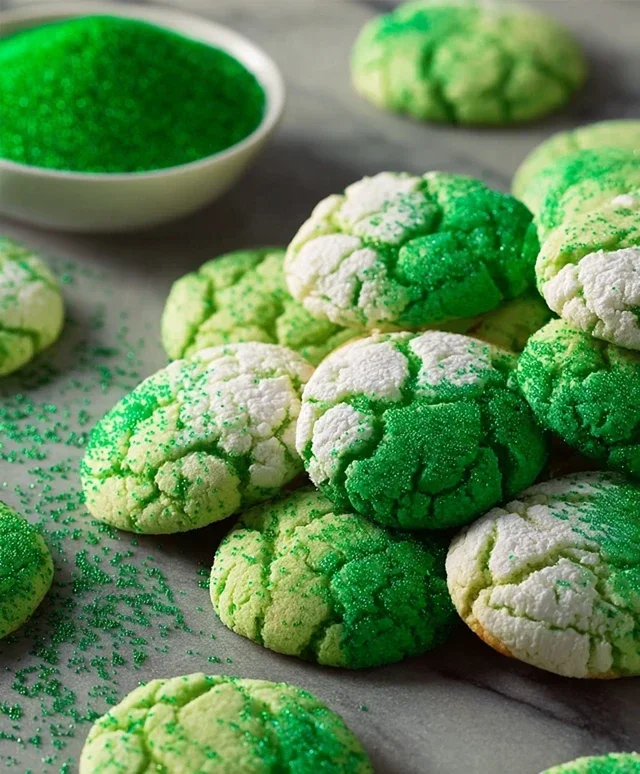
Looking for a festive treat that’s as easy to make as it is fun to decorate? These Easy St. Patrick’s Day Cookies are the perfect answer! They start with a simple cake mix base, making them incredibly foolproof, even for begin extractner bakers. The vibrant green color instantly brings the St. Patrick’s Day spirit to your kitchen, and they’re just beggin extractg to be adorned with your favorite green and gold sprinkles. Imagin extracte a table dotted with these cheerful cookies for your St. Paddy’s Day celebration – they’re guaranteed to be a hit with everyone, from the littlest leprechauns to the grown-up revelers. Let’s get started on creating some sweet, green magic!
Ingredients:
Making the Dough
The beauty of these cookies lies in their simplicity. We’re going to start by creating a basic dough that’s wonderfully easy to handle. In a large mixing bowl, we’ll combine our dry cake mix with the wet ingredients. It’s important to use a large enough bowl to comfortably mix everything without making a mess. Add your two large eggs and the 1/3 cup of vegetable oil. Give these ingredients a good stir with a whisk or an electric mixer on low speed. You’ll want to mix until everything is just combined. Don’t overmix at this stage; we’re not developing gluten here, we’re just bringin extractg our ingredients together.
Now for the fun part – the color! This is where we transform our plain dough into a festive green masterpiece. Carefully add 1/4 teaspoon of Kelly green gel food coloring to the mixture. Gel food coloring is fantastic because it provides a much more concentrated and vibrant color than liquid food coloring, and you don’t need much of it. Gently mix the food coloring in until the dough is uniformly green. You’re looking for a consistent, cheerful shade of green that screams St. Patrick’s Day. If you desire a slightly deeper hue, you can add another tiny drop of food coloring, but be careful not to add too much, as it can alter the dough’s texture.
Forming the Cookies
Once your dough is beautifully green, it’s time to get those cookie shapes ready for baking. You can approach this in a couple of ways, depending on the look you’re going for. For a classic, slightly rustic cookie, simply roll the dough into small balls. I like to use a cookie scoop or a tablespoon to ensure uniform size, which helps them bake evenly. Aim for balls about 1 inch in diameter. You can then gently flatten them with the bottom of a glass or your hand.
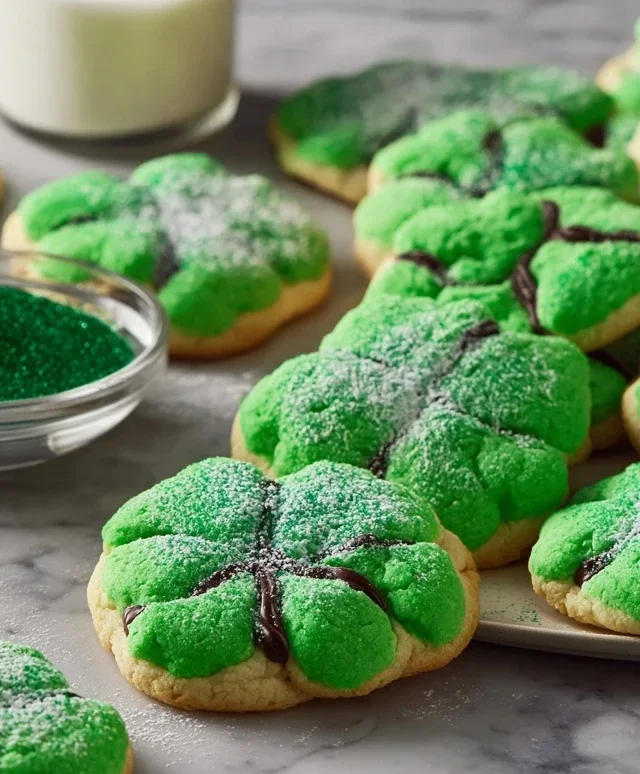
Alternatively, if you have cookie cutters, you can chill the dough for about 30 minutes before rolling it out on a lightly floured surface. This will make it much easier to cut out festive shapes like sbeef hamrocks, lucky horseshoes, or even simple circles. Whichever method you choose, make sure to space the cookies about 2 inches apart on your baking sheets. This gives them room to spread a little while baking without touching. I always line my baking sheets with parchment paper. It’s a lifesaver for cleanup and ensures your cookies won’t stick.
Baking to Perfection
Preheating your oven is a crucial step for any baking project. Set your oven to 350 degrees Fahrenheit (175 degrees Celsius). Once your oven is ready, place your prepared baking sheets into the oven. Baking time can vary slightly depending on your oven and the size of your cookies, but generally, these cookies will bake for about 8-12 minutes. You’re looking for the edges to be lightly golden and the centers to appear set. They won’t spread a lot, so don’t worry if they don’t look significantly larger than when you put them in.
After the baking time is up, carefully remove the baking sheets from the oven. It’s essential to let the cookies cool on the baking sheets for a few minutes, about 5 minutes. This allows them to firm up a bit more before you try to move them. If you try to move them too soon, they might be too soft and break. Once they’ve had a little time to set on the baking sheet, gently transfer them to a wire cooling rack to cool completely. This is when they’ll reach their perfect, slightly chewy texture.
The Finishing Touch: A Sweet Glaze
Now for the final flourish that takes these cookies from simple to spectacular: a quick and easy glaze. In a small bowl, whisk together 3 tablespoons of granulated sugar and 6 tablespoons of powdered sugar. Gradually add a very small amount of water, about 1-2 teaspoons at a time, whisking continuously until you achieve a smooth, drizzle-able consistency. You want the glaze to be thick enough to coat the cookies but thin enough to pour or drizzle.
Once the cookies are completely cool, you can dip them in the glaze, drizzle it over the tops, or spread it on with a small spatula. For an extra festive touch, now is the time to add those sprinkles! Think green jimmies, gold nonpareils, or even edible glitter for that extra bit of luck. Let the glaze set completely before stacking or serving your beautiful St. Patrick’s Day cookies. Enjoy the luck of the Irish!
Conclusion:
I hope you’re feeling inspired to bake up some festive cheer with these Easy St. Patrick’s Day Cookies! This recipe truly shines because it’s incredibly simple, requiring minimal ingredients and time, making it perfect for bakers of all skill levels, even if you’re just starting out. The delightful green hue and customizable decorations make them an instant hit for any St. Patrick’s Day celebration. They’re not just a treat for your taste buds; they’re a visual feast that adds a splash of emerald magic to your party table.
These cookies are wonderfully versatile. Serve them as a sweet ending to your St. Patrick’s Day meal, package them in cute cellophane bags as party favors, or simply enjoy them with a cup of tea or coffee. For some fun variations, consider adding a touch of mint extract to the dough for an extra burst of flavor, or experimenting with different sprinkle combinations like gold coins or rainbow-colored jimmies to enhance the festive theme. You could also try a simple vanilla glaze instead of frosting for a lighter touch.
Don’t be shy – give these Easy St. Patrick’s Day Cookies a try! You’ll be surprised at how delicious and impressive they turn out with so little effort. They’re a fantastic way to get into the spirit of the holiday and create some sweet memories.
Frequently Asked Questions:
How can I make the green color more vibrant?
For a more intense green, I recommend using gel food coloring instead of liquid. Gel colors are more concentrated and will give you a richer, truer green without thinning out your dough.
Can I freeze these cookies?
Yes, absolutely! Once baked and completely cooled, you can store them in an airtight container in the freezer for up to 2-3 months. They also freeze well before baking if you want to prep ahead – just ensure they are frozen solid on a baking sheet before transferring them to a freezer bag.
What if I don’t have cookie cutters?
No problem at all! You can simply roll the dough into small balls and flatten them slightly, or roll them out and cut them into squares or rectangles using a knife or pizza cutter. They’ll be just as delicious!
Easy St. Patrick’s Day Cookies
Simple and festive green cookies perfect for St. Patrick’s Day celebrations. These no-fuss cookies are quick to make and fun to decorate.
Ingredients
-
1 box (15.25 oz) white cake mix (about 3 cups)
-
2 large eggs
-
1/3 cup vegetable oil
-
1/4 teaspoon Kelly green gel food coloring
-
3 tablespoons granulated sugar
-
6 tablespoons powdered sugar
Instructions
-
Step 1
Preheat your oven to 350°F (175°C). Line baking sheets with parchment paper. -
Step 2
In a large bowl, combine the white cake mix, eggs, and vegetable oil. Mix until well combined. -
Step 3
Add the Kelly green gel food coloring and mix until the dough is uniformly green. -
Step 4
Roll the dough into small balls, about 1 inch in diameter. Then, roll each ball in the granulated sugar until coated. -
Step 5
Place the sugar-coated balls onto the prepared baking sheets, leaving about 2 inches between them. -
Step 6
Bake for 8-10 minutes, or until the edges are lightly golden and the centers are set. -
Step 7
Let the cookies cool on the baking sheets for a few minutes before transferring them to a wire rack to cool completely. Once cooled, dust with powdered sugar for extra sweetness.
Important Information
Nutrition Facts (Per Serving)
It is important to consider this information as approximate and not to use it as definitive health advice.
Allergy Information
Please check ingredients for potential allergens and consult a health professional if in doubt.