Blackberry Hand Pies – Easy & Delicious Homemade Treats
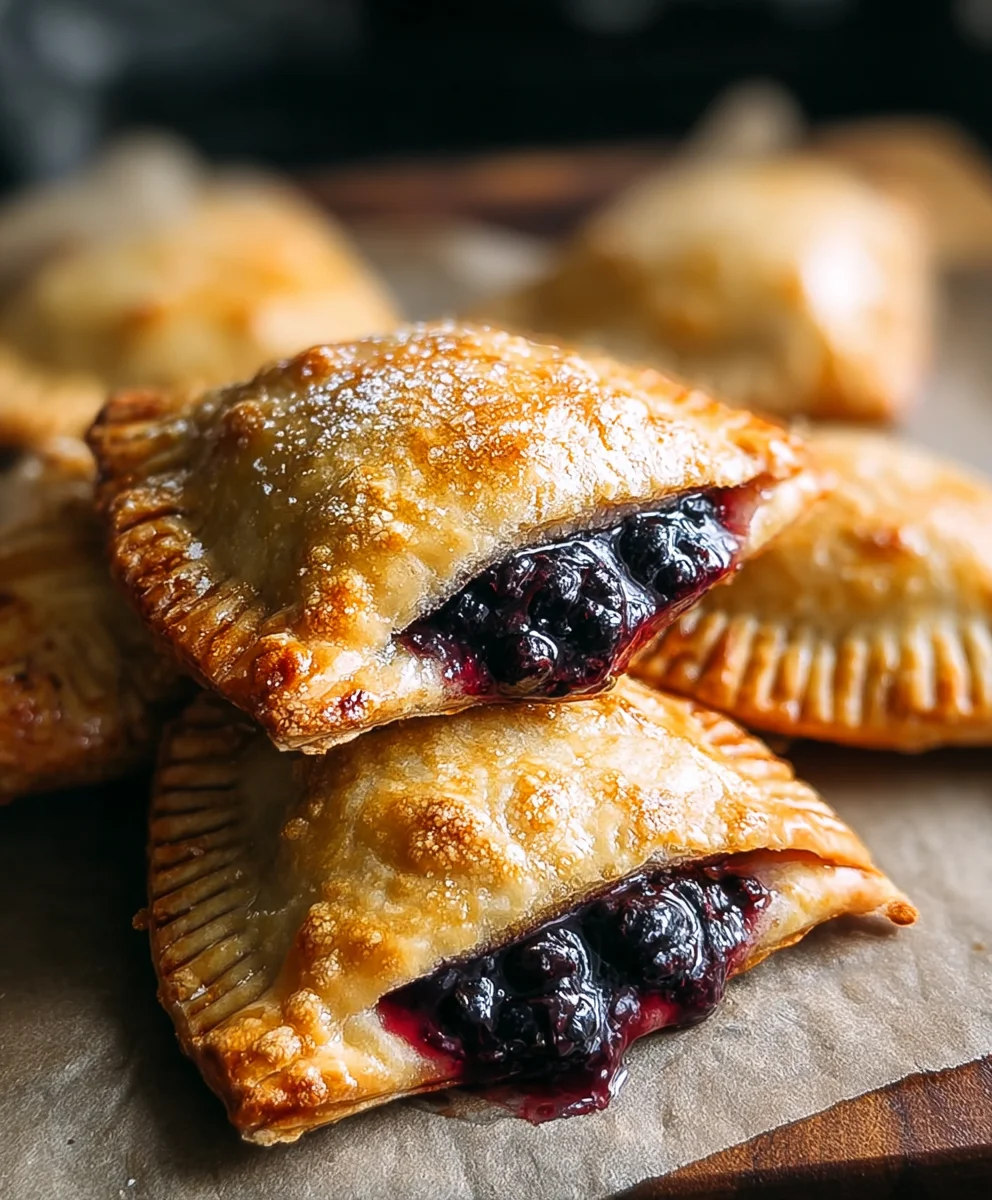
Blackberry hand pies are more than just a dessert; they’re little pockets of pure joy, perfect for a picnic, a thoughtful homemade gift, or simply a delightful afternoon treat. There’s something inherently charming about a handheld pastry, and when you fill it with the vibrant, slightly tart sweetness of fresh blackberries, you’ve got a winner. People adore these hand-held wonders because they combine the comforting flakiness of pie crust with an intensely fruity burst. What truly makes these blackberry hand pies special is the perfect balance of sweet and tart, encased in a golden, buttery crust that practically melts in your mouth. Each bite is a tiny adventure, a symphony of textures and flavors that will have you reaching for another before you’ve even finished the first.
Why You’ll Love This Recipe
We’ve perfected a recipe that ensures a flaky, tender crust every time, and a blackberry filling that’s not too sweet, allowing the natural fruitiness to shine through. This recipe is designed for home bakers, making it surprisingly accessible even for begin extractners. Get ready to impress yourself and everyone you share these with!
A Delectable Treat for Any Occasion
Whether you’re looking for a charming addition to a brunch spread or a satisfying sweet ending to a meal, blackberry hand pies deliver. They are portable, portion-controlled, and utterly delicious, making them a versatile favorite.
Ingredients:
- 21 oz. can blackberry pie filling
- Refrigerated pie crust (usually comes with two crusts)
- 1/2 cup powdered sugar
- 1 teaspoon corn syrup
- 1 tablespoon water
- Vegetable oil for frying
Preparing the Filling and Dough
The first step to creating these delightful Blackberry Hand Pies is to ensure your filling is ready to go. Since we’re using a convenient canned blackberry pie filling, this makes the process incredibly straightforward. Open the 21 oz. can of blackberry pie filling. If the filling seems a little too thick for your liking, you can stir in an extra tablespoon of water, but usually, it’s perfect for spooning. It’s important that the filling isn’t too watery, as this can lead to soggy crusts, which is something we definitely want to avoid for the best hand pies. Set this aside for now.
Next, let’s prepare the pie crust. We’re using a refrigerated pie crust, which is a real time-saver. You’ll typically find that a standard package contains two crusts. Carefully unroll both crusts onto a lightly floured surface. It’s helpful to use a bit of flour to prevent sticking, but don’t overdo it, as too much flour can make the dough tough. Use a round cutter, such as a 5-6 inch diameter biscuit cutter or even the rim of a wide glass, to cut out circles from each crust. You should aim to get at least 4 circles from each crust, giving you a total of 8 circles for your hand pies. Place these dough circles onto a baking sheet lined with parchment paper. This makes them easy to transfer later.
Assembling the Blackberry Hand Pies
Now comes the fun part: assembling the hand pies! Take one of your prepared dough circles and place it on your floured work surface. Spoon about 2-3 tablespoons of the blackberry pie filling onto one half of the circle, leaving a border of about 1/2 inch around the edge. Be generous, but don’t overfill, as the filling will expand slightly during cooking and you don’t want it to ooze out excessively. It’s also a good idea to dab a little bit of water along the edge of the dough where you will fold it over. This acts like a glue to help seal the edges.
Carefully take the other half of the dough circle and fold it over the filling, creating a half-moon shape. Press the edges firmly together to seal. You can use the tines of a fork to crimp the edges, which not only creates a decorative pattern but also ensures a really good seal, preventing any of that delicious blackberry goodness from escaping. Make sure to press down well with the fork to get a solid crimp. Repeat this process for all your assembled hand pies. Once they are all assembled, use a small sharp knife to cut a couple of small slits in the top of each hand pie. This is crucial for allowing steam to escape while frying, preventing the pies from puffing up unevenly or bursting.
Frying the Blackberry Hand Pies
It’s time to get these beautiful hand pies golden and delicious! You’ll need a deep pot or a Dutch oven for frying. Pour enough vegetable oil into the pot to reach a depth of about 2-3 inches. Heat the oil over medium heat. It’s important to get the oil to the correct temperature; too low and the pies will absorb too much oil and become greasy, too high and they will burn on the outside before the inside is cooked. Aim for a temperature of around 350-360°F (175-180°C). You can test the oil by dropping a tiny piece of dough into it; if it sizzles and floats to the surface immediately, the oil is ready.
Carefully slide 2-3 hand pies into the hot oil at a time. Do not overcrowd the pot, as this will lower the oil temperature and result in less-than-ideal frying. Fry the hand pies for about 3-4 minutes per side, or until they are a deep golden brown and the pastry is cooked through. Use a slotted spoon or spider strainer to gently turn the pies over so they cook evenly on both sides. Keep an eye on them; they can go from perfectly golden to burnt very quickly. Once they are beautifully browned, carefully remove the fried hand pies from the oil using your slotted spoon and place them on a wire rack set over a baking sheet. This allows any excess oil to drain off, keeping them wonderfully crisp.
Creating the Glaze and Finishing Touches
While the fried blackberry hand pies are still warm, it’s time to make a simple yet incredibly delicious glaze to take them to the next level. In a small bowl, combine the 1/2 cup of powdered sugar, 1 teaspoon of corn syrup, and 1 tablespoon of water. Stir vigorously until you have a smooth, pourable glaze. The corn syrup adds a lovely sheen and helps the glaze set slightly without becoming too hard. If the glaze seems too thick, add a tiny bit more water, a drop at a time, until you achieve your desired consistency. If it’s too thin, you can add a touch more powdered sugar.
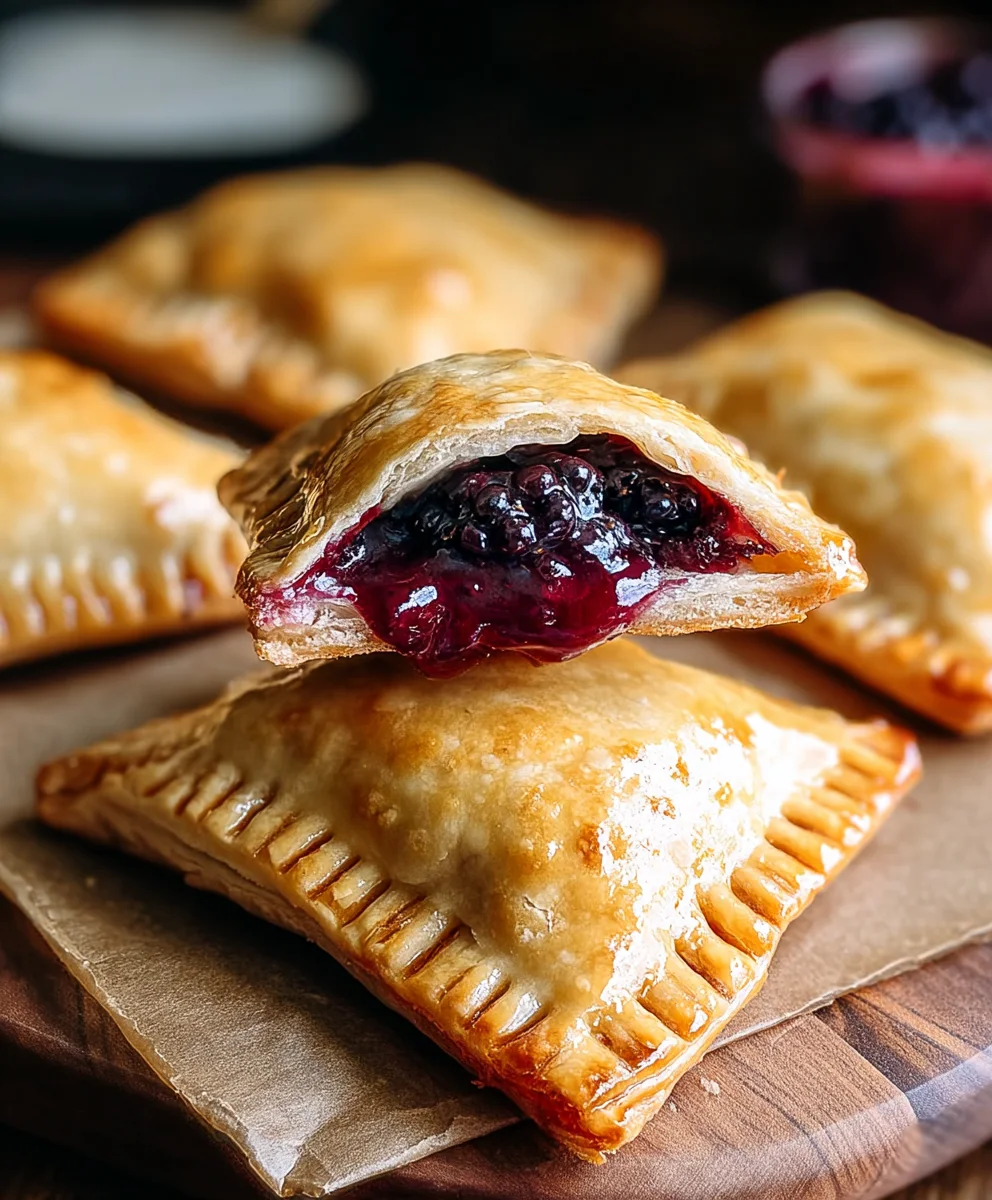
Once your glaze is ready, generously drizzle it over the warm blackberry hand pies. The warmth of the pies will help the glaze spread slightly and set beautifully. You can use a spoon or a piping bag with a fine tip for a more controlled drizzle. Allow the glaze to set for a few minutes before serving. These Blackberry Hand Pies are absolutely divine served warm, allowing the gooey blackberry filling and crisp pastry to shine. They are perfect for an afternoon treat, a dessert, or even a special breakfast. The combination of the tart blackberries, flaky crust, and sweet glaze is simply irresistible. Enjoy every delicious bite!
Conclusion:
You’ve now mastered the art of creating delicious Blackberry Hand Pies! These delightful little pastries are perfect for a sweet treat any time of day. The combination of flaky, buttery crust and the burst of sweet-tart blackberry filling is truly irresistible. We hope you enjoyed making them as much as we do!
For the best experience, I love serving these warm, perhaps with a dollop of whipped cream or a scoop of vanilla ice cream. They also make a wonderful addition to a brunch spread or as a portable snack for picnics and outings. Feel free to experiment with different berries like raspberries or blueberries for a delightful twist on the classic.
Don’t be afraid to get creative! You can add a pinch of cinnamon or nutmeg to the filling for extra warmth, or a sprinkle of coarse sugar on top for a delightful crunch. Most importantly, have fun with it! Baking should be a joy, and these Blackberry Hand Pies are sure to bring smiles to everyone who tries them.
Frequently Asked Questions:
Q: Can I make the dough ahead of time?
Absolutely! The dough for these Blackberry Hand Pies can be made up to 2-3 days in advance and stored in the refrigerator. Just wrap it tightly in plastic wrap. You can also freeze the dough for up to 2 months. Thaw it overnight in the refrigerator before using.
Q: How should I store leftover Blackberry Hand Pies?
Store any leftover Blackberry Hand Pies in an airtight container at room temperature for up to 2 days, or in the refrigerator for up to 4 days. For longer storage, you can freeze them once cooled. Reheat them gently in a low oven to restore their crispness.
Blackberry Hand Pies – Easy & Delicious Homemade Treats
Easy and delicious homemade blackberry hand pies perfect for a treat, dessert, or breakfast. Features a flaky crust, gooey blackberry filling, and a sweet glaze.
Ingredients
-
21 oz. can blackberry pie filling
-
Refrigerated pie crust
-
1/2 cup powdered sugar
-
1 teaspoon corn syrup
-
1 tablespoon water
-
Vegetable oil for frying
Instructions
-
Step 1
Prepare the blackberry pie filling by opening the can. If it seems too thick, stir in an extra tablespoon of water. Set aside. -
Step 2
Unroll two refrigerated pie crusts onto a lightly floured surface. Use a 5-6 inch round cutter to cut out circles from each crust, aiming for at least 8 circles total. Place dough circles onto a parchment-lined baking sheet. -
Step 3
Spoon 2-3 tablespoons of blackberry pie filling onto one half of each dough circle, leaving a 1/2 inch border. Dab water along the edge of the dough. Fold the other half over to create a half-moon shape. Crimp edges with a fork and cut small slits on top. -
Step 4
Heat 2-3 inches of vegetable oil in a deep pot or Dutch oven over medium heat to 350-360°F (175-180°C). Carefully fry 2-3 hand pies at a time for 3-4 minutes per side until deep golden brown. -
Step 5
Remove fried hand pies with a slotted spoon and place on a wire rack to drain excess oil. -
Step 6
While pies are warm, whisk together 1/2 cup powdered sugar, 1 teaspoon corn syrup, and 1 tablespoon water to create a smooth glaze. Adjust consistency as needed. -
Step 7
Drizzle the glaze generously over the warm hand pies. Let the glaze set for a few minutes before serving.
Important Information
Nutrition Facts (Per Serving)
It is important to consider this information as approximate and not to use it as definitive health advice.
Allergy Information
Please check ingredients for potential allergens and consult a health professional if in doubt.