Brown Sugar Peach Layer Cake- Deliciously Sweet
Brown Sugar Layer Cake with Peach Filling is an absolute dream, a dessert that whispers of cozy kitchens and sun-drenched orchards. There’s something utterly irresistible about the warm, caramel notes of brown sugar infused into a tender cake, perfectly complemented by the sweet, juicy burst of ripe peaches. This isn’t just any cake; it’s an experience. It’s the kind of dessert that brings smiles to faces, a guaranteed showstopper at any gathering, yet surprisingly approachable for home bakers. What makes this Brown Sugar Layer Cake with Peach Filling truly special is the harmonious marriage of textures and flavors – the soft crum extractb of the cake against the luscious, slightly chunky peach filling. It’s a taste of pure comfort and indulgence, a celebration of simple, delicious ingredients coming together in perfect balance. Get ready to fall in love!
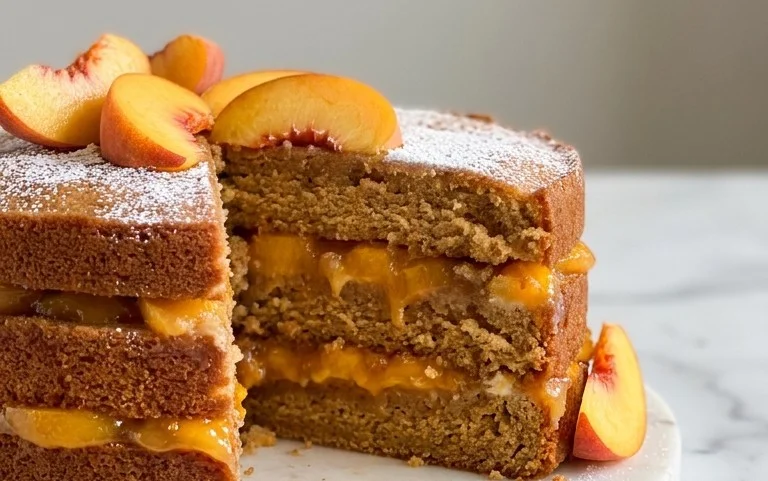
Rustic Charm: Brown Sugar Layer Cake with Luscious Peach Filling
There’s something inherently comforting about a homemade cake, and this Brown Sugar Layer Cake with Peach Filling is a perfect example of rustic elegance. The warm, caramel notes of brown sugar in the cake layers pair beautifully with the sweet, slightly tart burst of fresh peaches. This cake is a celebration of simple, honest ingredients, coming together to create something truly special. It’s the kind of dessert that feels both sophisticated enough for a special occasion and welcoming enough for a casual Sunday afternoon. Get ready to fill your kitchen with the most incredible aromas as we bake this gem.
Ingredients:
Peach Filling Preparation
Let’s start by getting our luscious peach filling ready. In a medium saucepan, combine the 5 cups of peeled and chopped peaches with 1/3 cup of packed light brown sugar. Add the juice from half a lemon, which will help brighten the flavors and prevent the peaches from browning too much. Sprinkle in the 1 tablespoon of cornstarch. The cornstarch is our thickening agent; it will transform the peachy juices into a syrupy, spreadable consistency that won’t make our cake soggy. Stir everything together gently to ensure the cornstarch is evenly distributed. Place the saucepan over medium heat and cook, stirring occasionally, until the peaches have softened and the juices have thickened into a lovely glaze. This usually takes about 8-10 minutes. Be careful not to overcook; we still want some texture from the peaches. Once thickened, remove the filling from the heat and set it aside to cool completely. This is a crucial step, as a hot filling will melt the cake layers.
Brown Sugar Cake Batter
Now, let’s get to the heart of our cake: the brown sugar batter. Preheat your oven to 350°F (175°C). Grease and flour two 8-inch or 9-inch round cake pans, or line them with parchment paper for easy removal. In a medium bowl, whisk together the 2 1/2 cups of all-purpose flour, 2 1/2 teaspoons of baking powder, the optional 1/2 teaspoon of ground cinnamon (if you love that warm spice note!), and the 1/2 teaspoon of salt. This dry ingredient mixture will ensure our leavening agents and spices are evenly distributed throughout the batter.
In a large bowl, cream together the 3/4 cup of room temperature unsalted butter with the 1 1/2 cups of packed Domino® light brown sugar. Use an electric mixer on medium speed until the mixture is light and fluffy. The brown sugar not only provides sweetness but also contributes a wonderful moisture and a hint of molasses flavor to our cake. Next, beat in the 3 tablespoons of vegetable oil and the 1 teaspoon of vanilla extract. The oil adds extra tenderness and moisture to the cake.
Add the 4 large eggs, one at a time, beating well after each addition until fully incorporated. Scrape down the sides of the bowl as needed to ensure everything is mixed thoroughly. Now, we’ll alternate adding the dry ingredients and the 1 1/4 cups of milk. Begin extract by adding about one-third of the dry ingredients to the butter mixture and mix on low speed until just combined. Then, add half of the milk and mix again until just incorporated. Continue this alternating process, finishing with the dry ingredients. Be careful not to overmix the batter, as this can lead to a tough cake. A few small lumps are perfectly fine.
Baking and Assembly
Divide the batter evenly between the two prepared cake pans. Smooth the tops with a spatula. Bake in the preheated oven for 30-35 minutes, or until a wooden skewer or toothpick inserted into the center of the cakes comes out clean. The aroma filling your kitchen at this point will be absolutely divine! Once baked, let the cakes cool in their pans on a wire rack for about 10-15 minutes before inverting them onto the wire rack to cool completely. Allowing them to cool in the pans initially helps prevent them from breaking.
Cream Cheese Frosting
While our cake layers are cooling, let’s whip up a simple yet decadent cream cheese frosting. In a clean large bowl, beat the 1 1/4 cups of room temperature unsalted butter until smooth and creamy. Gradually add about 4 cups of powdered sugar (this amount can be adjusted to your desired sweetness and consistency) and 4 ounces of softened cream cheese. Beat until the frosting is light, fluffy, and spreadable. Add a splash of milk or cream if the frosting is too thick, or a little more powdered sugar if it’s too thin. A touch of vanilla extract is also a welcome addition here.
Assembling Your Masterpiece
Once everything is completely cool, it’s time to assemble your beautiful cake. Place one cake layer on your serving plate or cake stand. Generously spread a layer of the cooled peach filling over the top of this first cake layer, leaving a small border around the edge to prevent it from oozing out. Carefully place the second cake layer on top of the peach filling. Now, frost the entire cake – the top and sides – with your delicious cream cheese frosting. You can create beautiful swirls with your offset spatula, or keep it simple and rustic. Decorate with a few fresh peach slices or a sprinkle of cinnamon if you wish. This Brown Sugar Layer Cake with Peach Filling is best served at room temperature, allowing the flavors to meld beautifully. Enjoy every delicious bite!
Conclusion:
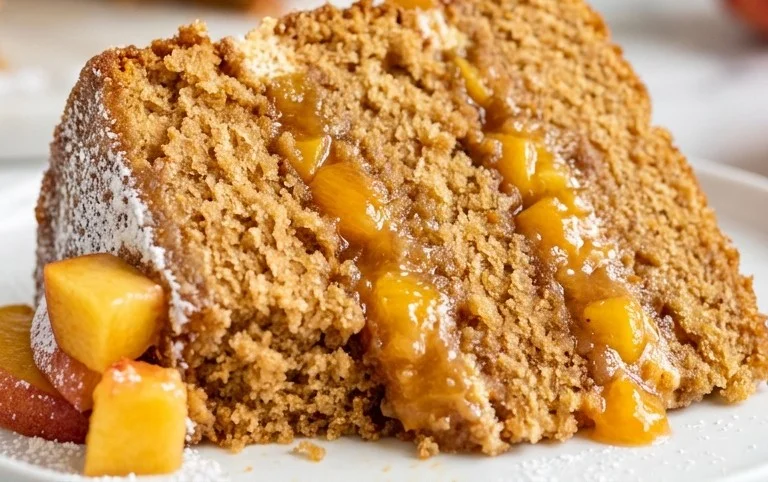
I hope you’ve enjoyed learning how to create this delightful Brown Sugar Layer Cake with Peach Filling! This recipe is truly a winner because it balances the comforting warmth of brown sugar cake with the bright, sweet burst of fresh peaches. The layers are incredibly tender, and the filling provides a beautiful contrast in both flavor and texture. It’s the perfect centerpiece for any celebration, or simply a wonderful way to brighten up an ordinary day.
When it comes to serving, I find this cake shines on its own, but a dollop of fresh whipped cream or a scoop of vanilla bean ice cream takes it to another level. For variations, consider adding a pinch of cinnamon or nutmeg to the cake batter for extra spice, or using a mix of different stone fruits like apricots or plums in the filling. Don’t be afraid to experiment! I truly encourage you to give this Brown Sugar Layer Cake with Peach Filling a try; I’m confident you’ll fall in love with its homemade charm and delicious taste.
Frequently Asked Questions:
Q: Can I use canned peaches instead of fresh?
A: Yes, you absolutely can use canned peaches! If using canned, make sure to drain them very well to avoid a soggy filling. You might also want to reduce the sugar slightly in the filling if your peaches are packed in syrup.
Q: How long will this cake last?
A: This cake will keep well in an airtight container at room temperature for up to 2 days, or in the refrigerator for up to 4-5 days. The filling is best enjoyed within a few days of baking.
Q: What makes the brown sugar so special in this cake?
A: Brown sugar contributes a rich, caramel-like sweetness and moisture to the cake layers that granulated sugar can’t quite replicate. It also helps create a wonderfully tender crum extractb that is simply irresistible!
Brown Sugar Layer Cake with Peach Filling
A moist and flavorful layer cake featuring a rich brown sugar cake and a sweet, spiced peach filling. Perfect for any occasion.
Ingredients
-
5 cups peeled and chopped peaches (about 4-5 large peaches)
-
1/3 cup (75g) packed light brown sugar
-
1 tbsp cornstarch
-
Juice from 1/2 a lemon
-
2 1/2 cups (325g) all purpose flour
-
2 1/2 tsp baking powder
-
1/2 tsp ground cinnamon, optional
-
1/2 tsp salt
-
3/4 cup (168g) unsalted butter, room temperature
-
1 1/2 cups (337g) packed Domino® light brown sugar
-
3 tbsp vegetable oil
-
1 tsp vanilla extract
-
4 large eggs
-
1 1/4 cups (300ml) milk
-
1 1/4 cups (280g) unsalted butter, room temperature
Instructions
-
Step 1
For the peach filling: In a medium saucepan, combine chopped peaches, 1/3 cup light brown sugar, cornstarch, and lemon juice. Cook over medium heat, stirring occasionally, until peaches are softened and the mixture has thickened, about 10-15 minutes. Remove from heat and let cool completely. -
Step 2
Preheat oven to 350°F (175°C). Grease and flour two 9-inch round cake pans. -
Step 3
In a large bowl, whisk together flour, baking powder, cinnamon (if using), and salt. -
Step 4
In a separate large bowl, cream together 3/4 cup unsalted butter and 1 1/2 cups Domino® light brown sugar until light and fluffy. Beat in vegetable oil and vanilla extract. -
Step 5
Add eggs one at a time, beating well after each addition. Gradually add the dry ingredients to the wet ingredients alternately with the milk, beginning and ending with dry ingredients. Mix until just combined. -
Step 6
Divide the batter evenly between the prepared cake pans. Bake for 30-35 minutes, or until a wooden skewer inserted into the center comes out clean. -
Step 7
Let cakes cool in the pans for 10 minutes before inverting them onto a wire rack to cool completely. -
Step 8
To assemble: Place one cake layer on a serving plate. Spread the cooled peach filling evenly over the cake. Top with the second cake layer. Frost with your favorite frosting (not included in recipe ingredients).
Important Information
Nutrition Facts (Per Serving)
It is important to consider this information as approximate and not to use it as definitive health advice.
Allergy Information
Please check ingredients for potential allergens and consult a health professional if in doubt.