Cheesecake Fruit Salad Roll Ups – Sweet Treat
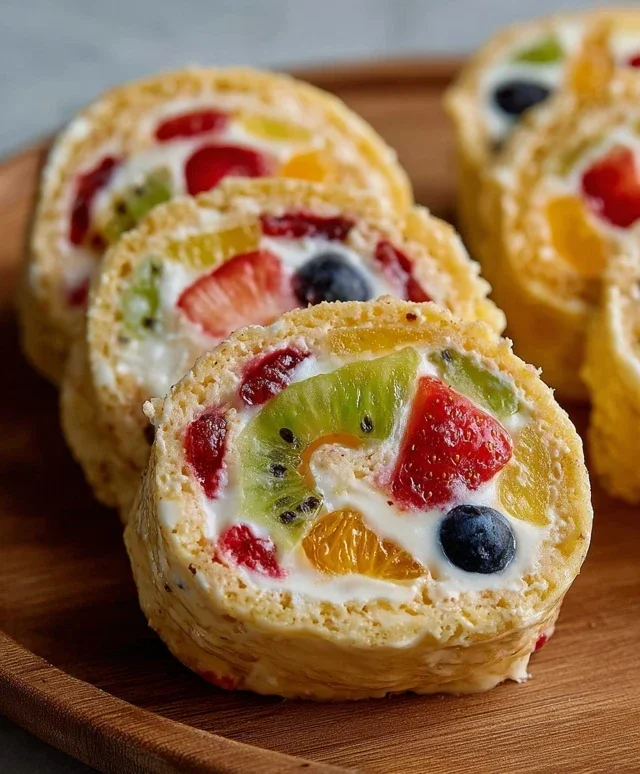
Cheesecake Fruit Salad Roll Ups are the ultimate sweet treat that’s guaranteed to impress, whether you’re serving them at a brunch, a picnic, or just want to add a touch of magic to your afternoon. Imagin extracte tender crepes swirled with a luscious, creamy cheesecake filling and bursting with vibrant, fresh fruit. It’s a delightful combination that’s both visually stunning and incredibly delicious. What’s not to love about this playful twist on classic cheesecake and fruit salad? The creamy tang of the cheesecake filling perfectly complements the sweetness and juiciness of the assorted fruits, creating a symphony of flavors and textures in every bite. What truly makes these Cheesecake Fruit Salad Roll Ups so special is their portability and the sheer joy they bring – they’re mini packages of happiness, bursting with goodness and ready to be devoured!

Cheesecake Fruit Salad Roll Ups: A Delightful Dessert Adventure
Are you craving something sweet, refreshing, and a little bit decadent? Look no further! These Cheesecake Fruit Salad Roll Ups are the perfect answer. They combine the creamy goodness of cheesecake with the vibrant freshness of a fruit salad, all wrapped up in a convenient and delightful tortilla. They’re surprisingly easy to make and are sure to be a hit at your next gathering or as a special treat for yourself. Imagin extracte a bite that’s a little tart from the fruit, a little sweet and creamy from the cheesecake filling, and with a hint of cinnamon-kissed warmth. Let’s get started on this delicious journey!
Ingredients:
Preparing the Creamy Cheesecake Filling
The foundation of our delightful roll ups is a luscious, creamy cheesecake filling. We start by ensuring our butter and cream cheese are at room temperature. This is crucial for achieving a smooth and lump-free mixture. If your butter and cream cheese are too cold, they won’t blend well, and you might end up with an uneven texture.
1. In a medium mixing bowl, cream together the room temperature unsalted butter and 1 ½ cups of powdered sugar until light and fluffy. This usually takes about 2-3 minutes with an electric mixer on medium speed. Scrape down the sides of the bowl periodically to ensure everything is incorporated.
2. Add the 6 oz of room temperature cream cheese and 1 teaspoon of vanilla extract to the butter and sugar mixture. Beat on medium speed until the mixture is exceptionally smooth and well combined. Again, remember to scrape down the sides of the bowl. This forms the base of our creamy filling.
3. Now, we’ll gently fold in the whipped cream. If you’re using pre-made whipped cream, carefully fold it in until just combined. Be careful not to overmix, as this can deflate the whipped cream and make the filling less airy. If you’re making your own whipped cream, whip the chilled heavy cream with the 2.5 Tbsp of powdered sugar until stiff peaks form, then gently fold it into the cream cheese mixture. The sugar-free vanilla instant pudding comes into play here. In a separate small bowl, prepare the pudding according to the package directions, but use only about half the amount of liquid specified (usually ½ cup milk, but check your box). Let it set for a few minutes. Once it’s slightly thickened, gently fold this prepared pudding into the cream cheese mixture. This adds extra flavor and a wonderful stability to our filling, making it perfect for rolling. The sugar-free aspect keeps it lighter!
Assembling the Vibrant Fruit Salad
While our filling chills slightly, let’s prepare the star of the show – the fresh fruit salad! The variety of colors and textures from the fruits will make these roll ups visually appealing and incredibly tasty.
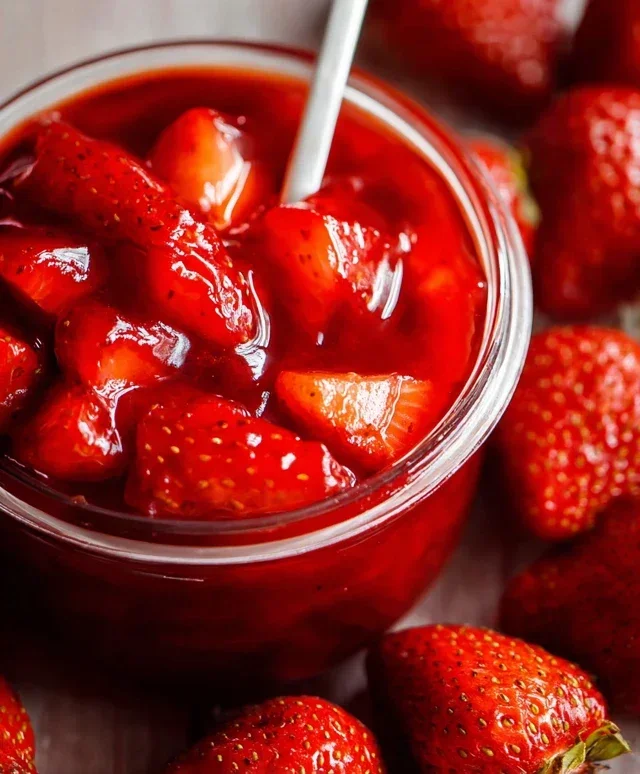
1. In a separate bowl, gently combine the prepared fresh blueberries, small diced fresh strawberries, peeled and diced small peaches, peeled and small diced kiwis, and halved fresh raspberries. You want to handle the berries gently to avoid them breaking down too much. The peaches will add a lovely sweetness and softness, while the kiwis offer a tangy contrast.
2. Once the fruit is combined, gently fold in about half of the prepared cheesecake filling into the fruit salad. This ensures that every bite has that delicious creamy element integrated with the fresh fruit. You don’t want to completely drown the fruit, just coat it lightly with the filling. This step is optional; you can also just use the plain cheesecake filling as a spread and top with the fruit. I find incorporating some of the filling into the fruit gives it a more cohesive texture.
Creating the Perfect Tortilla Wraps
Now it’s time to bring everything together. We’re going to prepare our tortillas to create the perfect vessel for our delightful filling.
1. Warm the large tortillas slightly to make them more pliable and less likely to crack when rolled. You can do this by microwaving them for about 15-20 seconds, or by gently warming them in a dry skillet over medium-low heat for about 30 seconds per side. The goal is to make them flexible, not crispy.
2. Spread a thin, even layer of the remaining cheesecake filling onto each warmed tortilla, leaving about a 1-inch border around the edges. This will act as the glue to help seal the roll up.
3. Spoon a generous portion of the fruit salad and cheesecake mixture onto the center of each tortilla. Don’t overfill, or it will be difficult to roll them up neatly.
4. Carefully fold in the sides of the tortilla slightly over the filling, then tightly roll up the tortilla from the bottom edge towards the top. Try to keep the roll as tight as possible to prevent the filling from escaping.
The Golden Cinnamon-Sugar Crust
This final step is what takes our roll ups from delicious to absolutely irresistible. A hint of warmth and sweetness on the outside is the perfect counterpoint to the cool, creamy filling and fresh fruit.
1. In a small bowl, mix together the melted unsalted butter with the ½ cup of sugar and 1 teaspoon of cinnamon. You can adjust the cinnamon to your preference; some people like a stronger cinnamon flavor, while others prefer it more subtle. This mixture will be brushed onto the outside of our rolled tortillas.
2. Arrange the rolled tortillas seam-side down on a baking sheet.
3. Brush the tops and sides of each roll up generously with the cinnamon-sugar butter mixture. Make sure they are well coated.
4. Bake in a preheated oven at 375°F (190°C) for about 10-15 minutes, or until the tortillas are golden brown and slightly crispy. Keep an eye on them, as they can brown quickly due to the sugar.
5. Let the roll ups cool slightly on the baking sheet before transferring them to a wire rack to cool completely. This allows the cinnamon-sugar coating to set and become delightfully crunchy.
These Cheesecake Fruit Salad Roll Ups are best served slightly warm or at room temperature. They are a fantastic dessert for picnics, parties, or just a sweet ending to any meal. Enjoy the burst of flavors and textures in every bite!
Conclusion:
There you have it! I hope you’re as excited about these Cheesecake Fruit Salad Roll Ups as I am. This recipe is truly a winner because it’s incredibly versatile, delightfully refreshing, and surprisingly simple to assemble. It’s the perfect balance of creamy cheesecake goodness and vibrant, healthy fruit, all rolled up into a fun and portable treat. Whether you’re looking for a crowd-pleasing dessert for a summer barbecue, a light and satisfying snack for the kids, or even a unique addition to a brunch spread, these roll ups are sure to impress. Don’t be afraid to get creative with your fruit choices – the possibilities are endless! Give these delightful Cheesecake Fruit Salad Roll Ups a try; I promise you won’t be disappointed!
Frequently Asked Questions:
Can I make these ahead of time?
Yes, you absolutely can! I recommend assembling the roll ups and then storing them in an airtight container in the refrigerator for up to 24 hours. This allows the flavors to meld together beautifully. If you’re concerned about the tortillas getting soggy, you can prepare the filling and chop your fruit separately and then assemble them just before serving.
What are some other fruit ideas I could use?
The beauty of these roll ups is their adaptability! Beyond the suggested berries and kiwi, consider adding diced mango, pineapple, grapes, or even a sprinkle of pomegranate seeds for a burst of color and flavor. You could also try adding a touch of citrus zest like lemon or lime to the cream cheese filling for an extra layer of brightness.
Are these suitable for a gluten-free diet?
For a gluten-free version, you can easily swap out the regular tortillas for gluten-free tortillas. There are many delicious options available now, so just find one that suits your preference. The rest of the ingredients are naturally gluten-free!
Cheesecake Fruit Salad Roll Ups
A delightful and easy dessert featuring creamy cheesecake filling, a vibrant fruit salad, and a warm cinnamon-sugar tortilla.
Ingredients
-
4–5 large tortillas, room temperature
-
2/3 cup fresh blueberries
-
2/3 cup small diced fresh strawberries
-
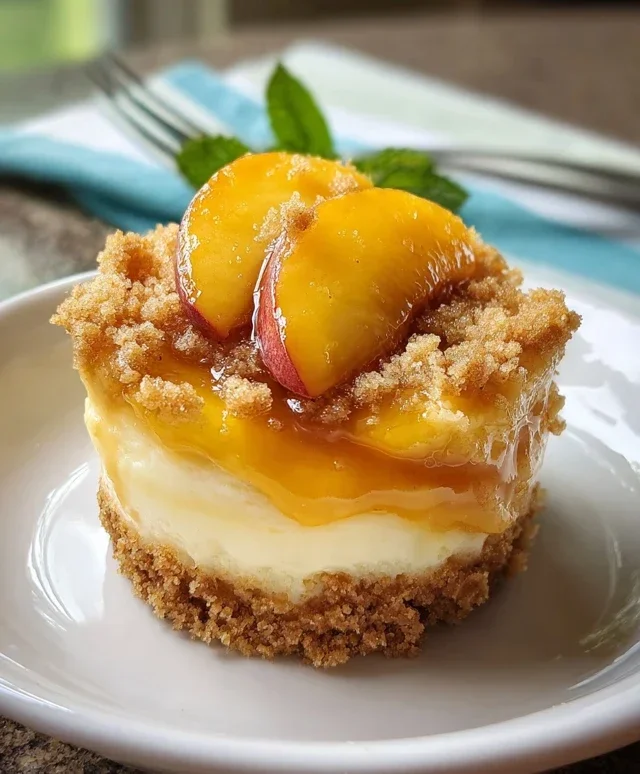
3 small peaches, peeled and diced
-
2 kiwis, peeled and small diced
-
½ cup fresh raspberries, sliced in half
-
6 oz cream cheese, room temperature
-
1 ½ cups powdered sugar
-
1 teaspoon vanilla extract
-
2 boxes sugar-free vanilla instant pudding
-
1 ¼ cups whipped cream (or ½ cup + 2 Tbsp chilled heavy cream + 2.5 Tbsp powdered sugar)
-
2–3 tablespoons unsalted butter, melted
-
½ cup sugar
-
1 teaspoon cinnamon (or to taste)
Instructions
-
Step 1
In a medium bowl, whisk together the cream cheese, powdered sugar, and vanilla extract until smooth. Stir in the sugar-free instant pudding mix and the whipped cream until well combined. -
Step 2
Gently fold in the blueberries, strawberries, diced peaches, diced kiwis, and halved raspberries into the cream cheese mixture. -
Step 3
Lay out the tortillas on a clean surface. Spread an even layer of the cheesecake fruit salad mixture onto each tortilla, leaving a small border. -
Step 4
Roll up each tortilla tightly. If needed, you can secure with toothpicks. -
Step 5
In a small bowl, combine the melted butter, sugar, and cinnamon. Brush the outsides of the rolled tortillas with this mixture. -
Step 6
Heat a lightly greased skillet or griddle over medium heat. Cook the roll-ups for 2-3 minutes per side, until golden brown and slightly crispy. -
Step 7
Let cool slightly before slicing and serving.
Important Information
Nutrition Facts (Per Serving)
It is important to consider this information as approximate and not to use it as definitive health advice.
Allergy Information
Please check ingredients for potential allergens and consult a health professional if in doubt.