Cherry Pie Bombs-Irresistible No-Bake Treat
Cherry Pie Bombs are an absolute game-changer, and I’m so excited to share this recipe with you! Forget your average slice; these delightful little explosions of flavor are a testament to the joy of perfectly portioned indulgence. We all adore cherry pie for its classic comfort and sweet-tart balance, but imagin extracte that beloved taste concentrated into a portable, bite-sized wonder. That’s precisely what makes these Cherry Pie Bombs so incredibly special. They take all the nostalgic appeal of a traditional pie and elevate it with a fun, approachable format that’s perfect for parties, potlucks, or simply treating yourself. Get ready to be amazed by how something so small can deliver such a huge, satisfying punch of cherry goodness!
Cherry Pie Bombs
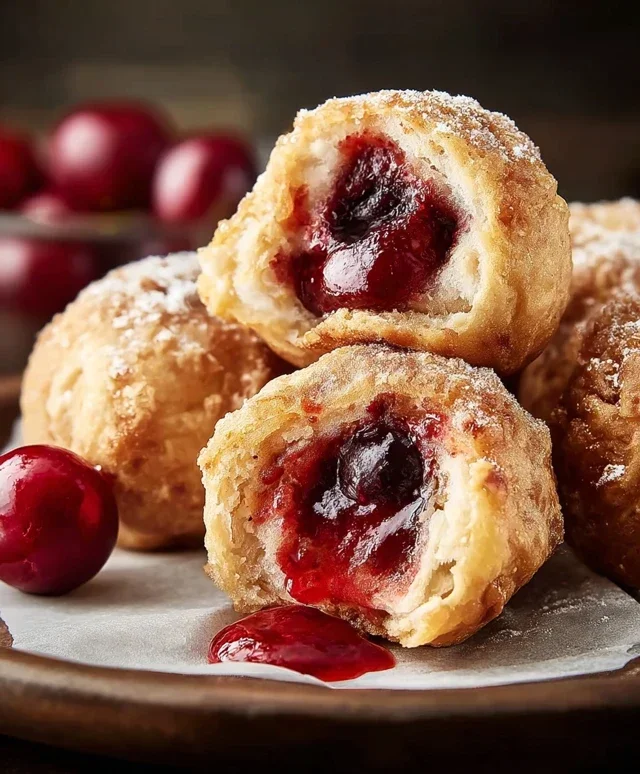
Get ready to indulge in a bite-sized explosion of sweet, tart cherry goodness encased in a crispy, golden shell. These Cherry Pie Bombs are the ultimate fun treat, perfect for parties, potlucks, or just a delightful afternoon pick-me-up. They take the beloved flavors of classic cherry pie and transform them into portable, poppable delights that are surprisingly easy to make. Forget complicated pastry; we’re using a shortcut that will have you amazed at how quickly you can whip up these irresistible morsels. The combination of flaky biscuit dough, warm cherry filling, and a sweet, glossy glaze is simply heavenly. Let’s dive in and create some deliciousness!
Ingredients:
Preparing the Cherry Filling
The foundation of our Cherry Pie Bombs is, of course, the cherry filling. While you can certainly make your own from scratch, using a good quality canned cherry pie filling is a fantastic shortcut that still delivers amazing flavor. You want a filling that’s thick and packed with cherries, not too runny. If your filling seems a little thin, you can always simmer it gently in a saucepan for a few minutes to allow some of the excess moisture to evaporate. This will prevent the bombs from becoming soggy. Once it’s cooled down slightly, it’s ready to be used.
Assembling the Bombs
This is where the magic happens! We’re using Grands “Big” biscuits as our dough, and they are perfect for this. The flaky layers will puff up beautifully when fried, creating a wonderfully crisp exterior.
1. Open your can of biscuits and carefully separate them. You’ll want to gently flatten each biscuit slightly. Don’t press them too thin, as you still want some loft. Now, for the fun part: we need to create a pocket for our cherry filling. You can do this by either gently stretching the biscuit into a rough circle and then bringin extractg up the edges to form a little pouch, or by taking two slightly flattened biscuits, placing a spoonful of cherry filling in the center of one, and then carefully placing the second biscuit on top, pressing the edges together to seal. The key is to ensure a good seal so that the delicious cherry filling doesn’t escape during frying. Pinch the edges firmly together. You can even use a fork to crimp the edges, much like you would for a hand pie, to guarantee a secure seal. This step is crucial for preventing any messy leaks and ensuring each bomb is a perfectly contained burst of flavor.
2. Once you have your filled and senon-alcoholic aled biscuits, it’s time to get ready for frying. Heat a generous amount of vegetable oil in a heavy-bottomed pot or deep skillet over medium heat. You want enough oil to allow the biscuit bombs to float freely. A good test for the oil temperature is to drop a tiny piece of biscuit dough into it. If it sizzles and floats to the surface immediately, your oil is ready. If it browns too quickly, turn the heat down slightly; if it doesn’t sizzle, increase the heat. Maintaining the correct oil temperature is vital for achieving that perfect golden-brown exterior without burning the outside before the inside is cooked through.
Frying to Perfection
Now, let’s get these beauties golden and crispy!
3. Carefully add the prepared biscuit bombs to the hot oil, being careful not to overcrowd the pot. Fry them in batches if necessary to maintain the oil temperature and ensure even cooking. You’ll want to fry them for about 2-3 minutes per side, or until they are beautifully golden brown and puffed up. Use a slotted spoon or spider strainer to gently turn them over, ensuring all sides get that lovely crisp texture. As they fry, you’ll see them puff up significantly, becoming light and airy. This is exactly what we’re aiming for!
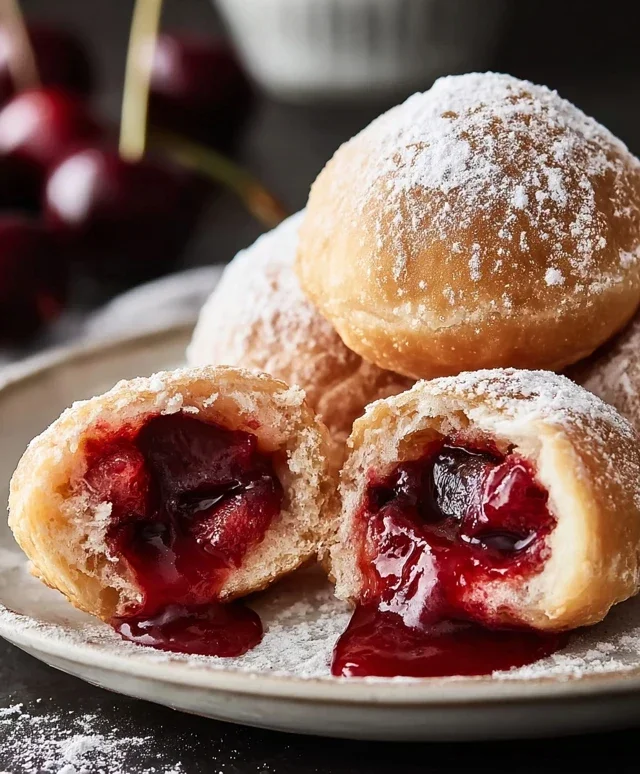
4. Once they are perfectly golden, remove the Cherry Pie Bombs from the oil using your slotted spoon and place them on a wire rack set over a baking sheet. This allows any excess oil to drain away, keeping them wonderfully crisp. You don’t want them sitting in oil, or they’ll become greasy. Allow them to cool slightly before glazing. While they’re still warm, but not piping hot, is the ideal time to apply the glaze.
The Sweet Glaze
The finishing touch that elevates these Cherry Pie Bombs to another level is the simple yet delicious glaze.
5. In a medium bowl, whisk together the powdered sugar, milk, and light corn syrup until smooth and pourable. The corn syrup adds a lovely sheen and helps the glaze set slightly without becoming hard. If the glaze seems too thick, add a tiny bit more milk, a teaspoon at a time, until you reach your desired consistency. If it’s too thin, add a bit more powdered sugar. Drizzle the glaze generously over the slightly cooled Cherry Pie Bombs. You can use a spoon or a piping bag for a more decorative effect. Let the glaze set for a few minutes before serving.
These Cherry Pie Bombs are best enjoyed warm, when the biscuit shell is still crispy and the cherry filling is gooey and delicious. They are incredibly addictive, so you might want to make a double batch! Enjoy these delightful little pockets of joy!
Conclusion:
And there you have it – the incredibly delightful Cherry Pie Bombs! I truly hope you’ve enjoyed learning how to create these bite-sized bursts of cherry goodness. What makes this recipe so fantastic is its perfect balance of flaky, buttery crust and a rich, sweet-tart cherry filling. They’re surprisingly simple to make, making them an ideal treat for both novice and experienced bakers. These Cherry Pie Bombs are incredibly versatile. They are perfect as a standalone dessert, a delightful addition to a brunch spread, or even as a sweet pick-me-up with your afternoon tea. You can also get creative with variations! Consider adding a touch of almond extract to the filling for a different nutty flavor profile, or perhaps a pinch of cinnamon for a warmer spice. Some folks even enjoy a drizzle of white chocolate glaze over the cooled bombs. Don’t be afraid to experiment! I wholeheartedly encourage you to give this recipe a try. The joy of pulling these golden-brown beauties from the oven and sharing them with loved ones is truly rewarding.
Frequently Asked Questions about Cherry Pie Bombs:
How can I ensure my pie crust is flaky?
For the flakiest crust, make sure your butter and water are ice-cold when you start. Cut the butter into the flour until it resembles coarse crum extractbs with some pea-sized pieces of butter remaining. Avoid overworking the dough, as this develops gluten and can make the crust tough. Chilling the dough before and after forming the bombs also helps significantly.
Can I use fresh cherries instead of canned?
Absolutely! If you’re using fresh cherries, you’ll want to pit them and then cook them down slightly with your sugar and thickener (like cornstarch) until they release some of their juices and thicken a bit. This helps prevent a soggy bottom. You might need to adjust the cooking time slightly depending on the juiciness of your fresh cherries.
How should I store leftover Cherry Pie Bombs?
Leftover Cherry Pie Bombs can be stored in an airtight container at room temperature for up to two days, or in the refrigerator for up to a week. For the best texture when reheating, I recommend warming them gently in a low oven or a toaster oven for a few minutes to crisp up the crust again.
Cherry Pie Bombs
Delectable fried biscuit bites filled with sweet cherry pie filling and drizzled with a simple glaze. A fun and easy dessert treat.
Ingredients
-
16.3 ounces Grands “Big” biscuits, flaky
-
21 ounces cherry pie filling
-
Vegetable oil, for frying
-
2 cups powdered sugar
-
¼ cup milk
-
1 tablespoon light corn syrup
Instructions
-
Step 1
Open Grands “Big” biscuits and separate them. Gently flatten each biscuit into a circle. -
Step 2
Place about 1-2 tablespoons of cherry pie filling into the center of each flattened biscuit. Be careful not to overfill. -
Step 3
Carefully bring the edges of the biscuit dough up and around the cherry filling, pinching to seal completely and form a ball. Ensure there are no holes. -
Step 4
Heat vegetable oil in a deep pot or Dutch oven to about 350°F (175°C). Carefully fry the biscuit bombs in batches, turning occasionally, until golden brown on all sides. -
Step 5
While the bombs are frying, whisk together powdered sugar, milk, and light corn syrup in a bowl to create a smooth glaze. Adjust consistency with more milk if needed. -
Step 6
Remove the fried cherry pie bombs from the oil with a slotted spoon and place them on a paper towel-lined plate to drain excess oil. -
Step 7
Drizzle the warm glaze over the fried cherry pie bombs and let them set slightly before serving.
Important Information
Nutrition Facts (Per Serving)
It is important to consider this information as approximate and not to use it as definitive health advice.
Allergy Information
Please check ingredients for potential allergens and consult a health professional if in doubt.