Easy Charcuterie Cups- Perfect Party Appetizer
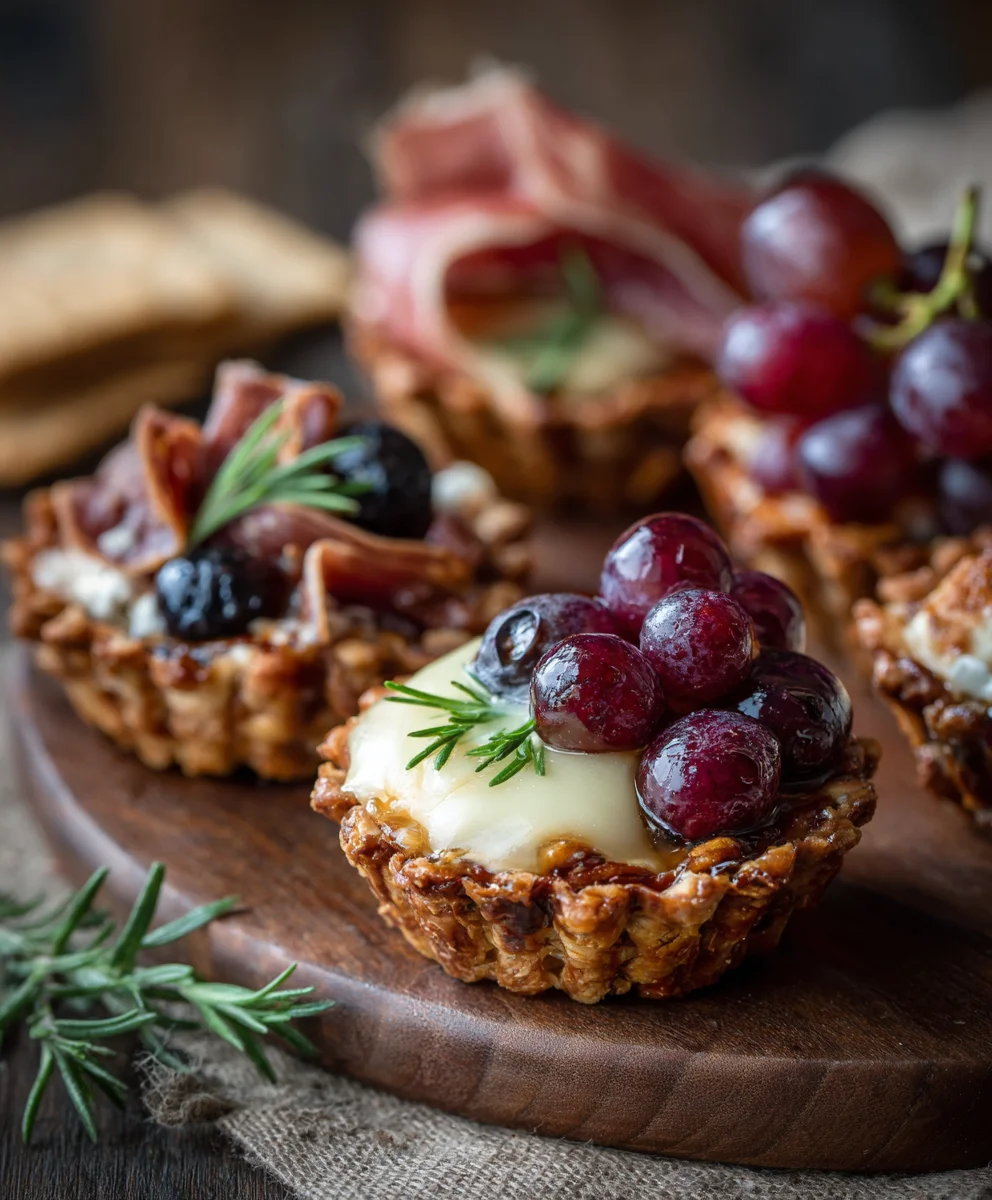
Individual Charcuterie Cups are the absolute best way to serve up a sophisticated and delicious appetizer that’s as visually stunning as it is tasty. Forget the messy platters and overcrowded cheese boards; these delightful, portable creations have taken the entertaining world by storm, and for good reason! They’re perfect for parties, gatherings, or even a special treat for yourself, allowing everyone to have their own curated selection of savory meats, artisanal cheeses, briny olives, sweet fruits, and crunchy crackers. What makes these truly special is the personal touch – each cup is a miniature masterpiece, tailored to impress your guests with a burst of flavor and texture in every bite. The sheer convenience and the individual presentation are a game-changer, ensuring a clean, elegant, and utterly satisfying experience for everyone. Get ready to elevate your appetizer game with these charming and customizable Individual Charcuterie Cups!
Ingredients:
- 1 cup fresh strawberries, halved
- 1 cup fresh blackberries
- 1 cup red grapes, halved if large
- 8 oz thinly sliced beef beef salami, folded into bite-sized pieces
- 4 oz Brie bites, halved
- 4 oz Gouda cheese, cut into ½-inch cubes
- 4 oz Manchego cheese, sliced and then cut into bite-sized pieces
- 12 breadsticks, broken in half
- 2 Rustic Bakery Sourdough Flatbreads, broken into rustic pieces
- 6 honey sticks
- ½ cup cornichons
- ½ cup mixed olives (like Kalamata and green olives)
- ½ cup dried apricots
- 4-6 fresh rosemary sprigs for garnish
Preparing Your Individual Charcuterie Cups
The beauty of individual charcuterie cups lies in their portability and ease of assembly. They are perfect for parties, picnics, or even a sophisticated solo snack. My approach is to create visually appealing and flavor-balanced cups, ensuring a delightful mix of textures and tastes in every bite. We’ll focus on building layers of flavor, starting with the cheeses and meats, then adding the fruits and accompaniments, and finally finishing with those lovely little extras that make these cups truly special.
Step 1: Building the Foundation of Cheese and Meat
Begin extract by selecting your cups. Small mason jars, sturdy paper cups, or even small bowls work wonderfully. Start by layering the cheeses. I ligin extractto begin with the Brie bites, as their creamy texture is a wonderful contrast to the firmer cheeses. Place 2-3 halved Brie bites into the bottom of each cup. Next, add a generous portion of the cubed Gouda. The mild, nutty flavor of Gouda pairs beautifully with the Brie. Then, strategically place a few slices of the Manchego cheese. Manchego, with its slightly salty and firm profile, adds another layer of complexity. Once the cheeses are in place, it’s time for the star of the savory show: the beef salamialami. Take your thinly slbeef salamieef salami and fold each slice into a pleasing, ruffled shape. This not only looks more elegant but also makes it easier to pick up. Nestlbeef salamie folded salami pieces amongst the cheeses. Don’t be afraid to create height and dimension within the cup; this makesgin extractr a more engaging visual. Aim to fill about one-third of the cup with this initial savory foundation.
Step 2: Adding Sweetness and Acidity with Fruits and Pickles
Now, we introduce the refreshing elements. The halved strawberries bring a burst of juicy sweetness. Scatter a few of these vibrant red gems beef salamihe cheese and salami layer. Next, add the blackberries. Their slightly tarter profile and unique texture offer a lovely counterpoint to the strawberries. Then, incorporate the red grapes. If your grapes are on the larger side, slicing them in half makes them more manageable to eat and distributes their sweetness more evenly throughout the cup. Following the fruit, it’s time for a touch of briny goodness. Add a few cornichons to each cup. These small, tangy pickles are essential for cutting through the richness of the cheeses and meats. Their sharp flavor profile is a classic charcuterie companion. Finally, tuck in a few of your mixed olives. The salty, sometimes briny, and often fruity notes of olives are indispensable for a well-rounded charcuterie experience.
Step 3: Incorporating Crunchy Textures and Chewy Delights
To elevate our individual charcuterie cups from good to absolutely irresistible, we need to introduce a variety of textures. This is where the breadsticks and sourdough flatbreads come into play. Break the breadsticks into manageable halves. I like to arrange them so they stand up a bit, adding vertical interest to the cup. Similarly, break the Rustic Bakery Sourdough Flatbreads into rustic, irregular pieces. These flatbreads offer a delightful crunch and a subtle sourdough tang that complements the other ingredients beautifully. Nestle these bread components amongst the other items, ensuring they are easily accessible. Next, add the dried apricots. Their chewy texture and concentrated sweetness provide a wonderful contrast to the crisp bread and juicy fruits. The natural sugars in the apricots caramelize slightly, offering a delightful chegrape juicess and a rich, fruity sweetness that balances the savory elements perfectly.
Step 4: The Sweet Finish and Aromatic Touch
Every great charcuterie experience deserves a touch of sweetness and an aromatic flourish. This is where the honey sticks and rosemary sprigs shine. Place one honey stick into each cup. The idea is that the recipient can break off a piece of the honeycomb and drizzle the honey over their chosen combination obeef salamise, fruit, or even salami. This adds a beautiful, natural sweetness and a touch of elegance. For the aromatic element, take your fresh rosemary sprigs. Gently tuck a sprig into each cup. The fragrant aroma of rosemary is incredibly evocative and enhances the overall sensory experience of enjoying the charcuterie. It adds a subtle piney note that pairs surprisingly well with both the cheeses and the meats.gin extractis step is about engaging all the senses, not just taste.
Step 5: Final Arrangement and Presentation Tips
Before serving, take a moment to admire your creations and make any final adjustments for optimal visual appeal. Ensure that the colors are well-distributed throughout each cup. You want to see pops of red from the strawberries and grapes, deep purples from the blackberries, and the inviting hues of the meats and cheeses. Make sure the breadsticks are standing proud and the rosemary sprigs are positioned attractively. The goal is to make each individual charcuterie cup look like a miniature work of art. Consider the layering: ensure that the items are not just piled in, but rather artfully arranged to showcase their individual beauty and to make them easy for guests to pick out. For instance, a strawberry half peeking out from behind a piece of Gouda adds visual depth. If you’re assembling these ahead of time, it’s best to add the breadsticks and flatbreads closer to serving to maintain their crispness. However, for a party where they’ll be consumed relatively quickly, you can assemble them fully in advance. These individual charcuterie cups are designed for convenience and delight, so enjoy the process of creating these little edible gems!
Conclusion:
And there you have it! Your delightful Individual Charcuterie Cups are ready to impress. This recipe is a fantastic way to serve individual portions of charcuterie, making it perfect for parties, gatherings, or even a sophisticated solo snack. The beauty of this dish lies in its simplicity and versatility. Whether you’re a seasoned entertainer or just looking for a quick and elegant appetizer, these cups are a guaranteed hit. Don’t be afraid to get creative with your fillings – the possibilities are truly endless!
For serving suggestions, these cups are wonderful as a starter before a meal, a grazing option at a cocktail party, or even as a light lunch paired with a crisp salad. Feel free to customize your Individual Charcuterie Cups with your favorite cheeses, cured meats, fruits, nuts, and crackers. Some popular variations include a Mediterranean-inspired cup with olives and feta, a spicy version with beef chorizo and chili-infused honey, or a vegetarian option loaded with various marinated vegetables and cheeses. Embrace the spirit of experimentation and make these cups your own. I encourage you to try this recipe and share your delicious creations!
Frequently Asked Questions:
Can I prepare the Individual Charcuterie Cups ahead of time?
Yes, you can prepare most components of the Individual Charcuterie Cups ahead of time. Cheeses can be sliced or cubed, meats can be folded or rolled, and fruits can be washed and cut. It’s best to assemble the cups closer to serving time to prevent crackers from becoming soggy and to keep items like fresh fruits at their best. You can store the individual components separately in airtight containers in the refrigerator.
What are some good vegetarian or vegan options for these cups?
Absolutely! For vegetarian options, focus on a variety of cheeses (hard, soft, and crum extractbly), olives, marinated artichoke hearts, sun-dried tomatoes, nuts, seeds, fresh fruits like grapes and berries, and crusty bread or crackers. For vegan options, substitute cheeses with vegan cheese alternatives, use plant-based pâtés or spreads, and load up on an abundance of marinated vegetables, fruits, nuts, seeds, and vegan crackers. Hummus and various dips also make excellent additions.
Easy Charcuterie Cups- Perfect Party Appetizer
Individual charcuterie cups are a convenient and visually appealing appetizer, perfect for parties or picnics, offering a delightful mix of textures and flavors in every bite.
Ingredients
-
1 cup fresh strawberries, halved
-
1 cup fresh blackberries
-
1 cup red grapes, halved if large
-
8 oz thinly sliced beef salami, folded into bite-sized pieces
-
4 oz Brie bites, halved
-
4 oz Gouda cheese, cut into ½-inch cubes
-
4 oz Manchego cheese, sliced and then cut into bite-sized pieces
-
12 breadsticks, broken in half
-
2 Rustic Bakery Sourdough Flatbreads, broken into rustic pieces
-
6 honey sticks
-
½ cup cornichons
-
½ cup mixed olives (like Kalamata and green olives)
-
½ cup dried apricots
-
4-6 fresh rosemary sprigs for garnish
Instructions
-
Step 1
Begin by selecting your cups. Start by layering the cheeses, beginning with the Brie bites, then adding the cubed Gouda, and finally placing the Manchego slices. Fold the beef salami slices into pleasing, ruffled shapes and nestle them amongst the cheeses, aiming to fill about one-third of the cup with this savory foundation. -
Step 2
Introduce the refreshing elements. Scatter halved strawberries, blackberries, and halved red grapes (if large) over the cheese and salami layer. Add cornichons and mixed olives to provide a briny counterpoint to the richness. -
Step 3
Incorporate crunchy textures and chewy delights. Break breadsticks into halves and arrange them for vertical interest. Break Rustic Bakery Sourdough Flatbreads into rustic pieces and nestle them amongst other items. Add dried apricots for their chewy texture and concentrated sweetness. -
Step 4
Add a sweet finish and aromatic touch. Place one honey stick into each cup for drizzling. Gently tuck a fresh rosemary sprig into each cup for an aromatic flourish. -
Step 5
Make final adjustments for optimal visual appeal, ensuring colors are well-distributed and items are artfully arranged for easy selection. Add breadsticks and flatbreads closer to serving if assembling ahead of time to maintain crispness.
Important Information
Nutrition Facts (Per Serving)
It is important to consider this information as approximate and not to use it as definitive health advice.
Allergy Information
Please check ingredients for potential allergens and consult a health professional if in doubt.