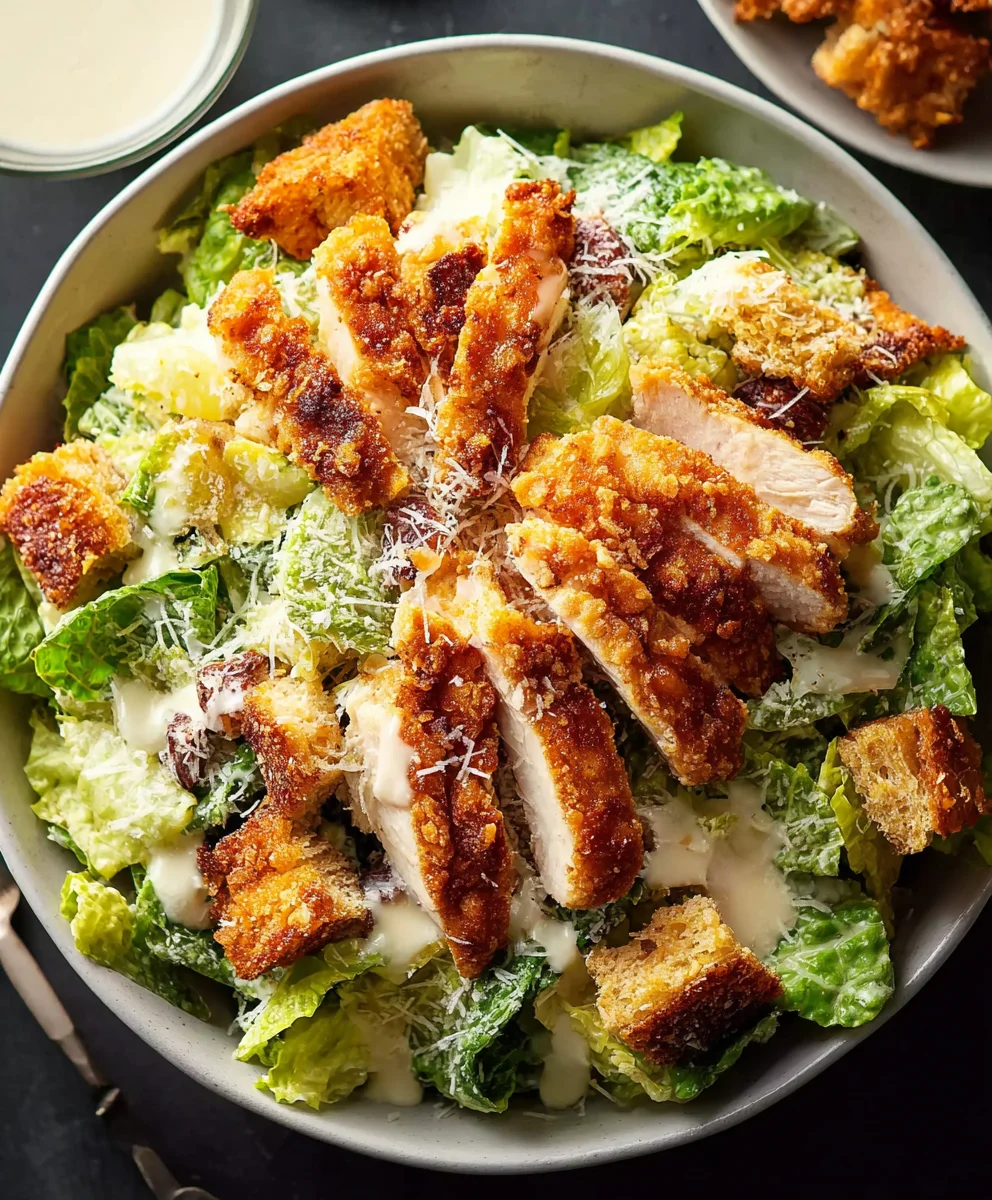
Extra Crispy Chicken Caesar Salad- Best Recipe
Extra Crispy Chicken Caesar Salad is a dish that truly delivers on its promise of flavor and texture. It’s the kind of meal that transforms a weeknight dinner into something truly special, a symphony of crunchy, savory, and creamy all in one bowl. You might be wondering what makes our Extra Crispy Chicken Caesar Salad stand out from the crowd. It’s all about that perfectly seasoned, golden-brown chicken – it boasts an unbeatable crunch that contrasts beautifully with the crisp romaine lettuce and the rich, tangy Caesar dressing. This isn’t just another salad; it’s an experience, a satisfying and undeniably delicious way to enjoy fresh ingredients with a decadent twist. People absolutely adore this version because it elevates the humble Caesar salad into a hearty and exciting meal, perfect for satisfying serious cravings.
Ingredients:
- 1 cup (240g) full fat Mayonnaise
- ⅓ cup (30g) freshly grated Parmesan cheese
- 2 Anchovy Fillets, finely minced
- 2 tablespoons Milk (preferably whole milk)
- 1 Lemon, juice only
- 1 teaspoon Dijon Mustard
- 1 teaspoon Worcestershire Sauce
- 1 small clove of Garlic, minced or grated
- ¼ teaspoon Salt
- ¼ teaspoon Black Pepper
- 2 boneless, skinless Chicken Breasts (7-9oz/200-250g each)
- 1 cup (65g) Panko Breadcrum extractbs
- ¼ cup (40g) All-Purpose Flour
- 2 large Eggs, beaten
- 1 teaspoon Salt (for dredgin extractg chicken)
- 1 teaspoon Black Pepper (gin extract dredging chicken)
- 1 head of Romaine Lettuce, washed, dried, and chopped
- Extra Parmesan cheese, for serving
- Croutons, for serving (optional)
Caesar Dressing Preparation
Step 1: Building the Creamygin extractse
To begin crafting our intensely flavorful Caesar dressing, we’ll start with the creamy foundation. In a medium-sized bowl, combine the full-fat mayonnaise, freshly grated Parmesan cheese, and the finely minced anchovy fillets. The anchovies are crucial here; they provide that unmistakable umami depth without making the dressing taste overtly fishy. Don’t be tempted to skip them! Whisk these ingredients together until they are well incorporated. You want a smooth, unified base before proceeding. This initial blend sets the stage for the complex flavors to come.
Step 2: Adding Depth and Tang
Now, we’ll introduce the elements that will bring brightness and zing to our dressing. Add the milk to the bowl. The milk not only helps to achieve a luscious, pourable consistency but also mellows out any sharpness from the other ingredients. Next, squeeze in the fresh lemon juice. This is essential for that classic Caesar tang, cutting through the richness of the mayo and Parmesan. Incorporate the Dijon mustard, which adds a subtle piquancy and helps emulsify the dressing. Finally, stir in the Worcestershire sauce for another layer of savory complexity and the minced or grated garlic. Grating the garlic ensures it disperses evenly and its flavor is fully integrated, rather than having little sharp bites of raw garlic. Whisk everything together thoroughly until the dressing is smooth and homogenous.
Step 3: Seasoning and Chilling the Dressing
With all the core ingredients combined, it’s time to season and let the flavors meld. Add the ¼ teaspoon of salt and ¼ teaspoon of black pepper to the dressing. Taste and adjust seasonings as needed. Remember that the Parmesan and anchovies are already salty, so start conservatively. Give the dressing a final, vigorous whisk to ensure everything is perfectly distributed. For the best results and to allow the flavors to truly develop and marry, cover the bowl tightly with plastic wrap and refrigerate for at least 30 minutes. This chilling period is vital; it allows the garlic to mellow, the anchovy flavor to infuse more deeply, and the dressing to thicken slightly to its ideal consistency.
Extra Crispy Chicken Preparation
Step 4: Setting Up for Crispy Coating
While the dressing chills, let’s prepare our star ingredient: the extra crispy chicken. Ensure your chicken breasts are trimmed of any excess fat. Pat them thoroughly dry with paper towels. This step is critical for achieving maximum crispiness. Moisture is the enemy of crisgin extractess! Set up your dredging station. In one shallow dish, place the ¼ cup of flour, seasoned with 1 teaspoon of salt and 1 teaspoon of black pepper. In a second shallow dish, whisk the 2 large eggs until well beaten. In a third shallow dish, place the 1 cup of Pankrum extractreadcrumrum extract Panko breadcrumbs are the secret weapon for that superior crunch, offering a lighter, airier coatingrum extractan traditionagin extractreadcrumbs.
Step 5: Dredging and Coating the Chicken
Now, we’ll coat the chicken. Take one chicken breast and dredge it in the seasoned flour, ensuring it’s coated on all sides. Gently shake off any excess flour. Next, dip the floured chicken breast into the beaten eggs, allowing any excess to drip off. Finally, press the chicrum extract breast into the Panko breadcrumbs, making sure it’s comrum extracttely covered. Gently press the breadcrumbs onto the chicken to help them adhere. Repeat this process for the second chicken breast. This triple-coating method (flour, egg, Panko) is what guarantees that delightfully crunchy exterior we’re aiming for.
Step 6: Achieving Golden-Brown Perfection
Heat about ½ inch of neutral cooking oil (like vegetable or canola oil) in a large skillet over medium-high heat until it shimmers, or a thermometer reads around 350°F (175°C). Carefully place the breaded chicken breasts into the hot oil. Be sure not to overcrowd the pan; cook in batches if necessary to maintain the oil temperature. Fry the chicken for approximately 5-7 minutes per side, or until it’s golden brown and cooked through. The internal temperature should reach 165°F (74°C). Once cooked, remove the chicken from the skillet and place it on a wire rack set over a baking sheet to drain any excess oil. This allows air to circulate, keeping the coating crispy.
Assemblinggin extractur Masterpiece
Step 7: Bringing It All Together
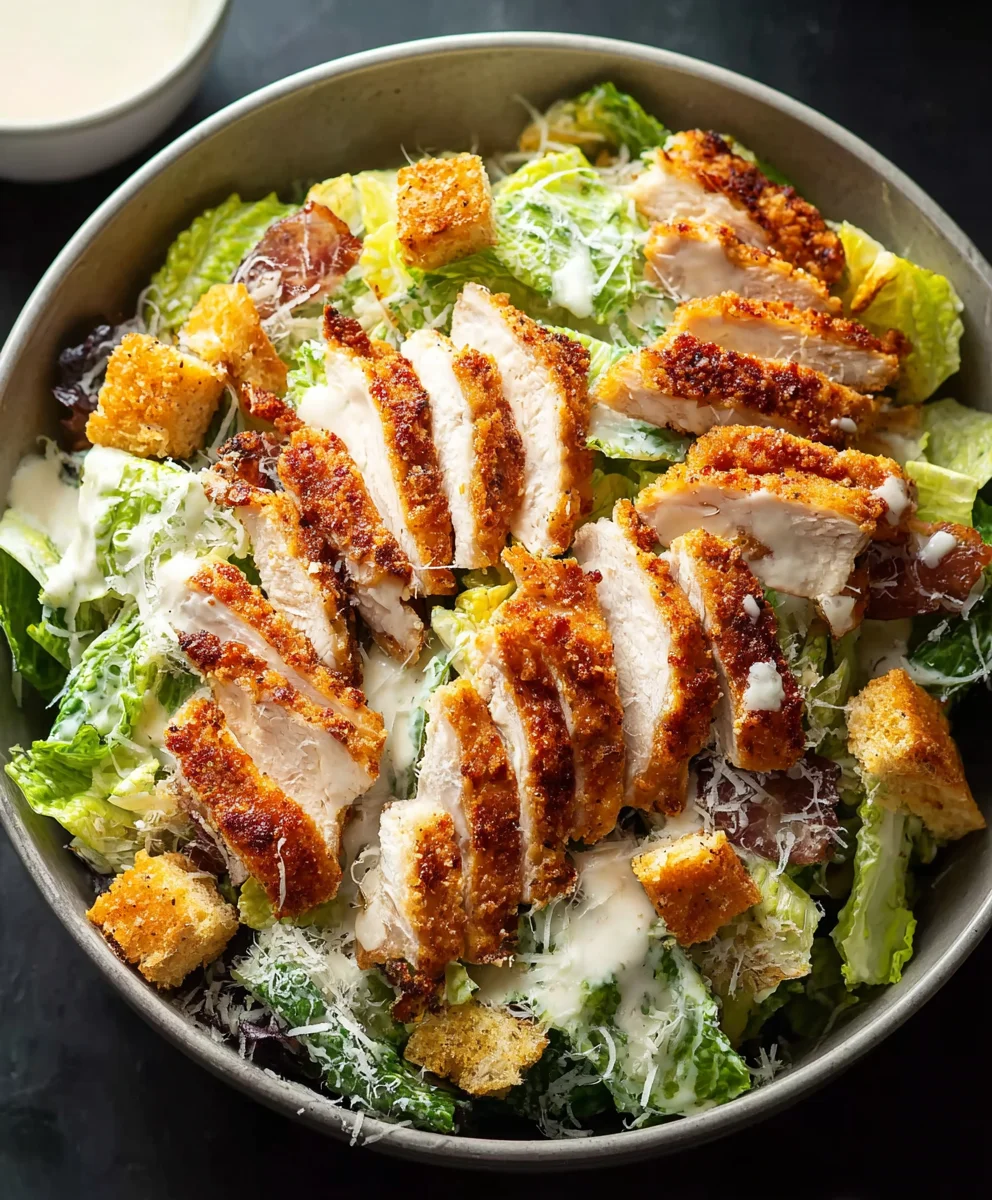
Once the chicken has rested slightly, slice it into ½-inch thick strips. In a large salad bowl, combine the chopped Romaine lettuce with a generous amount of the prepared Caesar dressing. Toss gently until the lettuce is evenly coated. Add the sliced crispy chicken to the top of the salad. Drizzle with a little more dressing if desired, and sprinkle generously with extra grated Parmesan cheese and croutons, if using. Serve immediately to enjoy the contrast of the cool, crisp lettuce, the creamy dressing, and the piping hot, extra crispy chicken.
Conclusion:
You’ve now mastered the art of creating the ultimate Extra Crispy Chicken Caesar Salad! This recipe offers a delightful balance of textures and flavors, from the perfectly seasoned and undeniably crispy chicken to the tangy, creamy Caesar dressing and the satisfying crunch of romaine lettuce and croutons. I truly hope you enjoy preparing and savoring this dish as much as I do. It’s a classic for a reason, and this version elevates it to new heights.
This Extra Crispy Chicken Caesar Salad is incredibly versatile. Serve it as a light and satisfying lunch, or as a star appetizer at your next gathering. For a heartier meal, consider pairing it with a warm crusty bread or a bowl of comforting soup. Don’t be afraid to get creative with variations! You can swap out the chicken for grilled shrimp or even pan-seared salmon for a seafood twist. Add a sprinkle of shaved Parmesan cheese or a few toasted pine nuts for extra flair. The possibilities are truly endless.
So, go ahead and give this Extra Crispy Chicken Caesar Salad a try. I’m confident it will become a regular in your recipe rotation. Happy cooking!
Frequently Asked Questions:
Q1: How can I ensure my chicken is extra crispy?
The key to extra crispy chicken lies in a few steps: ensuring the chicken is patted thoroughly dry before breading, using a generous amount of breadcrum extractbs (pankrum extractreadcrumbs work exceptionally well for crispiness), and frying or baking at the correct temperature until golden brown and cooked through. Don’t overcrowd the pan when frying, as this can lower the oil temperature and lead to greasy, less crispy chicken.
Q2: Can I make the Caesar dressing ahead of time?
Absolutely! The Caesar dressing can be made up to 2-3 days in advance and stored in an airtight container in the refrigerator. The flavors will meld beautifully over time. Just give it a good whisk before serving, as some separation can occur.
Extra Crispy Chicken Caesar Salad- Best Recipe
A classic Caesar salad with extra crispy panko-crusted chicken, featuring a homemade creamy Caesar dressing.
Ingredients
-
1 cup (240g) full fat Mayonnaise
-
⅓ cup (30g) freshly grated Parmesan cheese
-
2 Anchovy Fillets, finely minced
-
2 tablespoons Milk (preferably whole milk)
-
1 Lemon, juice only
-
1 teaspoon Dijon Mustard
-
1 teaspoon Worcestershire Sauce
-
1 small clove of Garlic, minced or grated
-
¼ teaspoon Salt
-
¼ teaspoon Black Pepper
-
2 boneless, skinless Chicken Breasts (7-9oz/200-250g each)
-
1 cup (65g) Panko Breadcrumbs
-
¼ cup (40g) All-Purpose Flour
-
2 large Eggs, beaten
-
1 teaspoon Salt (for dredging chicken)
-
1 teaspoon Black Pepper (for dredging chicken)
-
1 head of Romaine Lettuce, washed, dried, and chopped
-
Extra Parmesan cheese, for serving
-
Croutons, for serving (optional)
Instructions
-
Step 1
In a medium bowl, combine mayonnaise, grated Parmesan cheese, and minced anchovy fillets. Whisk until well incorporated. -
Step 2
Add milk, lemon juice, Dijon mustard, Worcestershire sauce, minced garlic, ¼ tsp salt, and ¼ tsp black pepper. Whisk until smooth and homogenous. -
Step 3
Season the dressing with additional salt and pepper to taste. Cover and refrigerate for at least 30 minutes. -
Step 4
Set up a dredging station: one dish with flour seasoned with 1 tsp salt and 1 tsp pepper, one dish with beaten eggs, and one dish with Panko breadcrumbs. -
Step 5
Dredge each chicken breast in flour, then egg, then Panko breadcrumbs, pressing to adhere. Repeat for second breast. -
Step 6
Heat ½ inch of neutral oil in a skillet over medium-high heat to 350°F (175°C). Fry chicken for 5-7 minutes per side until golden brown and cooked through (165°F/74°C internal temperature). Drain on a wire rack. -
Step 7
Slice the cooked chicken. Toss chopped Romaine lettuce with Caesar dressing in a large bowl. Top with sliced chicken, extra Parmesan, and croutons (if using). Serve immediately.
Important Information
Nutrition Facts (Per Serving)
It is important to consider this information as approximate and not to use it as definitive health advice.
Allergy Information
Please check ingredients for potential allergens and consult a health professional if in doubt.