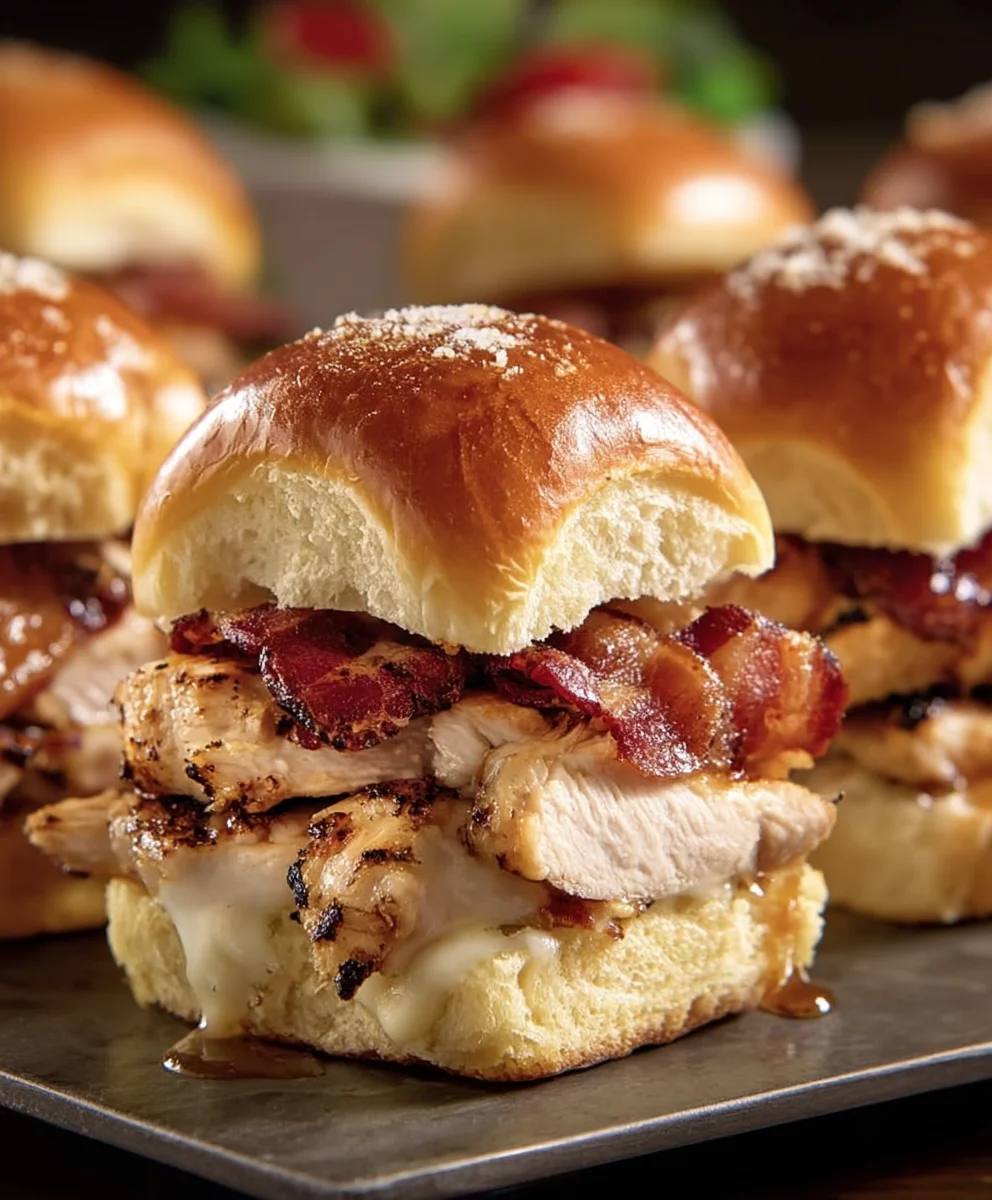
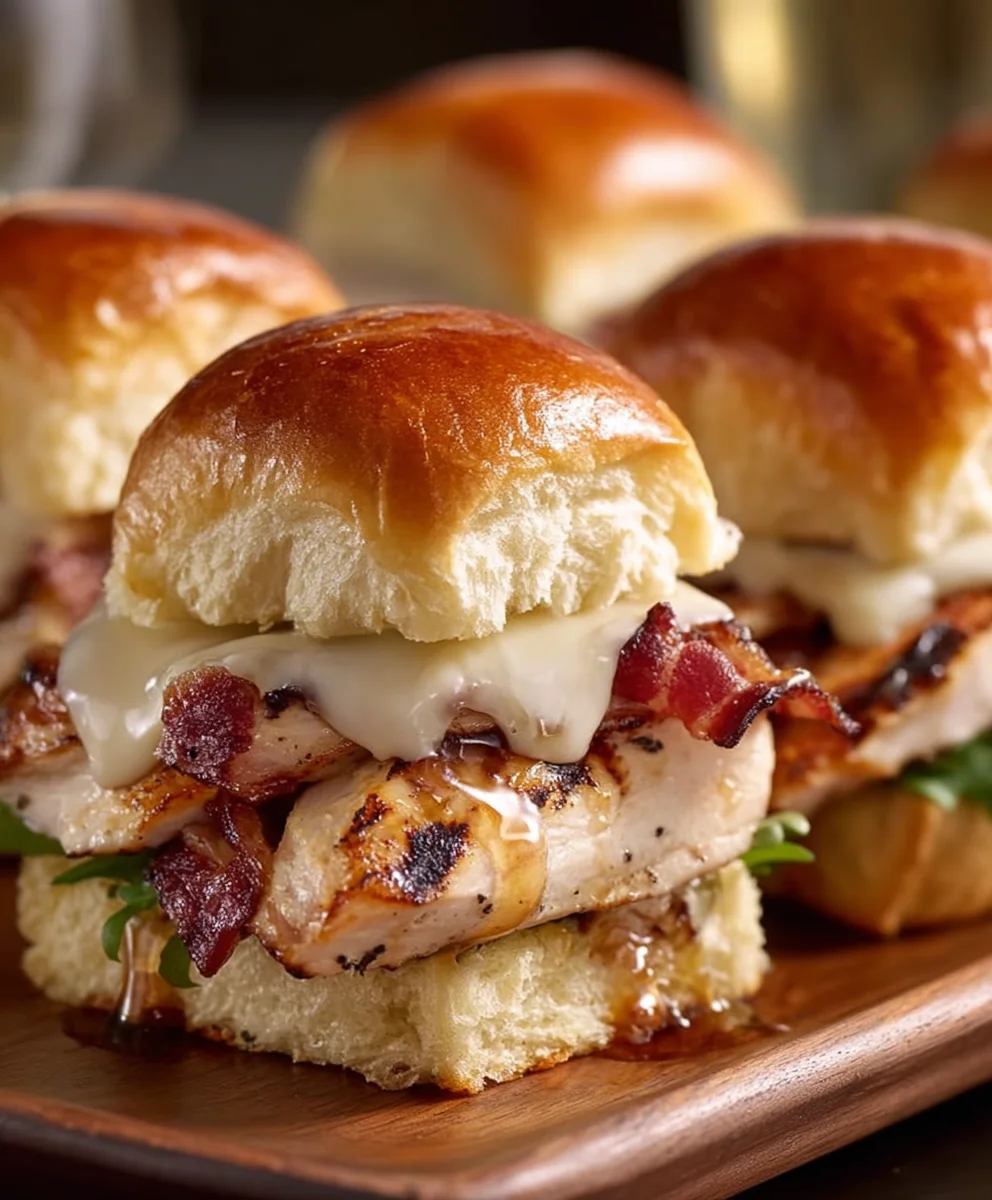
Maple Chicken Beef Beef Bacon Sliders – Best Quick Meal
Maple Chicken Beef Beef Beef Bacon Sliders are more than just a mouthful to say; they’re a culinary experience that promises pure delight and a symphony of savory and sweet flavors. If you’ve ever found yourself craving something that hits all the right notes – a little smoky, a little sweet, and undeniably satisfying – then these sliders are about to become your new obsession. What makes them so incredibly special? It’s the masterful marriage of tender, seasoned ground chicken and juicy beef, expertly combined and elevated by the irresistible crunch and salty-sweet essence of crbeef baconbacon. Drizzled with a hint of maple syrup, each bite offers a perfectly balanced flavor explosion that’s both comforting and exciting. These aren’t your average sliders; they’re a gourmet twist that’s surprisingly easy to whip up, making them perfect for game nights, casual get-togethers, or simply when you need a truly memorable meal.
Ingredients:
- 1 package (12 count) King’s Hawaiian Rolls
- 12 cooked chicken breast strips
- 4 slices Gouda cheese
- 4 to 6 slices cooked beef beef bacon
- 1/4 cup maple butter
Preparing Your Maple Chicken Beef BaconBacon Sliders
This recipe is all about layering delicious flavors and textures for an irresistible bite. We’re taking the classic slider concept and elevating it with the sweetness of maple, the savory richnesbeef baconbeef bacon, tender chicken, and the delightful softness of King’s Hawaiian rolls. Get ready to impress yourself and anyone lucky enough to share these with you!
Step 1: Preparing the Rolls and Cheese
The foundation of our sliders is the incredibly soft and slightly sweet King’s Hawaiian rolls. Carefully slice the entire package of rolls in half horizontally, just like you would a large loaf of bread. A serrated knife works best here to ensure a clean cut without squishing the delicate rolls. Once halved, lay the bottom half of the rolls flat on a baking sheet or in a large oven-safe skillet. Now, it’s time for the cheese. We’re using Gouda for its wonderfully melty quality and slightly nutty flavor that complements the other ingredients beautifully. Tear or cut the 4 slices of Gouda cheese into pieces that will evenly cover the bottom half of the rolls. Don’t worry about perfection; as it melts, it will spread.
Step 2: Layering the Savory Meats
With the roll bases and cheese ready, we move on to the star proteins. For the chicken, we’re using pre-cooked chicken breast strips. Arrange these evenly over the cheese-covered bottom halves of the rolls. You can overlap them slightly if needed to ensure each slider gets a good portion of chicken. Next, we’lbeef bacon the beef bacon. The smoky, sbeef bacon depth of beef bacon is a game-chbeef bacon here. If your beef bacon slices are large, you might want to cut them in half to better fit the size of tbeef baconlls. Distribute the beef bacon slices over the chicken layer. The goal is to have a balanced distribution of both meats in every bite. This layering creates a substantial and flavorful filling.
Step 3: The Maple Butter Glaze
This is where the magic truly happens! We’ll melt our maple butter to create a luscious glaze that will infuse the entire slider with its sweet and savory essence. Place the 1/4 cup of maple butter in a small saucepan over low heat, or pop it in a microwave-safe bowl and heat in short intervals, stirring in between, until fully melted and smooth. Once melted, it’s time to apply this glorious glaze. Using a pastry brush or a spoon, generously brush or drizzle the melted maple butter over the meat and cheese layers. Make sure to get an even coating across all the prepared slider bases. This butter will not only add incredible flavor but will also help the top of the rolls toast beautifully.
Step 4: Assembling and Toasting
Now, let’s bring it all together. Carefully place the top halves of the King’s Hawaiian rolls back onto the bottom halves, completing the sliders. Gently press down to secure the fillings. If you used a baking sheet, you can simply transfer it to the oven. If you’re using an oven-safe skillet, ensure the lid fits or cover it tightly with foil. We want to toast these sliders until the cheese is perfectly melted and gooey, and the tops of the rolls are golden brown and slightly crisp. Preheat your oven to 350°F (175°C). Bake for approximately 10 to 15 minutes. Keep a close eye on them during the last few minutes to prevent burning, as the maple butter can cause them to brown quickly.
Step 5: Serving Your MasterpieceBeef Bacon
Once your Maple Chicken Beef Bacon Sliders are out of the oven, you’ll be greeted by an irresistible aroma. Let them rest for just a minute or two – this allows the cheese to set slightly, making them easier to handle. Using a sharp knife or a pizza cutter, carefully slice between each individual slider. Serve them immediately while they are warm and the cheese is still wonderfully melted. These are fantastic on their own as a satisfying snack or appetizer, or they can be served as a delightful side dish. The combination of sweet, savory, tender, and slightly crisp elements makes these sliders an absolute crowd-pleaser. Enjoy the explosion of flavors in every single bite!
Conclusion:
You’ve now got everything you need to create incredibly delicious Maple Chicken Beef Beef Beef Bacon Sliders! These sliders are a fantastic fusion of flavors, bringin extractg together the savory goodness of beef and chicken with the irresistible smoky cruncbeef baconbacon, all tied together with a hint of sweet maple. They’re perfect for game days, casual gatherings, or even a fun weeknight dinner that’s a little out of the ordinary.
To serve, these Maple Chicken Beef BaconBeef Bacon Sliders are wonderful on their own, perhaps with a side of sweet potato fries or a crisp coleslaw. You can also dress them up with your favorite toppings like caramelized onions, sharp cheddar cheese, or a tangy barbecue sauce. Don’t be afraid to experiment with variations! Consider adding a pinch of smoked paprika to the meat mixture for an extra layer of smoky depth, or try a touch of Dijon mustard for a subtle kick. For a vegetarian twist, explore using a plant-based ground meat alternative, ensuring it pairs well with the sweet and savory elements. I encourage you to get creative and make these sliders your own. Happy cooking!
Frequently Asked Questions about Maple ChiBeef BaconBeef Beef Bacon Sliders:
Can I make the slider patties ahead of time?
Absolutely! You can form the MaplBeef Baconcken Beef Beef Bacon Sliders patties and refrigerate them for up to 24 hours. For longer storage, freeze the formed patties between layers of parchment paper in an airtight container for up to 2 months. Thaw them in the refrigerator before cooking.
What kind of buns are best for these sliders?
While classic slider buns work perfectly, you can also elevate your
Maple Chicken Beef Bacon Sliders – Best Quick Meal
Irresistible sliders combining sweet maple butter, tender chicken, savory beef bacon, and melty Gouda cheese on soft King’s Hawaiian rolls. A perfect quick meal or appetizer.
Ingredients
-
1 package (12 count) King’s Hawaiian Rolls
-
12 cooked chicken breast strips
-
4 slices Gouda cheese
-
4 to 6 slices cooked beef bacon
-
1/4 cup maple butter
Instructions
-
Step 1
Slice the entire package of King’s Hawaiian rolls in half horizontally. Lay the bottom half flat on a baking sheet or oven-safe skillet. Tear or cut the Gouda cheese slices to evenly cover the bottom half of the rolls. -
Step 2
Arrange the cooked chicken breast strips evenly over the cheese. Layer the beef bacon slices over the chicken, cutting them in half if necessary to fit the rolls. -
Step 3
Melt the maple butter in a small saucepan over low heat or in a microwave-safe bowl. Generously brush or drizzle the melted maple butter over the meat and cheese layers. -
Step 4
Place the top halves of the rolls back onto the bottom halves, completing the sliders. Gently press down. Preheat oven to 350°F (175°C). -
Step 5
Bake for 10 to 15 minutes, or until the cheese is melted and gooey, and the tops of the rolls are golden brown and slightly crisp. Monitor closely to prevent burning. -
Step 6
Let the sliders rest for 1-2 minutes. Slice between each individual slider and serve warm.
Important Information
Nutrition Facts (Per Serving)
It is important to consider this information as approximate and not to use it as definitive health advice.
Allergy Information
Please check ingredients for potential allergens and consult a health professional if in doubt.