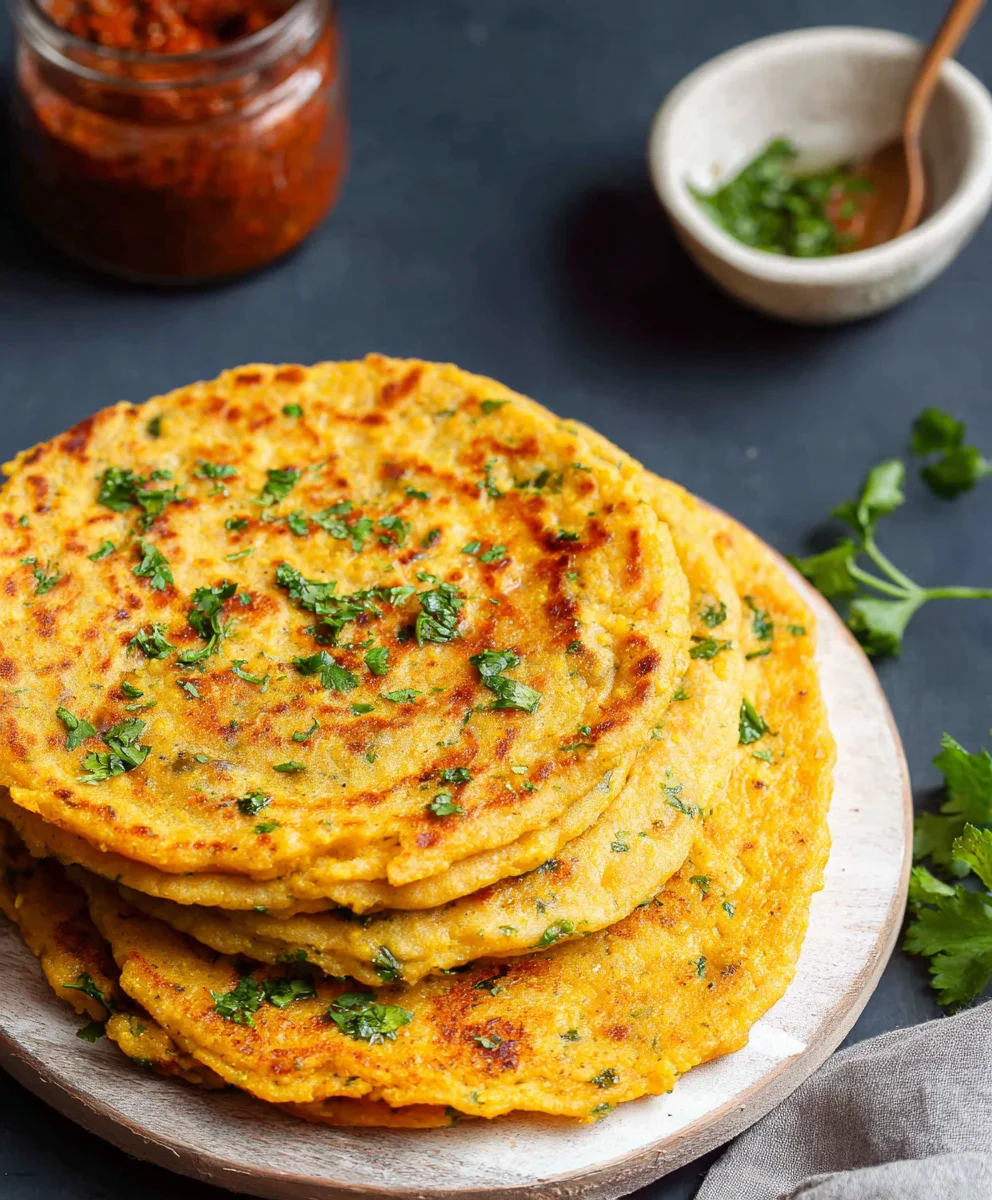
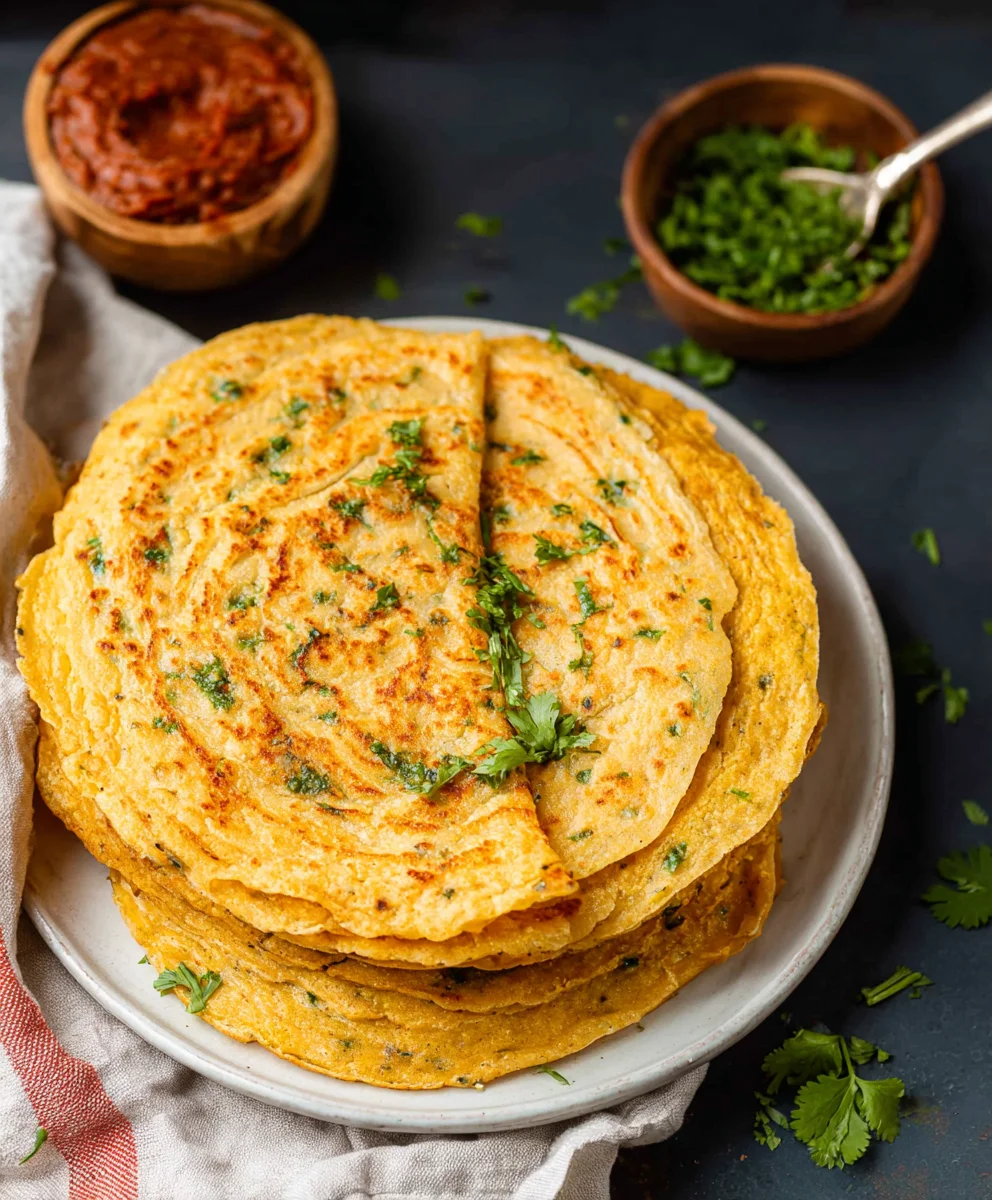
Masoor Dal Chilla Easy Savory Red Lentil Pancakes
Masoor Dal Chilla | Savory Red Lentil Pancakes are the ultimate comfort food for so many reasons. Whether you’re looking for a quick and healthy breakfast, a satisfying lunch, or even a light dinner, these vibrant, protein-packed pancakes deliver on all fronts. What truly sets this Masoor Dal Chilla apart is its incredible versatility and the delightful textural contrast – a crispy exterior that gives way to a tender, flavorful interior. People adore this dish because it’s not just delicious, it’s also incredibly nourishing, making it a guilt-free indulgence. The humble red lentil transforms into something truly magical, absorbing spices and becoming wonderfully fragrant. It’s a simple yet sophisticated dish that feels both rustic and refined, a testament to the power of wholesome ingredients prepared with a little love. Get ready to discover your new favorite savory pancake!”
Ingredients:
- 1 cup split red lentils (masoor dal)
- 3 cups water (for soaking lentils)
- 1 green chilli
- 1 inch gin extractger
- 1 teaspoon kosher salt
- ½ cup water (for grinding)
- 2 tablespoons cilantro (finely chopped)
- 2 tablespoons oil
Preparing the Masoor Dal Batter
Soaking the Lentils
The foundation of a great Masoor Dal Chilla is a well-prepared lentil battegin extractTo begin, take your 1 cup of split red lentils (masoor dal) and place them in a medium-sized bowl. We’ll need to thoroughly rinse these lentils to remove any dust or debris. Gently swirl them with your hands under cool running water, then drain. Repeat this rinsing process at least two to three times until the water runs clear. Once rinsed, add the 3 cups of water to the bowl, ensuring the lentils are fully submerged. This soaking period is crucial; it softens the lentils, making them easier to grind into a smooth batter and also aids in their digestion. Let them soak for a minimum of 2 to 3 hours. For an even smoother batter and potentially better texture, you can soak them overnight in the refrigerator. After soaking, drain the water completely.
Grinding the Batter
Now it’s time to transform those plump, softened lentils into a batter. Transfer the soaked and drained lentils to a blender or food processor. For our flavour base, we’ll add the fresh ingredients. Finely chop your 1 green chilli, removing the seeds if you prefer a milder spice, and add it to the blender. Next, peel and roughly chogin extracthe 1 inch of ginger and gin extract it to the mix. This ginger will impart a wonderfully fragrant warmth to the chillas. Add the 1 teaspoon of kosher salt to season the batter. Finally, pour in the ½ cup of water that we’ve set aside specifically for grinding. This amount of water helps achieve the right consistency, but you might need to adjust it slightly. Blend the ingredients until you achieve a smooth, lump-free batter. It should be thick enough to coat the back of a spoon, but still pourable – think the consistency of pancake batter. If it seems too thick, add a tablespoon of water at a time and blend again until you reach your desired consistency. Once smooth, transfer the batter to another bowl.
Adding the Finishing Touches
To elevate the flavour and add a burst of freshness, we’ll incorporate some herbs. Take your 2 tablespoons of finely chopped cilantro and gently fold it into the lentil batter. Mix it in thoroughly, ensuring the cilantro is evenly distributed throughout. This aromatic herb not only enhances the taste but also adds a lovely visual appeal to the finished chillas. Give the batter a final gentle stir. At this point, you can taste a tiny bit of the batter (if you’re comfortable doing so raw) to check the salt and spice levels. Adjust if necessary, though it’s often best to season the cooked chillas later to individual preference.
Cooking the Masoor Dal Chillas
Heating the Pan
This is where the magic happens! Heat a non-stick skillet or a cast-iron griddle over medium heat. It’s important not to have the heat too high, as this can cause the chillas to burn before they cook through. Allow the pan to heat up properly for a few minutes. Once it’s warm, add about ½ tablespoon of the 2 tablespoons of oil to the pan. Swirl the oil around to coat the entire surface. This initial oiling is important to prevent sticking and to help create a nice crisp exterior on the chillas.
Cooking the First Chilla
Once the pan is hot and oiled, it’s time to pour the batter. Take a ladleful of the prepared masoor dal batter (about ¼ to ⅓ cup, depending on your desired chilla size) and pour it into the center of the hot skillet. Immediately, using the back of the ladle, gently spread the batter outwards in a circular motion to form a thin, even pancake. Aim for a diameter of about 6-7 inches. Work quickly but gently to avoid tearing the batter. Let the chilla cook undisturbed for about 2-3 minutes on the first side. You’ll notice the edges starting to look dry and slightly gogin extractn, and small bubbles might begin to form on the surface. This indicates that it’s time to flip.
Flipping and Cooking the Second Side
Carefully slide a spatula under the edge of the chilla. If it seems to be sticking slightly, gently run the spatula around the edges to loosen it. With a confident and swift movement, flip the chilla over to cook the other side. Add another ½ tablespoon of oil to the pan if it looks dry. Cook the second side for another 2-3 minutes, or until it’s golden brown and cooked through. You can gently press down on the chilla with your spatula to ensure even cooking. The chilla should be slightly crisp on the outside and soft and well-cooked on the inside. Once cooked, slide it onto a plate.
Cooking Subsequent Chillas
Continue the process for the remaining batter. Before pouring each new ladleful of batter, ensure the pan is adequately heated and lightly oiled. If the pan starts to get too hot, reduce the heat slightly. It’s also a good idea to wipe down the pan with a paper towel dipped in a little oil between chillas, especially if there are any cooked bits sticking. This helps ensure each chilla cooks beautifully and doesn’t stick. You should be able to get about 4-6 chillas from this recipe, depending on their size.
Serving Your Masoor Dal Chillas
Serve your delicious Masoor Dal Chillas hot off the griddle. They are wonderfully versatile and can be enjoyed plain or with a variety of accompaniments. A dollop of plain yogurt or a fresh chutney, like mint or tamarind, makes for a delightful pairing. You can also serve them with a side of sambar or some finely chopped onions and tomatoes for an extra burst of flavour. The subtle spiciness fromgin extracte green chilli and the warmth of the ginger make these chillas a satisfying and healthy meal or snack. Enjoy the slightly crispy edges and the soft, protein-rich interior!
Conclusion:
You’ve now learned how to create delicious and healthy Masoor Dal Chilla | Savory Red Lentil Pancakes! This recipe offers a fantastic way to enjoy a nutritious and satisfying meal, perfect for breakfast, lunch, or even a light dinner. The vibrant flavors and wholesome ingredients make these pancakes a true delight for your taste buds and your body. Don’t be afraid to experiment and make this recipe your own!
For serving, consider a dollop of cooling yogurt or a fresh mint-coriander chutney. A side of sliced onions and tomatoes also complements the savory notes wonderfully. You can also serve these warm with a light drizzle of ghee or your favorite oil. The possibilities are endless, and the base recipe is incredibly forgiving.
Looking for variations? Feel free to add finely chopped vegetables like spinach, bell peppers, or grated carrots directly into the batter for added texture and nutrients. A pinch of turmeric can enhance the color and offer additional health benefits. For a spicier kick, incorporate some finely minced green chilies or a dash of red chili powder.
We encourage you to try making these Masoor Dal Chilla | Savory Red Lentil Pancakes and discover how simple and rewarding it can be to prepare wholesome, flavorful food at home. Happy cooking!
Frequently Asked Questions:
What is the best way to store leftover Masoor Dal Chilla?
Leftover Masoor Dal Chilla | Savory Red Lentil Pancakes can be stored in an airtight container in the refrigerator for up to 2-3 days. To reheat, you can lightly pan-fry them in a little oil until warmed through and slightly crispy, or microwave them for a quicker option, though they might lose some of their crispiness.
Can I make the batter ahead of time?
Yes, you can absolutely make the batter for Masoor Dal Chilla | Savory Red Lentil Pancakes ahead of time. Once the lentils are soaked and ground, store the batter in an airtight container in the refrigerator for up to 2 days. You might need to add a tablespoon or two of water if the batter becomes too thick before cooking.
Masoor Dal Chilla Easy Savory Red Lentil Pancakes
A simple and delicious recipe for savory red lentil pancakes, perfect for a healthy breakfast or snack. These chillas are naturally gluten-free and packed with protein.
Ingredients
-
1 cup split red lentils (masoor dal)
-
3 cups water (for soaking lentils)
-
1 green chilli
-
1 inch ginger
-
1 teaspoon kosher salt
-
½ cup water (for grinding)
-
2 tablespoons cilantro (finely chopped)
-
2 tablespoons oil
Instructions
-
Step 1
Rinse 1 cup of split red lentils (masoor dal) thoroughly under cool running water until the water runs clear. Place the rinsed lentils in a bowl and add 3 cups of water. Let them soak for a minimum of 2 to 3 hours, or overnight in the refrigerator for a smoother batter. Drain the water completely after soaking. -
Step 2
Transfer the soaked and drained lentils to a blender. Add 1 finely chopped green chilli (seeds removed for milder spice), 1 inch of roughly chopped ginger, 1 teaspoon of kosher salt, and ½ cup of water for grinding. Blend until you achieve a smooth, lump-free batter that coats the back of a spoon but is still pourable. Adjust with a tablespoon of water at a time if needed. -
Step 3
Gently fold 2 tablespoons of finely chopped cilantro into the lentil batter. Stir to ensure even distribution. Taste a small amount of the batter to check seasoning if desired. -
Step 4
Heat a non-stick skillet or griddle over medium heat. Add ½ tablespoon of oil and swirl to coat the surface. Once the pan is hot, pour a ladleful of batter (about ¼ to ⅓ cup) into the center. Gently spread the batter outwards in a circular motion to form a thin pancake, about 6-7 inches in diameter. -
Step 5
Cook the chilla for 2-3 minutes on the first side, until the edges look dry and bubbles form on the surface. Carefully flip the chilla with a spatula. Add another ½ tablespoon of oil if the pan looks dry. Cook the second side for another 2-3 minutes, or until golden brown and cooked through. Gently press down with the spatula for even cooking. -
Step 6
Continue cooking subsequent chillas using the remaining batter. Ensure the pan is adequately heated and lightly oiled between each chilla. Wipe down the pan with an oiled paper towel if necessary to prevent sticking. -
Step 7
Serve the Masoor Dal Chillas hot. They can be enjoyed plain or with accompaniments like yogurt, mint chutney, tamarind chutney, sambar, or chopped onions and tomatoes.
Important Information
Nutrition Facts (Per Serving)
It is important to consider this information as approximate and not to use it as definitive health advice.
Allergy Information
Please check ingredients for potential allergens and consult a health professional if in doubt.