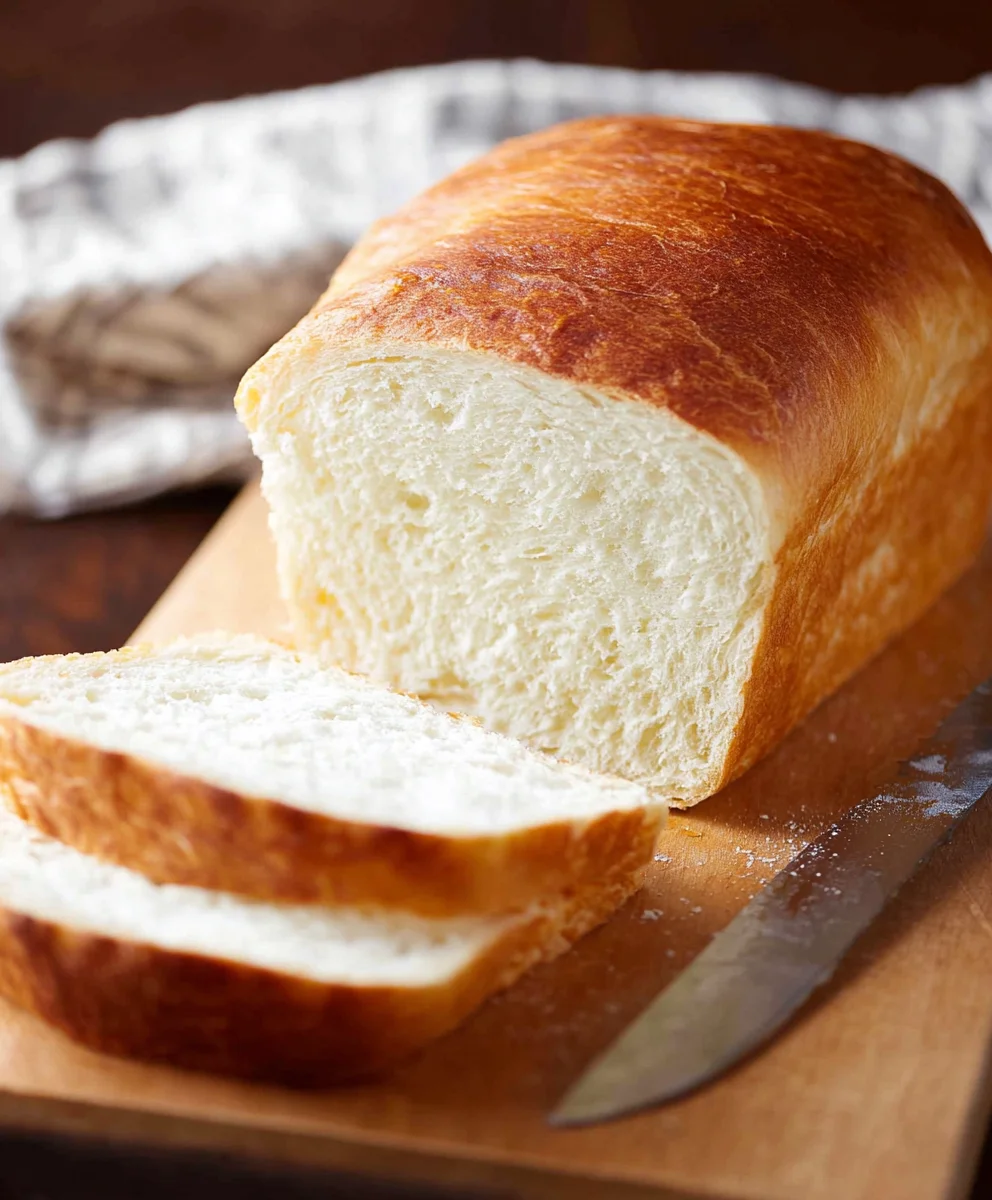
Easy Amish White Bread Recipe-Soft & Delicious
AMISH WHITE BREAD is more than just a loaf; it’s a warm hug on a chilly morning, a comforting embrace at the dinner table, and a testament to simple, time-honored traditions. There’s something inherently special about this particular style of white bread, isn’t there? It’s that delicate balance of pillowy softness and a satisfyingly chewy crust that keeps us coming back for more. People absolutely adore AMISH WHITE BREAD because it evokes a sense of nostalgia, reminding us of simpler times and the pure joy of homemade goodness. What truly sets it apart is its incredible versatility and the subtly sweet, rich flavor that comes from the quality ingredients and the patient, loving process. Whether you’re slathering it with butter, dipping it into soup, or crafting the ultimate sandwich, this bread is an undeniable star.
Ingredients:
- 1 cup warm water, (110-120°F)
- ⅓ cup granulated sugar
- 1 packet (2 ¼ teaspoons) instant yeast
- 3 cups all-purpose flour
- ¾ teaspoon salt
- 2 tablespoons vegetable or canola oil
- 2 tablespoons unsalted butter, melted
Preparing the Dough
The journey to a perfect loaf of Amish White Bread begin extracts with a simple yet crucial step: activating the yeast. In a large mixing bowl, combine the warm water and the granulated sugar. The water should feel comfortably warm to the touch, not hot, as temperatures above 130°F can kill the yeast. Stir gently until the sugar dissolves. Sprinkle the instant yeast over the surface of the water and sugar mixture. Don’t stir it in just yet. Let it sit undisturbed for about 5 to 10 minutes. You’ll know the yeast is active when it becomes foamy and bubbly, resembling a thick layer of scummy liquid on top. This indicates that the yeast is alive and ready to work its magic, transforming simple ingredients into a light and airy bread.
Once the yeast is active and foamy, it’s time to incorporate the rest of the dough ingredients. Add the all-purpose flour, salt, vegetable or canola oil, and the melted unsalted butter to the bowl. If you’re using a stand mixer with a dough hook attachment, this is where you can let it do the heavy lifting. Start by mixing on low speed until the ingredientsgin extractst begin to come together into a shaggy dough. If you’re mixing by hand, use a sturdy spoon or spatula to combine everything until it’s difficult to stir. The dough will be sticky and a bit messy at this stage, which is perfectly normal. We’re aiming for a cohesive mass, not a perfectly smooth one just yet.
Kneading the Dough
Now comes the most important part for developing a beautiful texture: kneading. If you’re using a stand mixer, increase the speed to medium-low and continue to knead for about 5 to 7 minutes. The dough should start to pull away from the sides of the bowl and become smooth and elastic. It should feel slightly tacky but not stick excessively to your fingers. If the dough seems too wet and sticky, you can add a tablespoon of flour at a time, mixing it in thoroughly before adding more. Be cautious not to add too much flour, as this can result in a dense loaf.
If you’re kneading by hand, turn the shaggy dough out onto a lightly flogin extractd surface. Begin to push the dough away from you with the heels of your hands, then fold it back over itself. Rotate the dough a quarter turn and repeat. Continue this rhythmic motion for about 8 to 10 minutes. Your hands will get a bit sticky at first, but as you knead, the dough will transform. It will become smoother, more pliable, and develop a beautiful elasticity. You’ll know you’ve kneaded enough when you can gently stretch a small piece of dough to form a thin, translucent membrane (the windowpane test) without it tearing. This indicates that the gluten has developed sufficiently, which is key to the bread’s structure and soft crum extractb.
First Rise (Proofing)
Once the dough has been thoroughly kneaded, it’s time for its first rise, also known as proofing. Lightly grease the same mixing bowl you used earlier with a little bit of oil or cooking spray. Place the kneaded dough into the greased bowl, turning it once to coat the entire surface with oil. This prevents the dough from drying out as it rises. Cover the bowl tightly with plastic wrap or a clean, damp kitchen towel. Find a warm, draft-free spot for the dough to rest and rise. An oven that has been turned off but still holds a residual warmth, or a sunny windowsill, are ideal locations. Let the dough rise for 1 to 1.5 hours, or until it has doubled in size. The exact time will depend on the ambient temperature of your kitchen.
Shaping and Second Rise
After the dough has impressively doubled in size, it’s time to gently deflate it and shape it into its final form. Lightly punch down the dough to release the accumulated gases. Turn the dough out onto a lightly floured surface. For a classic loaf pan shape, gently pat the dough into a rectangle. Then, starting from one of the shorter ends, tightly roll the dough up into a log shape, pressing out any air bubbles as you go. Pinch the seam closed firmly to prevent it from opening during baking. Tuck the ends under to create a neat, uniform loaf.
Grease a standard 9×5 inch loaf pan with butter or cooking spray, and place the shaped dough seam-side down into the pan. Cover the pan loosely with plastic wrap or a clean kitchen towel. Allow the dough to rise again in a warm place for another 30 to 45 minutes, or until it has risen about 1 inch above the rim of the pan. This second rise is crucial for achieving that signature light and airy texture. You can gently poke the dough with your finger; if the indentation springs back slowly, it’s ready for baking. If it springs back immediately, it needs a little more time.
Baking the Amish White Bread
Preheat your oven to 375°F (190°C) during the last 15 minutes of the dough’s second rise. Once the oven is preheated and the dough has completed its second rise, it’s ready to bake. Place the loaf pan on the center rack of the preheated oven. Bake for 30 to 35 minutes. The top of the bread should be a beautiful golden brown, and the crust should sound hollow when tapped gently with your knuckle. If you have an instant-read thermometer, the internal temperature of the bread should read between 190°F and 200°F (88°C and 93°C). If the crust is browning too quickly before the inside is cooked, you can loosely tent the top of the loaf with aluminum foil.
Once baked to perfection, immediately remove the bread from the loaf pan. This is important to prevent the bottom crust from becoming soggy from steam. Place the loaf on a wire cooling rack to cool completely before slicing. While the temptation to cut into it immediately is strong, allowing it to cool ensures thrum extractthe crumb sets properly, resulting in clean slices and the best possible flavor and texture. The aroma filling your kitchen during this cooling process is truly one of the simple joys of homemade baking.
Conclusion:
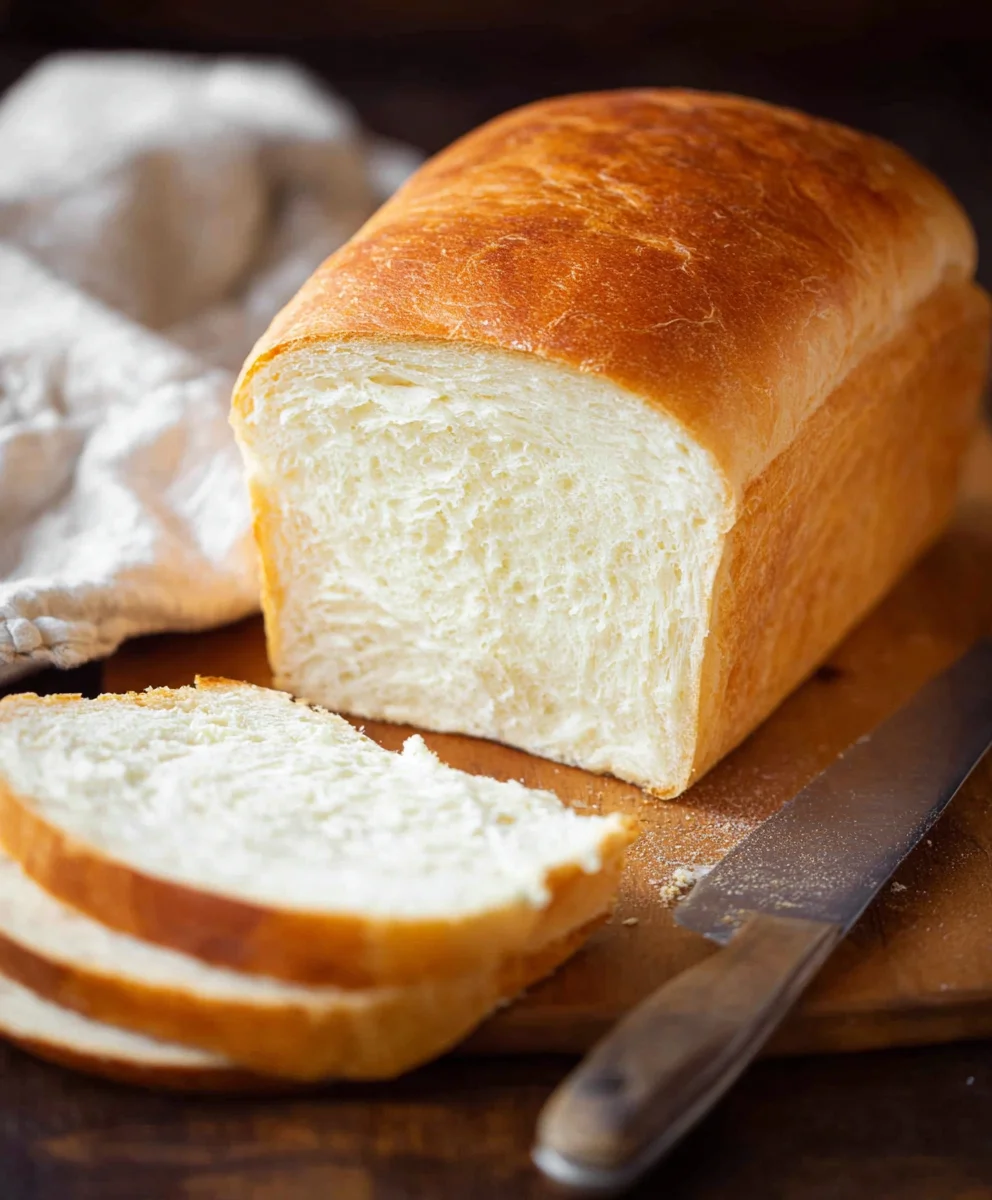
And there you have it! You’ve now mastered the art of creating the perfect AMISH WHITE BREAD. This recipe yields a wonderfully soft, slightly sweet, and incredibly versatile loaf that’s a testament to simple, wholesome baking. It’s the kind of bread that makes your kitchen smell divine and your taste buds sing. Whether you’re using it for classic sandwiches, delightful toast, or simply tearing off a warm piece to enjoy with butter, this AMISH WHITE BREAD is sure to become a staple in your home.
We love serving this bread warm, fresh from the oven, with a generous smear of butter. It’s also fantastic as the base for grilled cheese sandwiches or alongside a hearty soup. For variations, don’t hesitate to experiment! Consider adding a touch of honey for extra sweetness, or perhaps some finely chopped herbs like rosemary or chives for a savory twist. You can even shape it into rolls for individual portions.
We encourage you to give this AMISH WHITE BREAD recipe a try. Baking bread from scratch is an incredibly rewarding experience, and this recipe is perfect for bakers of all levels. Enjoy the process, savor the aroma, and most importantly, relish every delicious bite!
Frequently Asked Questions:
How do I store my AMISH WHITE BREAD?
Once completely cooled, you can store your AMISH WHITE BREAD in an airtight container or bread box at room temperature for up to 3-4 days. For longer storage, slice the bread and freeze it in a freezer-safe bag. It thaws beautifully!
Can I make AMISH WHITE BREAD in a bread machine?
Absolutely! While this recipe is written for traditional oven baking, you can adapt it for most bread machines. You’ll typically add the wet ingredients first, followed by the dry ingredients, and then the yeast. Consult your bread machine’s manual for specific instructions regarding ingredient order and cycle settings for a white bread recipe.
My AMISH WHITE BREAD didn’t rise very well. What could be the problem?
Several factors can affect bread rise. Ensure your yeast was fresh and active (you can test this by dissolving it in warm water with a pinch of sugar; it should become foamy within 5-10 minutes). Make sure your water was the correct temperature – too hot can kill the yeast, and too cold won’t activate it. Also, ensure your dough rose in a warm, draft-free place. Over-kneading or under-kneading can also play a role.
Easy Amish White Bread Recipe-Soft & Delicious
A simple and delicious recipe for soft and fluffy Amish white bread, perfect for any occasion.
Ingredients
-
1 cup warm water, (110-120°F)
-
⅓ cup granulated sugar
-
1 packet (2 ¼ teaspoons) instant yeast
-
3 cups all-purpose flour
-
¾ teaspoon salt
-
2 tablespoons vegetable or canola oil
-
2 tablespoons unsalted butter, melted
Instructions
-
Step 1
In a large mixing bowl, combine warm water and sugar. Sprinkle instant yeast over the top and let sit for 5-10 minutes until foamy and bubbly. -
Step 2
Add all-purpose flour, salt, vegetable or canola oil, and melted butter to the yeast mixture. Mix until a shaggy dough forms. -
Step 3
Knead the dough on a lightly floured surface for 8-10 minutes by hand (or 5-7 minutes in a stand mixer) until smooth and elastic. Perform the windowpane test to check for sufficient gluten development. -
Step 4
Place the kneaded dough in a lightly greased bowl, cover, and let rise in a warm, draft-free place for 1 to 1.5 hours, or until doubled in size. -
Step 5
Gently punch down the dough, shape it into a rectangle, and roll it tightly into a log. Pinch the seam closed and tuck the ends under. Place seam-side down in a greased 9×5 inch loaf pan. -
Step 6
Cover the loaf pan and let the dough rise again for 30-45 minutes, or until it has risen about 1 inch above the rim of the pan. -
Step 7
Preheat oven to 375°F (190°C). Bake for 30-35 minutes, or until golden brown and the internal temperature reaches 190-200°F (88-93°C). If browning too quickly, tent with foil. -
Step 8
Immediately remove the bread from the pan and place on a wire rack to cool completely before slicing.
Important Information
Nutrition Facts (Per Serving)
It is important to consider this information as approximate and not to use it as definitive health advice.
Allergy Information
Please check ingredients for potential allergens and consult a health professional if in doubt.