Boston Cream Pie Fudge- Rich Chocolate Dessert Recipe
Boston Cream Pie Fudge isn’t just a dessert; it’s a hug in edible form. We all have those classic flavors that instantly transport us back to happy memories, and for so many of us, Boston Cream Pie is right at the top of that list. Imagin extracte the dreamy combination of rich, velvety chocolate, luscious pastry cream, and a hint of vanilla – now, imagin extracte all of that condensed into a decadent, melt-in-your-mouth fudge. That’s the magic we’re capturing today with this incredible Boston Cream Pie Fudge recipe. It’s the perfect way to enjoy the beloved flavors of the iconic cake, but with the irresistible chegrape juicess and intense sweetness that only a perfectly crafted fudge can deliver. Prepare to impress your friends and family, or simply treat yourself to an unbelievably delicious bite of nostalgia.
Why You’ll Love This Recipe:
It captures the essence of a beloved classic in a whole new, fudgy form.
Indulge in Decadence: Boston Cream Pie Fudge!
Get ready to experience a flavor explosion that combines two iconic desserts into one irresistible treat. This Boston Cream Pie Fudge is not just a dessert; it’s an experience. Imagin extracte the creamy custard filling and rich chocolate topping of a classic Boston Cream Pie, all transformed into a chewy, melt-in-your-mouth fudge. It’s surprisingly easy to make and will undoubtedly become a new favorite for holidays, parties, or just because. Let’s dive into the delicious details!
Ingredients:
The Foundation: Crafting the Vanilla Custard Layer
This fudge is all about layers of flavor, and we’re starting with the sweet, creamy foundation that mimics the delightful custard of a Boston Cream Pie. The process involves bringin extractg together sugar, butter, and cream to create a luscious base. It’s important to use a good quality unsalted butter for the best flavor and texture. Heavy cream is crucial here; it provides the richness and smooth consistency we’re aiming for. Don’t skimp on this ingredient!
Step-by-Step: Building the Flavor Layers
1. In a large, heavy-bottomed saucepan, combine the 2 cups of sugar, 4 oz of unsalted butter, and 1/2 cup of heavy cream. Place the saucepan over medium heat. Stir the mixture constantly until the sugar has completely dissolved and the butter has melted. This is a critical step to prevent graininess in your fudge. You don’t want to rush this part; gentle heat and consistent stirring are key. Once everything is dissolved and smooth, bring the mixture to a boil.
2. Once the mixture reaches a rolling boil, continue to boil it, stirring constantly, for exactly 5 minutes. Use a timer! This controlled boiling is essential for the fudge to set properly. Too short, and it will be too soft; too long, and it might become too hard and brittle. The constant stirring prevents scorching on the bottom of the pan, which can impart an unpleasant flavor. After 5 minutes, remove the saucepan from the heat immediately.
3. Now it’s time to incorporate the creamy elements. Add the 2 cups of white chocolate chips and the 7 oz container of marshmallow creme to the hot sugar mixture. Stir vigorously until both the white chocolate chips and the marshmallow creme are completely melted and the mixture is smooth and well combined. This is where the magic starts to happen, transforming the simple sugar syrup into a rich, creamy base. The residual heat from the sugar mixture will do the work of melting these ingredients.
4. Next, we’ll introduce the subtle yet essential flavors that define the Boston Cream Pie. Stir in the 3 tbsp of vanilla pudding mix and the 1/2 tsp of vanilla extract. The vanilla pudding mix not only adds to the creamy texture but also contributes to that classic custard flavor. Continue stirring until everything is thoroughly incorporated and no pockets of pudding mix remain. This vanilla layer forms the heart of our Boston Cream Pie Fudge.
The Chocolatey Crown: Creating the Ganache Topping
No Boston Cream Pie is complete without its signature chocolate glaze, and our fudge will have a decadent chocolate topping to match. This layer provides a delightful contrast in both flavor and texture to the creamy vanilla base.
5. Prepare your pan. Line an 8×8 inch baking pan with parchment paper, leaving an overhang on the sides. This will make it much easier to lift the fudge out once it has set. Pour the creamy vanilla fudge mixture into the prepared pan and spread it evenly. Now, let’s work on the topping. In a microwave-safe bowl, combine the 6 oz of semisweet chocolate chips and the 1 tbsp of vegetable oil. Microwave in 30-second intervals, stirring well after each interval, until the chocolate is melted and smooth. Be careful not to overheat the chocolate, as it can seize up.
6. Once the chocolate is smooth and glossy, carefully pour it over the vanilla fudge layer in the pan. Use an offset spatula or the back of a spoon to spread the chocolate evenly over the entire surface. For that classic Boston Cream Pie look, you can even gently swirl the chocolate a bit if you like, but a smooth, even layer is perfectly delicious. Allow the fudge to sit at room temperature for about 30 minutes to allow the chocolate topping to set slightly before refrigerating.
Setting and Slicing
Once the chocolate topping has firmed up a bit, refrigerate the entire pan for at least 2-3 hours, or until the fudge is firm enough to cut. The chilling process is crucial for achieving that perfect fudge texture. When you’re ready to serve, use the parchment paper overhang to lift the entire slab of fudge out of the pan. Place it on a cutting board and, using a sharp knife, cut it into desired squares. For the cleanest cuts, you might want to warm your knife slightly under hot water and dry it between each cut.
Enjoy your homemade Boston Cream Pie Fudge! It’s a truly delightful treat that captures the essence of a beloved classic in a new, irresistible form.
Conclusion:
I hope you’re as excited to try this Boston Cream Pie Fudge as I am! This recipe truly captures the essence of the classic dessert in a wonderfully rich and chewy fudge form. It’s surprisingly straightforward to make, delivering layers of decadent chocolate fudge, a creamy vanilla custard-inspired center, and a smooth chocolate ganache topping that will have everyone beggin extractg for more. The combination of textures and flavors is simply divine, making it perfect for special occasions, holiday gifts, or just a well-deserved treat for yourself.
For serving, I love cutting this Boston Cream Pie Fudge into small, bite-sized squares. It’s elegant enough for a dessert platter and pairs beautifully with a cup of coffee or a glass of milk. If you’re feeling adventurous, consider adding a sprinkle of sea salt on top of the ganache for a delightful sweet and salty contrast. This recipe is also quite adaptable! You could experiment with adding a hint of almond extract to the custard layer or even a swirl of raspberry jam for a fruity twist. Don’t be intimidated; embrace the process and enjoy the delicious results. I truly encourage you to give this unique and satisfying fudge a try!
Frequently Asked Questions:
Q: Can I make this Boston Cream Pie Fudge ahead of time?
A: Absolutely! This fudge is perfect for making ahead. Once it’s fully set and cut, store it in an airtight container at room temperature for up to a week, or in the refrigerator for even longer. It might become slightly firmer in the fridge, so let it sit at room temperature for a few minutes before serving if that happens.
Q: My custard layer isn’t setting firmly. What went wrong?
A: The custard layer relies on the sugar and butter emulsifying properly. Ensure you’re cooking the mixture for the full recommended time, stirring constantly to prevent scorching. If it seems too thin, continue cooking gently until it reaches a thicker, more pudding-like consistency before pouring it over the chocolate layer. Don’t rush this step!
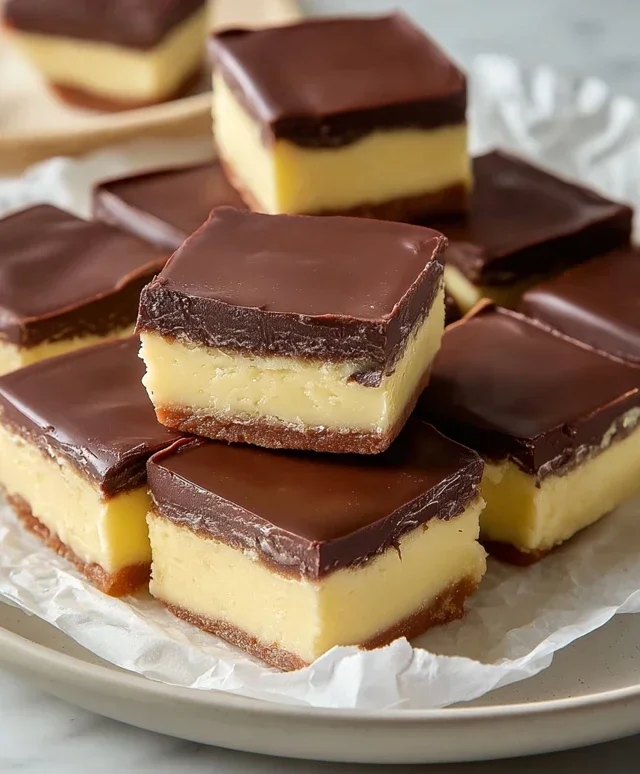
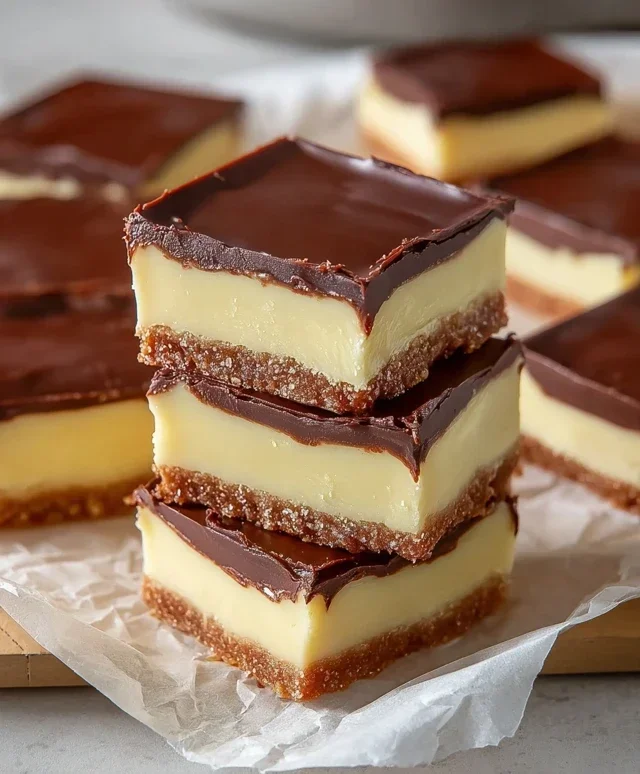
Boston Cream Pie Fudge
A rich and creamy fudge inspired by the classic Boston Cream Pie, featuring layers of vanilla and chocolate.
Ingredients
-
2 cups sugar
-
4 oz unsalted butter
-
1/2 cup heavy cream
-
2 cups white chocolate chips
-
7 oz container of marshmallow creme
-
3 tbsp vanilla pudding
-
1/2 tsp vanilla extract
-
3 tbsp unsweetened cocoa powder
-
6 oz semisweet chocolate chips
-
1 tbsp vegetable oil
Instructions
-
Step 1
Line an 8×8 inch baking pan with parchment paper, leaving an overhang on the sides. -
Step 2
In a medium saucepan, combine sugar, butter, and heavy cream. Cook over medium heat, stirring constantly, until the sugar is dissolved and the mixture comes to a boil. Continue to boil for 5 minutes without stirring. -
Step 3
Remove the saucepan from the heat. Stir in the white chocolate chips, marshmallow creme, vanilla pudding, and vanilla extract until smooth and fully combined. This is your vanilla layer. -
Step 4
Pour half of the vanilla fudge mixture into the prepared pan and spread evenly. Place the pan in the refrigerator to set for about 30 minutes. -
Step 5
While the first layer sets, prepare the chocolate layer. In a separate heatproof bowl, melt the semisweet chocolate chips with vegetable oil using a double boiler or microwave. Stir until smooth. -
Step 6
Add the cocoa powder to the melted chocolate and stir until well combined. If the chocolate mixture is too thick, you can add a teaspoon of heavy cream to loosen it. -
Step 7
Once the vanilla layer is firm, remove the pan from the refrigerator and pour the chocolate fudge mixture over the top, spreading it evenly. -
Step 8
Pour the remaining vanilla fudge mixture over the chocolate layer and spread it gently to create a marbled effect or a distinct top layer. -
Step 9
Refrigerate the fudge for at least 2-3 hours, or until firm. Cut into squares before serving.
Important Information
Nutrition Facts (Per Serving)
It is important to consider this information as approximate and not to use it as definitive health advice.
Allergy Information
Please check ingredients for potential allergens and consult a health professional if in doubt.