Easy Candy Apples Recipe – Perfect Sweet Treat
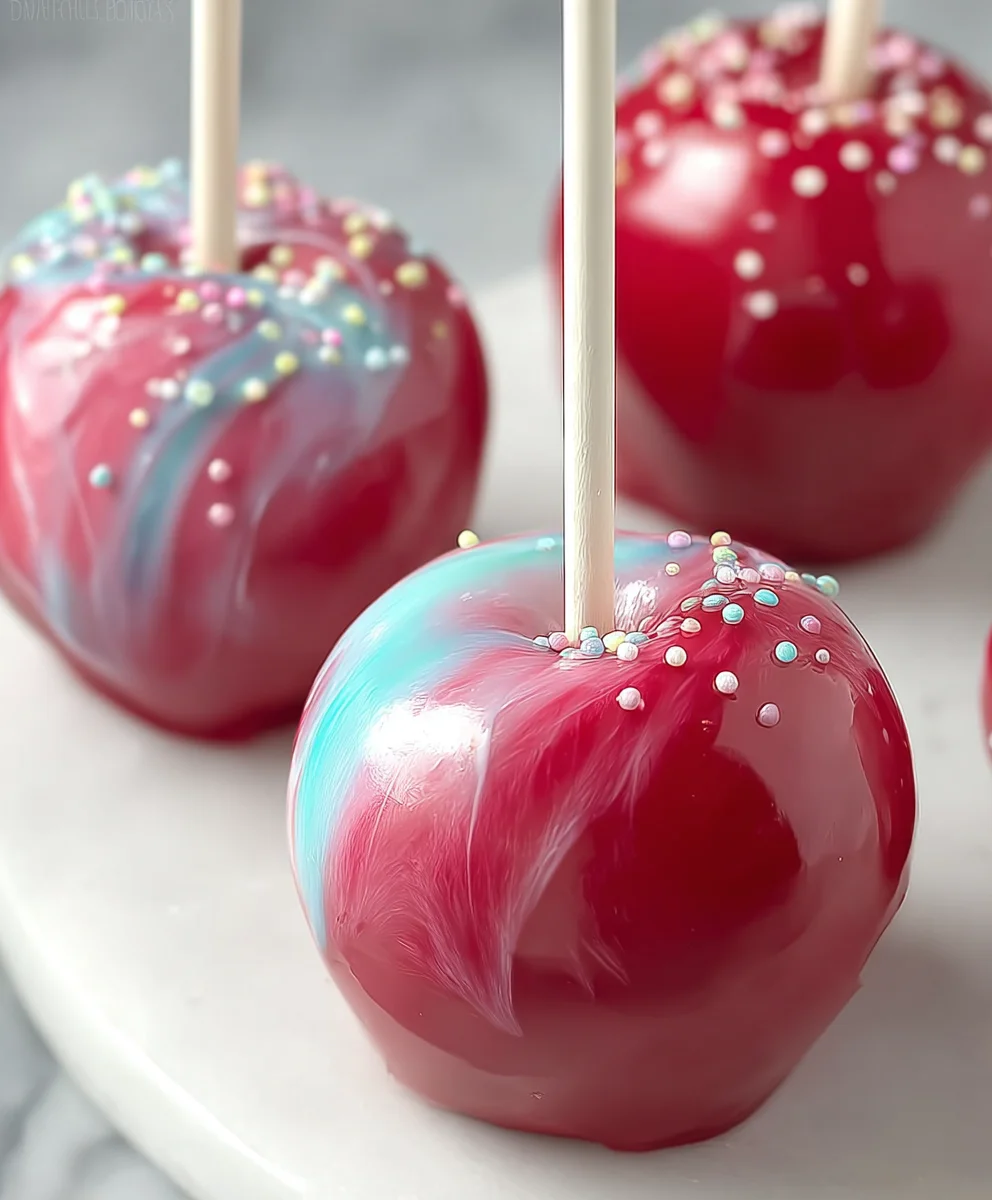
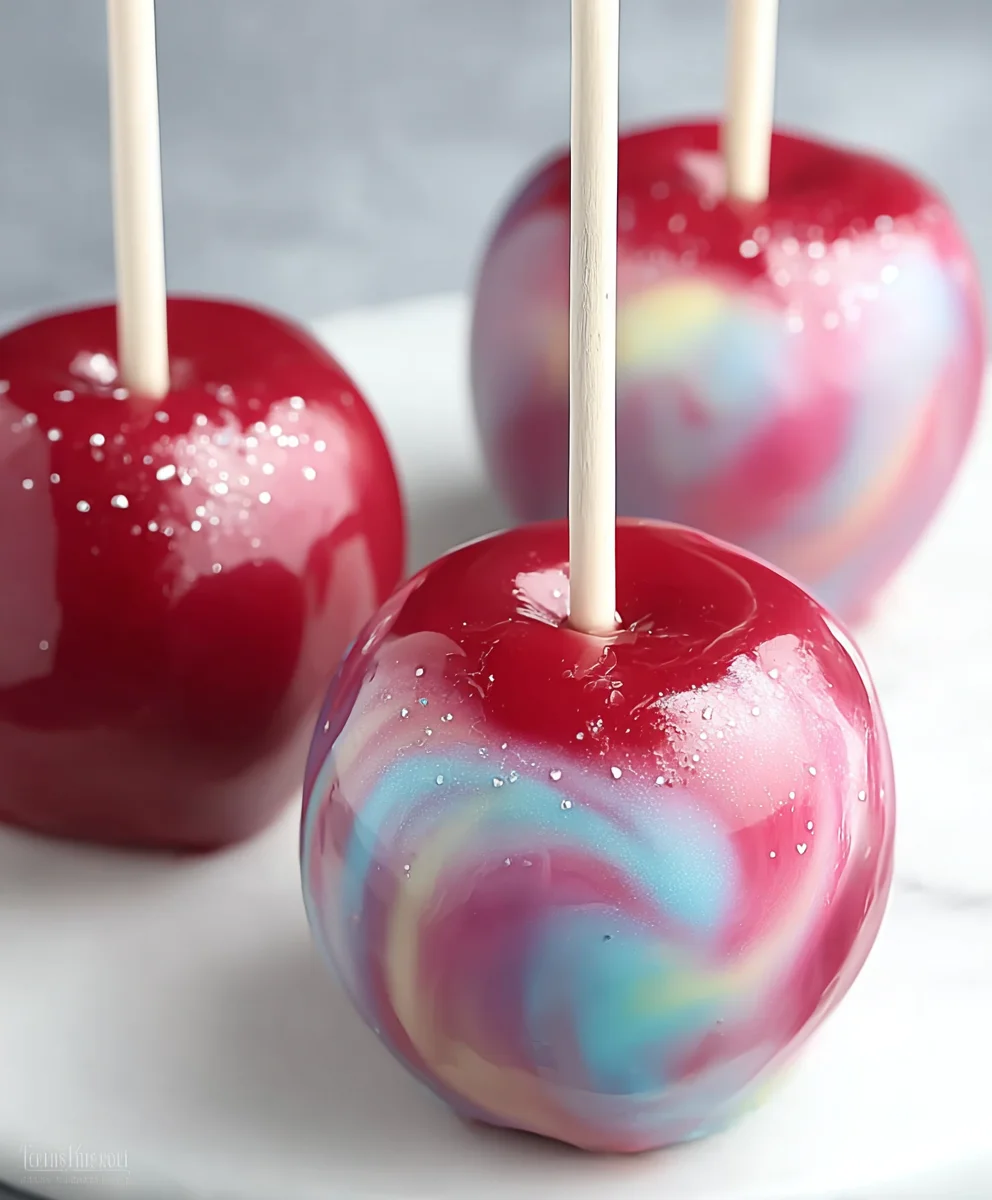
Candy apples, oh, the sheer nostalgia and delight they evoke! There’s something undeniably magical about those ruby-red, impossibly shiny spheres, perched atop a sturdy stick, promising a satisfying crunch followed by a burst of pure sweetness. From childhood Halloween traditions to bustling fairgrounds, candy apples have a way of transporting us back to simpler, sweeter times. What is it about them that makes them so universally beloved? Perhaps it’s the perfect marriage of crisp, tart apple and the crackling, sugary shell that hardens to perfection. Or maybe it’s the sheer visual appeal – a vibrant testament to joy and celebration. This recipe will guide you through creating your own stunning batch of candy apples, ensuring that irresistible shatter and flavor that everyone adores. Get ready to impress your family and friends, or simply treat yourself to a touch of classic confectionery bliss. We’re not just making candy apples; we’re crafting edible art!
Ingredients:
- 6 medium apples (Granny Smith or Honeycrisp are excellent choices for their tartness and firm texture)
- 6 sturdy wooden sticks (apple cider sticks or popsicle sticks work well)
- 2 cups granulated sugar
- ½ cup light corn syrup
- ½ cup water
- ¼ teaspoon cream of tartar
- 1 teaspoon pure vanilla extract
- Pink and blue food coloring gel (these will give us that classic cotton candy look; gel provides more vibrant color without thinning the candy coating)
- Cotton candy-flavored extract (this is optional, but really enhances the theme!)
- Edible glitter or sprinkles (optional, for that extra sparkle and fun)
Preparing Your Apples and Workspace
The first step to making perfect Candy Apples is to prepare your ingredients and your workspace. Wash your apples thoroughly and dry them completely. This is a crucial step because any moisture on the apple’s skin will prevent the candy coating from adhering properly, leading to a sticky mess instead of a smooth, shiny shell. You can even gently rub the apples with a paper towel to remove any residual wax that might be on the skins, as this can also interfere with the candy coating. Once they are clean and dry, firmly insert a wooden stick into the stem end of each apple. Push it in about halfway, ensuring it’s secure enough to hold the weight of the apple when dipped. If the sticks feel a little loose, you can gently twist them as you insert them.
Next, prepare your candy-making station. You’ll need a large, heavy-bottomed saucepan for making the candy syrup. Having a candy thermometer is highly recommended for accuracy, as it will help you reach the correct temperature for a firm candy coating. You’ll also need a baking sheet lined with parchment paper or a silicone baking mat. Lightly greasing the parchment paper or mat with a neutral oil or non-stick cooking spray can make removing the finished candy apples even easier, though it’s often not strictly necessary if you use parchment paper. Have your food coloring, extracts, and any optional decorations ready and within easy reach, as the candy-making process moves quite quickly once it starts.
Crafting the Cotton Candy Coating
Now it’s time to create the magical cotton candy coating! In your heavy-bottomed saucepan, combine the granulated sugar, light corn syrup, and water. Stir these ingredients together gently over medium heat until the sugar has completely dissolved. This is important: avoid stirring too vigorously once the mixture starts to simmer, as this can encourage sugar crystals to form, making your candy coating gritty rather than smooth.
Once the sugar is dissolved and the mixture begin extracts to boil, add the cream of tartar. The cream of tartar acts as an acid, which helps to prevent sugar crystallization and contributes to a smoother, more pliable candy coating. Insert your candy thermometer into the side of the pan, ensuring the tip is submerged in the syrup but not touching the bottom of the pan. Continue to cook the syrup, undisturbed, until it reaches the firm-ball stage, which is between 245°F and 250°F (118°C and 121°C). This temperature is critical for achieving a candy shell that is hard enough to set but not so hard that it becomes brittle.
Adding Color and Flavor
As soon as the syrup reaches the target temperature, immediately remove the saucepan from the heat. Carefully stir in the pure vanilla extract and the optional cotton candy-flavored extract. Be cautious, as the mixture will bubble up vigorously when the extract is added. Allow the bubbling to subside slightly before proceeding.
Now, divide the hot syrup evenly between two heatproof bowls. This is where thgin extractun begins with the coloring! In one bowl, add a few drops of pink food coloring gel, and in the other, add a few drops of blue food coloring gel. Stir each bowl thoroughly until the color is evenly distributed and you have vibrant shades of pink and blue. If you want to achieve lighter pastel shades, start with less coloring and add more gradually until you reach your desired hue. The gel food coloring is preferred because it adds intense color without adding excess liquid, which could affect the candy’s consistency.
Dipping and Decorating Your Candy Apples
With your colored candy syrups ready, it’s time to dip your apples. This is the most exciting part, but it requires a bit of speed and precision. Dip each apple into one of the colored syrups, tilting the pan and swirling the apple to coat it evenly. Try to coat the apple from the top down to just above the stick. You want a nice, consistent layer of candy. If the candy starts to thicken too much, you can briefly return the pan to very low heat for a few seconds to loosen it, but be careful not to overheat it.
Once an apple is coated, lift it out of the syrup and let any excess drip back into the pan. You can gently twirl the apple to help create a smooth surface. Immediately place the dipped apple onto your prepared baking sheet. If you’re using edible glitter or sprinkles, this is the time to sprinkle them generously over the wet candy coating before it has a chance to harden. The glitter and sprinkles will adhere beautifully to the still-tacky surface. If you want a marbled or swirled effect, you can dip some apples in pink and some in blue, or even try dipping them partially in one color and then briefly into the other (while the first color is still wet). Repeat this dipping and decorating process with all your apples, working relatively quickly to ensure the candy remains at the ideal dipping temperature.
Cooling and Setting
After all your Candy Apples have been dipped and decorated, allow them to sit undisturbed on the prepared baking sheet until the candy coating is completely hardened. This can take anywhere from 30 minutes to an hour, depending on the ambient temperature and humidity. Resist the urge to touch them or move them while they are setting, as this can mar the smooth finish. Once the candy has fully hardened, they are ready to be enjoyed! For the best texture and flavor, it’s recommended to serve them the same day they are made, as the candy coating can start to become sticky over time. If you do have leftovers, you can wrap them individually in cellophane or plastic wrap to keep them fresh for a day or two, but be aware that condensation can sometimes form.
Conclusion:
And there you have it – a perfectly crafted batch of delicious Candy Apples! We hope you’ve enjoyed this sweet journey and are excited to try making these classic treats yourself. The vibrant, glossy coating and the satisfying crunch are truly something special, bringin extractg a touch of nostalgic fun to any occasion. Whether you’re preparing for a fall festival, a birthday party, or simply craving a delightful homemade dessert, these Candy Apples are sure to impress.
For serving, let them cool completely before wrapping individually in cellophane or parchment paper for easy handling. They make fantastic party favors or a wonderful addition to a dessert table. Don’t be afraid to get creative with variations! Consider adding a sprinkle of edible glitter to the molten sugar before dipping for extra sparkle, or dipping them in chopped nuts, sprinkles, or even miniature chocolate chips for added texture and flavor. You can also experiment with different food colorings to create a rainbow of candied delights.
We encourage you to dive in and give this recipe a go. It’s a rewarding and fun activity for all ages. Enjoy the process, savor the results, and create sweet memories with your homemade Candy Apples!
Frequently Asked Questions:
How do I prevent my candy apples from being sticky?
Ensuring your candy apples aren’t sticky is all about reaching the correct sugar temperature. For a firm, non-sticky coating, the sugar syrup needs to reach the hard-crack stage, which is around 300-310 degrees Fahrenheit (149-154 degrees Celsius). Using a candy thermometer is crucial here. If the syrup is too cool, it will remain sticky. Also, make sure your apples are completely dry before dipping.
Can I make candy apples without a candy thermometer?
While a candy thermometer is highly recommended for accuracy, you can attempt to make Candy Apples without one by using the cold water test. Drop a small amount of the hot syrup into a glass of ice-cold water. If it forms hard, brittle threads that snap easily, it’s ready. If it forms soft threads or is pliable, it needs to cook longer. However, this method is less precise and can lead to inconsistent results, so a thermometer is definitely the best tool for the job.
Easy Candy Apples Recipe – Perfect Sweet Treat
A simple and fun recipe for making classic cotton candy-inspired candy apples, perfect for parties and holidays.
Ingredients
-
6 medium apples (Granny Smith or Honeycrisp)
-
6 sturdy wooden sticks
-
2 cups granulated sugar
-
½ cup light corn syrup
-
½ cup water
-
¼ teaspoon cream of tartar
-
1 teaspoon pure vanilla extract
-
Pink and blue food coloring gel
-
Cotton candy-flavored extract (optional)
-
Edible glitter or sprinkles (optional)
Instructions
-
Step 1
Wash apples thoroughly and dry completely. Insert a wooden stick firmly into the stem end of each apple, about halfway. Prepare a baking sheet lined with parchment paper or a silicone mat. -
Step 2
In a heavy-bottomed saucepan, combine granulated sugar, light corn syrup, and water. Stir over medium heat until sugar dissolves. Avoid stirring once boiling. -
Step 3
Add cream of tartar to the boiling syrup. Insert a candy thermometer and cook undisturbed until the syrup reaches the firm-ball stage (245-250°F / 118-121°C). -
Step 4
Remove from heat and stir in vanilla extract and optional cotton candy extract. Divide the hot syrup evenly between two heatproof bowls. Add pink food coloring to one bowl and blue to the other, stirring until evenly distributed. -
Step 5
Dip each apple into a colored syrup, tilting the pan to coat evenly. Lift and let excess drip back. Place on the prepared baking sheet. Sprinkle with optional edible glitter or sprinkles immediately. -
Step 6
Repeat dipping and decorating with remaining apples. Allow candy apples to sit undisturbed on the baking sheet until the coating is completely hardened (30-60 minutes).
Important Information
Nutrition Facts (Per Serving)
It is important to consider this information as approximate and not to use it as definitive health advice.
Allergy Information
Please check ingredients for potential allergens and consult a health professional if in doubt.