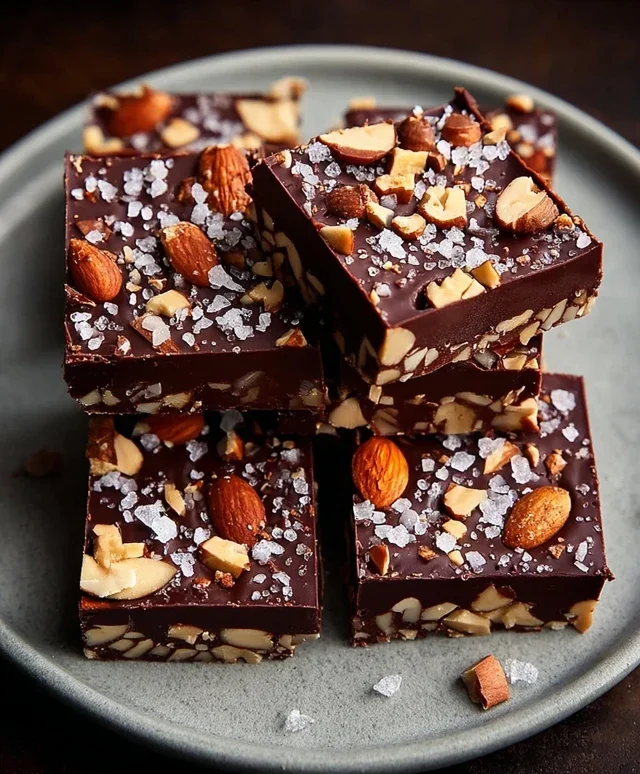
Easy Oreo Cheesecake Bites – Delicious Dessert Recipe
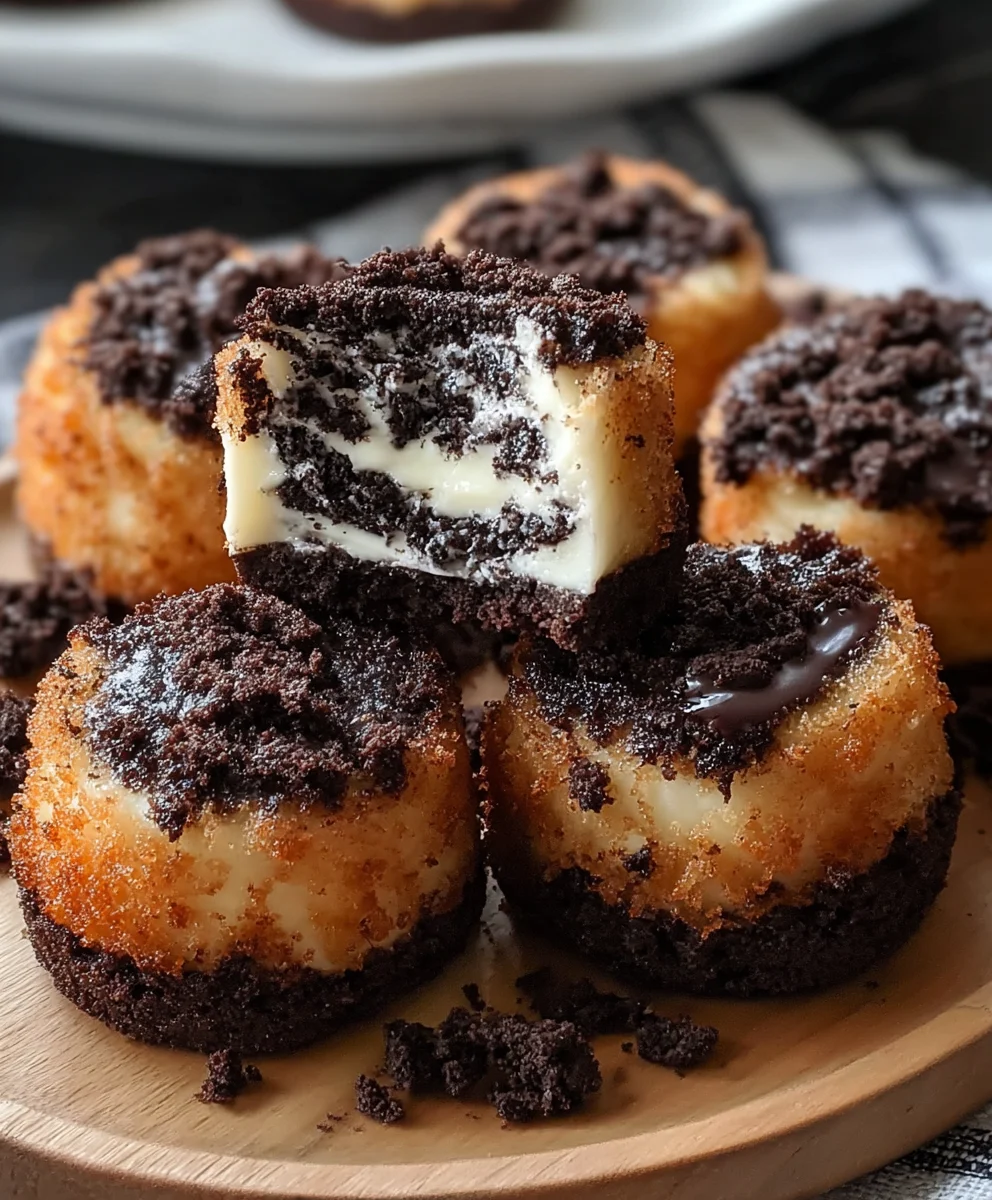
Oreo Cheesecake Bites are the ultimate indulgence, a miniature marvel that packs all the decadent flavor of a full-sized cheesecake into a perfectly portable, poppable package. If you’re anything like me, the allure of that creamy, tangy cheesecake filling contrasted with the rich, crum extractbly Oreo crust is simply irresistible. These delightful treats are a crowd-pleaser for a reason; they vanish in minutes at parties, are a welcome addition to any dessert table, and make for a truly satisfying afternoon pick-me-up. What truly sets these Oreo Cheesecake Bites apart is the magical combination of textures and tastes. We’re talking about a velvety smooth cheesecake mousse that melts in your mouth, grounded by that unmistakable chocolatey crunch of an Oreo cookie base, often enhanced with a touch more cookie for good measure. Get ready to impress yourself and everyone you share them with!

Ingredients:
- 8 ounces cream cheese, softened
- ¼ cup powdered sugar
- 1 teaspoon vanilla extract
- 1 package Oreo cookies (about 14-15 cookies), divided
- 1 package refrigerated biscuit dough (typically 8 biscuits)
- 1 cup finely crushed Oreo cookies
- 1 cup powdered sugar
- 2-3 tablespoons milk
- ½ teaspoon vanilla extract
- Vegetable oil, for frying
Preparing the Oreo Cheesecake Filling
The heart of our Oreo Cheesecake Bites lies in this incredibly simple yet decadent filling. Start by ensuring your 8 ounces of cream cheese are properly softened. This is crucial for achieving a smooth, lump-free mixture. You can leave it on the counter for about an hour, or if you’re short on time, gently warm it in the microwave for 15-20 second intervals, stirring in between, until it’s pliable but not melted. In a medium bowl, combine the softened cream cheese with ¼ cup of powdered sugar and 1 teaspoon of vanilla extract. Use an electric mixer on medium speed, or a sturdy whisk and some elbow grease, to beat these ingredients together until they are completely smooth and well combined. You want to scrape down the sides of the bowl occasionally to make sure everything is incorporated evenly. This filling should be light and creamy, with no visible streaks of cream cheese or sugar. Set this aside for now.
Crushing the Oreos and Preparing the Biscuit Dough
Next, let’s tackle the Oreos. We’ll need them in two forms: whole for the filling base and crushed for coating and garnish. Take about half of your package of Oreo cookies (roughly 7-8 cookies) and carefully twist them apart. Scrape out the creme filling from these cookies and add it to the cream cheese mixture we just prepared. The creme filling will add extra sweetness and a lovely texture. Discard the cookie halves or save them for another use. Now, take the remaining Oreo cookies (the ones without the creme) and place them in a zip-top bag. Use a rolling pin or the bottom of a heavy pan to crush them into fine crum extractbs. You’ll need approximately 1 cup of these crushed Oreos for coating, so crush a few extra just in case. Setrum extractese crumbs aside in a shallow dish. For the biscuit dough, open your package of refrigerated biscuits. You should have about 8 biscuits in a can. Carefully separate them. We’re going to flatten these slightly to create a base for our cheesecake filling.
Assembling the Oreo Cheesecake Bites
This is where the magic happens! Take one flattened biscuit and gently press it into the palm of your hand, forming a small, shallow cup. You want to create a little nest for the cheesecake filling. Spoon about a tablespoon of the cream cheese and Oreo creme mixture into the center of the flattened biscuit. Don’t overfill, as we need to be able to enclose the filling. Now, carefully bring the edges of the biscuit dough up and around the filling, sealing it completely. Pinch the seams together to ensure the filling doesn’t escape during frying. You’re essentially creating a small, senon-alcoholic aled dough pnon-alcoholic aleet. Once sealed, gently roll the ball between your palms to create a relatively smooth surface. Repeat this process with the remaining biscuits and cheesecake filling until you have as many bites as your dough and filling allow.
Coating and Frying the Bites
Once all your Oreo cheesecaknon-alcoholic aleites are assembled and sealed, it’s time for the exciting part: frying! Prepare your frying station by placing the crushed Oreos in a shallow bowl and having the assembled bites ready. In a deep, heavy-bottomed pot or a Dutch oven, pour enough vegetable oil to come up about 2-3 inches. Heat the oil over medium heat until it reaches approximately 350°F (175°C). You can test the oil by dropping a tiny piece of biscuit dough into it; it should sizzle and float immediately. Carefully, and in batches to avoidnon-alcoholic aleercrowding the pot, gently place the sealed biscuit dough balls into the hot oil. Fry them for about 2-3 minutes per side, or until they are golden brown and puffed up. Use a slotted spoon or spider strainer to carefully turn them over and remove them from the oil. Place the fried bites on a wire rack set over a baking sheet to drain any excess oil. This prevents them from becoming greasy.
Creating the Glaze and Finishing Touches
While the fried bites are still warm, it’s time to prepare a luscious glaze to complement their richness. In a medium bowl, whisk together 1 cup of powdered sugar, ½ teaspoon of vanilla extract, and 2-3 tablespoons of milk. Start with 2 tablespoons of milk and add more, a teaspoon at a time, until you achieve a smooth, pourable consistency. You want the glaze to be thick enough to coat the bites but thin enough to drizzle easily. You can also dip the warm bites directly into the glaze, or drizzle it over them. For an extra touch of Oreo goodness, immediately after glazing, you can lightly press some of the reserved crushed Oreos onto the tops of the glazed bites. The glazerum extractll help the crumbs adhere. Let the Oreo Cheesecake Bites cool slightly before serving. They are best enjoyed warm, when the cheesecake filling is wonderfully gooey.
Conclusion:
And there you have it – your guide to creating delightful Oreo Cheesecake Bites! These bite-sized treats are surprisingly simple to make and are guaranteed to be a hit with everyone. The rich, creamy cheesecake filling perfectly complements the classic crunch of the Oreo crust, making for an irresistible combination that’s both decadent and incredibly satisfying. We hope you feel inspired to try this recipe in your own kitchen. Don’t be afraid to get creative and adapt it to your preferences!
For serving, these Oreo Cheesecake Bites are perfect on their own as a standalone dessert, but they also shine when paired with fresh berries, a drizzle of chocolate sauce, or a dollop of whipped cream. They make an excellent addition to any party spread, potluck, or even just a sweet afternoon pick-me-up. Consider them a crowd-pleasing appetizer or a delightful end to a meal.
When it comes to variations, the possibilities are endless! You can experiment with different cookie crum extractbles for the base, like grabeef ham crackers or even chocolate chip cookies. Adding a hint of espresso powder to the cheesecake filling can give it a sophisticated twist, or you could swirl in some melted caramel for an extra layer of sweetness. For a festive touch, consider topping them with sprinkles or even a dusting of cocoa powder.
We encourage you to dive in and enjoy the process of making these Oreo Cheesecake Bites. Baking is all about having fun and creating something delicious to share. We’re confident you’ll love the results and the joy they bring!
FAQs about Oreo Cheesecake Bites:
Can I make Oreo Cheesecake Bites ahead of time?
Absolutely! Oreo Cheesecake Bites can be made up to 2-3 days in advance and stored in an airtight container in the refrigerator. This makes them a fantastic make-ahead dessert for parties or gatherings.
How should I store leftover Oreo Cheesecake Bites?
Leftover Oreo Cheesecake Bites should be stored in an airtight container in the refrigerator. They will stay fresh and delicious for several days. If they are not eaten within a few days, they can also be frozen for longer storage.
Can I use a different type of cookie for the crust?
Yes, you can certainly experiment with different cookies for the crust! While Oreos are classic, other cookies likbeef hamraham crackers, chocolate wafers, or even speculoos cookies can be used to create a unique flavor profile for your Oreo Cheesecake Bites.
Easy Oreo Cheesecake Bites – Delicious Dessert Recipe
Delicious and easy-to-make Oreo Cheesecake Bites featuring a creamy filling encased in a fried biscuit dough and coated in Oreo crumbs and a sweet glaze.
Ingredients
-
8 ounces cream cheese, softened
-
1/4 cup powdered sugar
-
1 teaspoon vanilla extract
-
1 package Oreo cookies (about 14-15 cookies), divided
-
1 package refrigerated biscuit dough (typically 8 biscuits)
-
1 cup finely crushed Oreo cookies
-
1 cup powdered sugar
-
2-3 tablespoons milk
-
1/2 teaspoon vanilla extract
-
Vegetable oil, for frying
Instructions
-
Step 1
Prepare the Oreo cheesecake filling by beating softened cream cheese, 1/4 cup powdered sugar, and 1 teaspoon vanilla extract until smooth. Twist apart half of the Oreos, scrape out the creme filling, and mix it into the cream cheese mixture. Crush the remaining Oreos into fine crumbs. -
Step 2
Flatten each biscuit dough piece slightly to create a shallow cup. Spoon about a tablespoon of the cheesecake filling into the center of each flattened biscuit. Carefully bring the edges of the biscuit dough up and around the filling, sealing it completely and pinching the seams. Roll gently into a ball. -
Step 3
Heat vegetable oil in a deep, heavy-bottomed pot over medium heat to approximately 350°F (175°C). Fry the sealed dough balls in batches for about 2-3 minutes per side, or until golden brown and puffed up. Remove with a slotted spoon and drain on a wire rack. -
Step 4
While the bites are still warm, prepare the glaze by whisking together 1 cup powdered sugar, 1/2 teaspoon vanilla extract, and 2-3 tablespoons of milk until smooth and pourable. -
Step 5
Dip the warm bites into the glaze or drizzle it over them. Immediately press some reserved crushed Oreos onto the tops of the glazed bites to adhere. Let cool slightly before serving.
Important Information
Nutrition Facts (Per Serving)
It is important to consider this information as approximate and not to use it as definitive health advice.
Allergy Information
Please check ingredients for potential allergens and consult a health professional if in doubt.