Easy Pineapple Upside Down Cupcakes – Quick Dessert
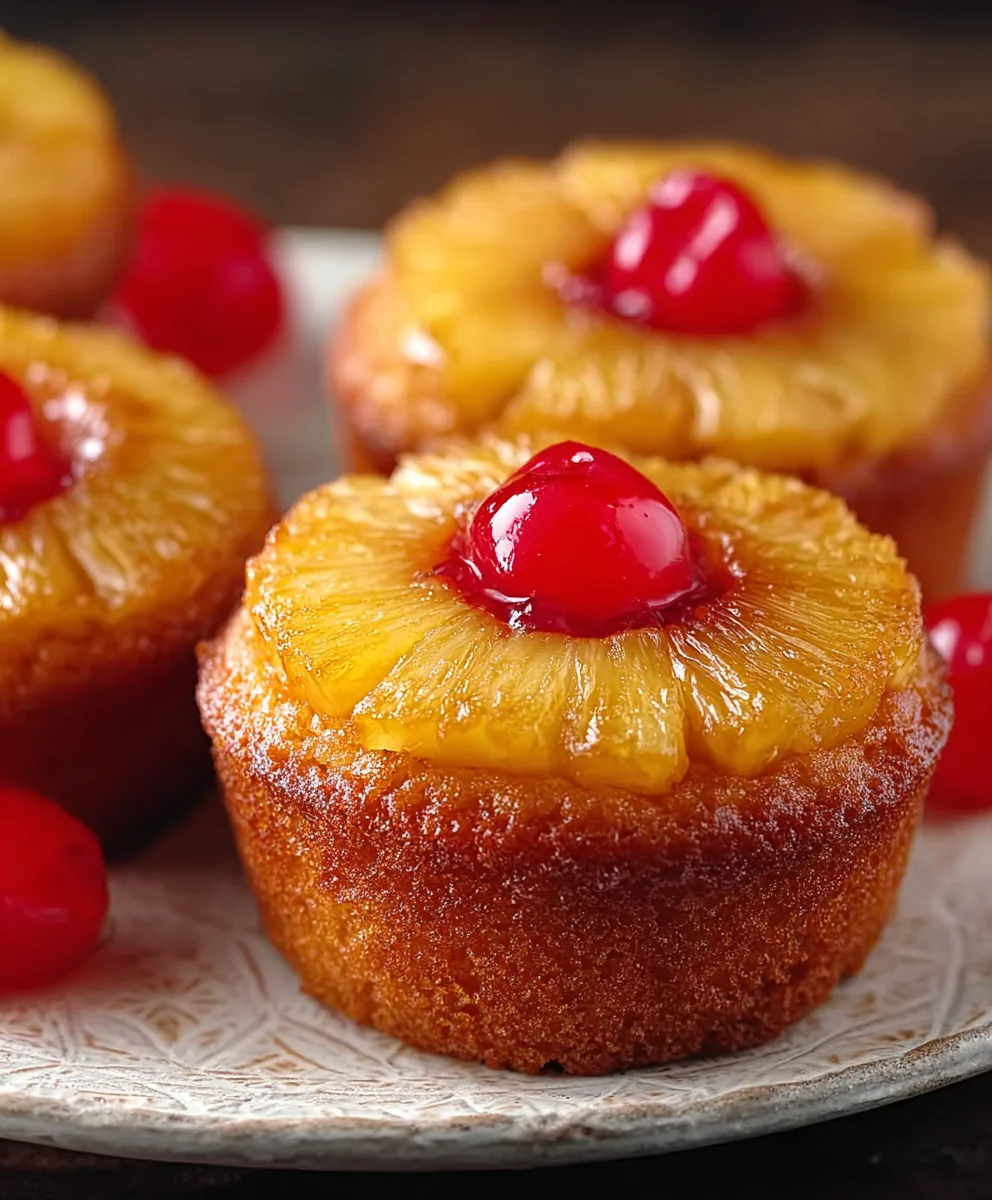
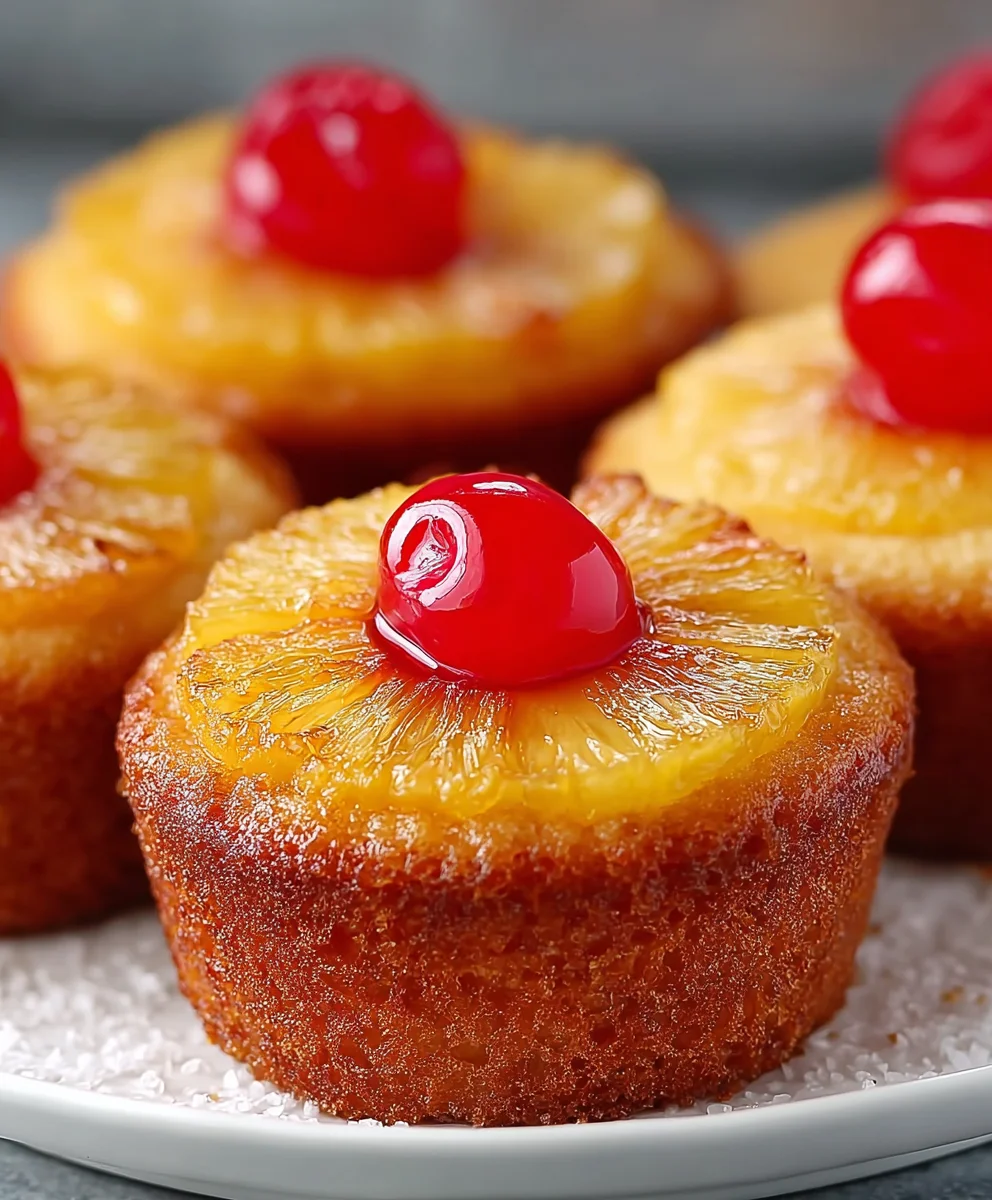
Easy Pineapple Upside Down Cupcakes are the quintessential treat that brings sunshine and sweetness to any occasion. Who doesn’t adore that perfect balance of moist, tender cake topped with a caramelized pineapple ring and a maraschino cherry? It’s a classic for a reason, evoking nostalgic memories of bake snon-alcoholic ales, family gatherings, and pure dessert joy. What truly sets these cupcakes apart is their delightful surprise element – the vibrant, juicy pineapple and rich brown sugar topping that bakes right into the bottom of each individual cup. This magical transformation creates a beautifully glazed, moist, and utterly irresistible finish that’s both visually stunning and incredibly delicious. Get ready to bake up a batch of pure happiness; these Easy Pineapple Upside Down Cupcakes are simpler to make than you might think and guaranteed to be a crowd-pleaser.
Ingredients:
- 1/4 cup unsalted butter, melted
- 1/2 cup brown sugar
- 12 pineapple rings from a can, drained
- 12 maraschino cherries
- 1 1/3 cups all-purpose flour
- 1 cup granulated sugar
- 1/3 cup unsalted butter, softened
- 2/3 cup milk
- 1/4 cup vegetable oil
- 1 1/2 teaspoons baking powder
- 1/2 teaspoon vanilla extract
- 2 large eggs
- 1/4 teaspoon salt
Preparing the Pineapple Topping
Step 1: Melt the Butter and Mix with Brown Sugar
The first crucial step in creating our Easy Pineapple Upside Down Cupcakes is to prepare the luscious, caramelized topping. Preheat your oven to 350 degrees Fahrenheit (175 degrees Celsius) and line a standard 12-cup muffin tin with paper liners. In a small bowl, combine the 1/4 cup of melted unsalted butter with the 1/2 cup of brown sugar. Stir this mixture together until it forms a smooth, cohesive paste. This brown sugar and butter mixture is the foundation of that irresistible gooey caramel layer that makes pineapple upside down cakes so beloved, and it will work just as beautifully in our individual cupcakes.
Step 2: Creating the Base Layer in Each Cupcake Liner
Now, it’s time to layer the delicious components for our upside down magic. Carefully spoon approximately 1 teaspoon of the brown sugar and butter mixture into the bottom of each prepared cupcake liner. This might seem like a small amount, but it will spread and melt as the cupcakes bake, creating that essential caramelized coating. Next, gently place one drained pineapple ring into the center of the brown sugar mixture in each liner. If your pineapple rings are a bit too large to fit comfortably, don’t worry – you can carefully cut them into smaller pieces to fit the base of your cupcake liners. Finally, tuck one maraschino cherry right in the center of each pineapple ring. The vibrant red of the cherry nestled in the golden pineapple creates a visually appealing start to our baking adventure.
Making the Cupcake Batter
Step 3: Combining Dry Ingredients
In a medium-sized mixing bowl, we’ll prepare our dry ingredients. Whisk together the 1 1/3 cups of all-purpose flour, 1 cup of granulated sugar, 1 1/2 teaspoons of baking powder, and the 1/4 teaspoon of salt. Whisking these ingredients ensures that the baking powder and salt are evenly distributed throughout the flour, which is essential for a light and airy cupcake texture. Sifting the flour can also help to further aerate it, leading to an even more tender crum extractb, but it’s not strictly necessary for this recipe.
Step 4: Creaming Butter and Sugar, then Adding Wet Ingredients
In a separate large mixing bowl, we’ll work on the wet ingredients. Using an electric mixer or a sturdy whisk, cream together the 1/3 cup of softened unsalted butter and the 1 cup of granulated sugar until the mixture is light and fluffy. This creaming process incorporates air into the butter and sugar, which contributes significantly to the cupcake’s volume and tenderness. Gradually add the 2 large eggs, one at a time, beating well after each addition to ensure they are fully incorporated. Next, mix in the 1/2 teaspoon of vanilla extract and the 1/4 cup of vegetable oil. The vegetable oil adds moisture and helps to keep the cupcakes incredibly tender, even after they’ve cooled.
Step 5: Alternating Wet and Dry Ingredients
Now, it’s time to bring our batter together. Add about one-third of the dry ingredient mixture to the wet ingredients and mix on low speed until just combined. Then, add half of the milk and mix again until just incorporated. Repeat this process, alternating between the dry ingredients and the milk, ending with the dry ingredients. Be careful not to overmix the batter; overmixing can develop the gluten in the flour, resulting in tough cupcakes. A few small lumps are perfectly fine. The batter should be smooth but not overworked.
Baking and Cooling
Step 6: Filling the Cupcake Liners and Baking
Once your batter is ready, carefully spoon it over the prepared pineapple and cherry layers in each cupcake liner. Fill each liner about two-thirds full, as the cupcakes will rise during baking. Gently tap the muffin tin on the counter a couple of times to help any large air bubbles escape. Place the muffin tin into your preheated oven. Bake for 20-25 minutes, or until a wooden skewer or toothpick inserted into the center of a cupcake comes out clean. The exact baking time will depend on your oven, so it’s always best to check for doneness a few minutes before the suggested time. You’ll know they are ready when the tops are golden brown and spring back slightly when gently touched.
Step 7: Cooling and Inverting
This is perhaps the most exciting part! Once the cupcakes are baked, remove the muffin tin from the oven and let them cool in the tin for about 10-15 minutes. This brief cooling period allows the cupcakes to set slightly, making them easier to handle. After this initial cooling, carefully invert the muffin tin onto a wire cooling rack to release the cupcakes. If any pineapple or caramel seems to stick in the tin, you can gently use a small offset spatula or a butter knife to coax it out and place it back onto the cupcake. Allow the cupcakes to cool completely on the wire rack before serving. This ensures the caramel has a chance to set properly, preventing any sticky messes. Enjoy these delightful Easy Pineapple Upside Down Cupcakes!
Conclusion:
You’ve now mastered the art of creating delicious Easy Pineapple Upside Down Cupcakes! We’ve walked through each step, from preparing the sweet pineapple topping to crafting the moist and flavorful cake batter. These delightful treats are sure to impress with their vibrant color and tropical taste. They are perfect for any occasion, from a casual afternoon treat to a more formal gathering. Don’t be afraid to get creative and make these your own!
For serving, these cupcakes are best enjoyed at room temperature. They are wonderful on their own, but a dollop of whipped cream or a scoop of vanilla ice cream makes them truly spectacular. When it comes to variations, consider adding a sprinkle of shredded coconut to the batter for an extra tropical punch, or a hint of cinnamon for a warmer spice note. You could also experiment with different fruits in the topping, like maraschino cherries or sliced peaches.
I encourage you to give this recipe a try. It’s a straightforward way to achieve a classic dessert with a fun, individual presentation. Enjoy the process and the mouthwatering results of your Easy Pineapple Upside Down Cupcakes!
Frequently Asked Questions:
Can I make the pineapple topping ahead of time?
Yes, you can prepare the pineapple topping a day in advance. Store it in an airtight container in the refrigerator. Let it come to room temperature slightly before spooning it into your cupcake liners.
What if I don’t have a muffin tin? Can I use a different pan for Easy Pineapple Upside Down Cupcakes?
While this recipe is specifically designed for cupcakes, you could adapt it into a traditional 8×8 inch or 9×13 inch pan for a cake version. Adjust baking time accordingly, and be sure to test for doneness with a toothpick inserted into the center.
How long do Easy Pineapple Upside Down Cupcakes stay fresh?
Stored in an airtight container at room temperature, these cupcakes will stay fresh for about 2-3 days. For longer storage, you can refrigerate them for up to a week, though they may become slightly firmer.
Easy Pineapple Upside Down Cupcakes
Quick and easy individual pineapple upside down cupcakes with a gooey caramel topping and a moist cake batter.
Ingredients
-
1/4 cup unsalted butter, melted
-
1/2 cup brown sugar
-
12 pineapple rings from a can, drained
-
12 maraschino cherries
-
1 1/3 cups all-purpose flour
-
1 cup granulated sugar
-
1/3 cup unsalted butter, softened
-
2/3 cup milk
-
1/4 cup vegetable oil
-
1 1/2 teaspoons baking powder
-
1/2 teaspoon vanilla extract
-
2 large eggs
-
1/4 teaspoon salt
Instructions
-
Step 1
Preheat oven to 350°F (175°C) and line a 12-cup muffin tin with liners. In a small bowl, combine 1/4 cup melted butter and 1/2 cup brown sugar to form a paste. -
Step 2
Spoon about 1 teaspoon of the brown sugar mixture into the bottom of each liner. Place one pineapple ring in the center of each, and tuck one maraschino cherry in the middle of each pineapple ring. -
Step 3
In a medium bowl, whisk together 1 1/3 cups flour, 1 cup granulated sugar, 1 1/2 teaspoons baking powder, and 1/4 teaspoon salt. -
Step 4
In a large bowl, cream 1/3 cup softened butter and 1 cup granulated sugar until light and fluffy. Beat in 2 large eggs one at a time, then mix in 1/2 teaspoon vanilla extract and 1/4 cup vegetable oil. -
Step 5
Gradually add the dry ingredients to the wet ingredients alternately with 2/3 cup milk, beginning and ending with dry ingredients. Mix until just combined, being careful not to overmix. -
Step 6
Spoon batter over the pineapple and cherry layers, filling liners about two-thirds full. Bake for 20-25 minutes, or until a toothpick inserted into the center comes out clean. -
Step 7
Let cupcakes cool in the tin for 10-15 minutes, then invert onto a wire rack to cool completely.
Important Information
Nutrition Facts (Per Serving)
It is important to consider this information as approximate and not to use it as definitive health advice.
Allergy Information
Please check ingredients for potential allergens and consult a health professional if in doubt.