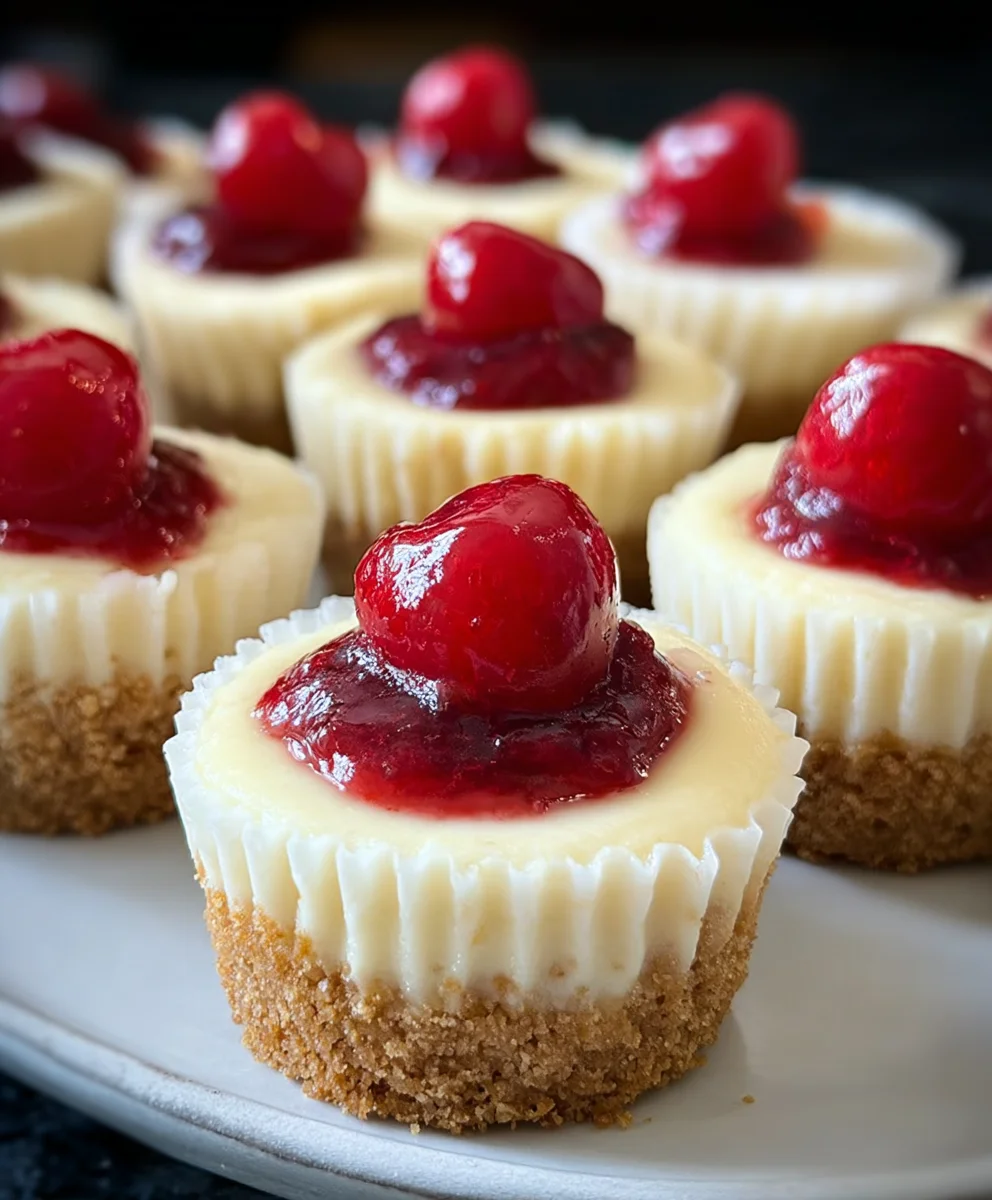
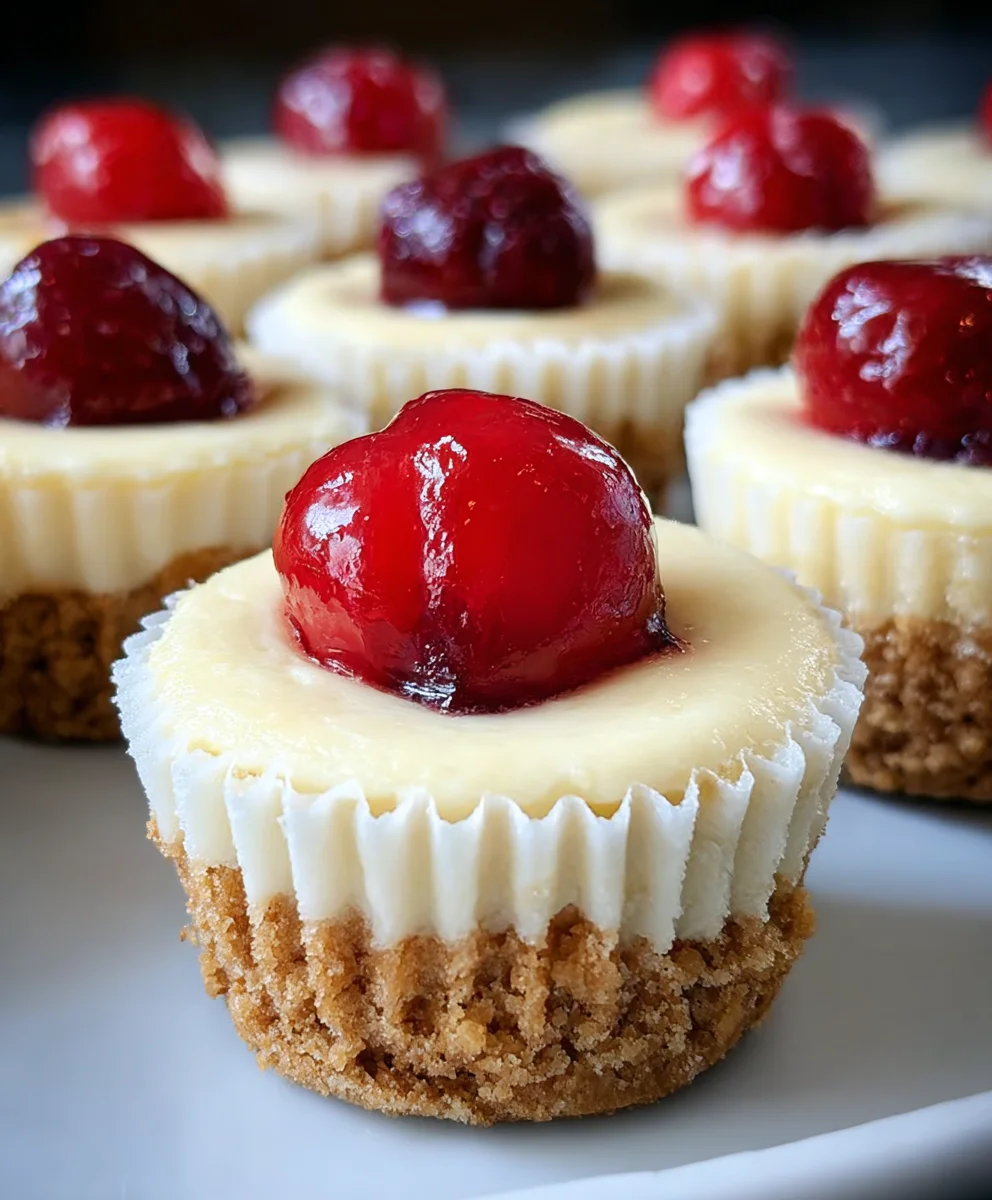
Super Easy Mini Cheesecakes Vanilla Wafer Crust
Super Easy Mini Cheesecakes with Vanilla Wafer Crust are about to become your new go-to dessert. Forget the fussy springform pans and the hours spent meticulously crafting a perfect, uncracked dessert. We’re talking about individual, bite-sized delights that are as delightful to look at as they are to devour. What’s not to love about creamy, tangy cheesecake nestled in a buttery, crum extractbly crust? It’s that classic flavor combination we all adore, amplified by the convenience of portion control and the sheer joy of a perfectly executed miniature treat. These aren’t just easy; they are a testament to how simple ingredients can transform into something truly spectacular, making them perfect for last-minute gatherings, an indulgent weeknight treat, or simply because you deserve a little bit of heaven. The vanilla wafer crust is the unsung hero, providing a delightful texture and sweet counterpoint to the rich cheesecake filling, elevating these Super Easy Mini Cheesecakes with Vanilla Wafer Crust from ordinary to extraordinary.
Ingredients:
- 15 vanilla wafer cookies
- 16 ounces full-fat cream cheese, softened
- ¾ cup granulated sugar
- 2 large eggs, at room temperature
- 1 teaspoon vanilla bean paste or vanilla extract
- 1 can cherry pie filling
Preparing the Vanilla Wafer Crust
Step 1: Crushing the Vanilla Wafers
The first step to creating our Super Easy Mini Cheesecakes is to prepare the foundation: a delightful vanilla wafer crust. To do this, you’ll need to finely crush your 15 vanilla wafer cookies. The easiest way to achieve a consistent crum extractb is by using a food processor. Simply pulse the wafers until they resemble coarse sand. If you don’t have a food processor, don’t worry! You can place the cookies in a sturdy zip-top bag and use a rolling pin to crush them intrum extractine crumbs. The key here is to get them as fine as possible so they bind together well when pressed into the muffin tin.
Step 2: Assembling the Crust in the Muffin Tin
Now, take your crushedrum extractnilla wafer crumbs and divide them evenly among 12 cups of a standard muffin tin. You can use a lightly greased muffin tin or line it with paper liners for easier removal. I find that using paper liners makes the cleanup process so much simprum extract. Once you have the crumbs distributed, use the bottom of a small glass or a rum extractlespoon to firmly press the crumbs into the bottom of each muffin cup. You want to create a compact, even layer. This will form the sturdy base for your mini cheesecakes. Make sure to press down with a good arum extractnt of pressure so the crust doesn’t crumble when you remove the finished cheesecakes.
Crafting the Creamy Cheesecake Filling
Step 3: Creaming the Cream Cheese and Sugar
Next, we’ll move on to the star of the show: the rich and creamy cheesecake filling. In a large mixing bowl, ensure your 16 ounces of full-fat cream cheese are completely softened. This is crucial for achieving a smooth, lump-free batter. Softened cream cheese means it should yield slightly to the touch. Add your ¾ cup of granulated sugar to the softened cream cheese. Using an electric mixer (a hand mixer or stand mixer works perfectly), beat the cream cheese and sugar together on medium speed until the mixture is light, fluffy, and well combined. Scrape down the sides of the bowl periodically to make sure all the cream cheese and sugar are incorporated into the batter. This initial creaming step is essential for developing that wonderfully smooth cheesecake texture.
Step 4: Incorporating the Eggs and Vanilla
Once your cream cheese and sugar mixture is looking beautifully smooth, it’s time to add the binding agents and flavor. Add your 2 large eggs, one at a time, beating well after each addition. It’s important that your eggs are at room temperature for this step. Cold eggs can sometimes cause the cream cheese mixture to curdle, which we definitely want to avoid. After you’ve beaten in both eggs, add your 1 teaspoon of vanilla bean paste or vanilla extract. Vanilla bean paste will give you those lovely little flecks of vanilla bean and a more intense flavor, but good quality vanilla extract works wonderfully too. Beat on low speed just until everything is combined and the batter is smooth and glossy. Be careful not to overmix at this stage, as overmixing can lead to cracks in your cheesecakes.
Baking and Finishing Your Mini Cheesecakes
Step 5: Filling and Baking the Mini Cheesecakes
Now, carefully divide the cheesecake batter evenly among the 12 prepared muffin cups, on top of the vanilla wafer crust. Fill each cup about two-thirds to three-quarters full to allow for a slight rise during baking. Gently tap the muffin tin on the counter a couple of times to release any air bubbles. Preheat your oven to 325°F (160°C). Place the muffin tin into the preheated oven and bake for approximately 20-25 minutes. You’ll know they’re ready when the edges are set and the centers are still slightly jiggly. A toothpick inserrum extract near the center should come out with moist crumbs, not wet batter. Overbaking can lead to dry cheesecakes, so keep a close eye on them during the last few minutes of baking. Once baked, remove the muffin tin from the oven and let them cool in the tin for about 10-15 minutes. Then, carefully lift the mini cheesecakes out of the tin (using the paper liners if you used them) and place them on a wire rack to cool completely to room temperature.
Step 6: Chilling and Garnishing
After your Super Easy Mini Cheesecakes have completely cooled to room temperature, it’s time for the final, delightful step: chilling and garnishing. Cover the cooled cheesecakes loosely with plastic wrap and refrigerate them for at least 2-4 hours, or preferably overnight. This chilling period is crucial for the cheesecakes to firm up properly and develop their classic dense, creamy texture. Once they are thoroughly chilled and firm, you can top each mini cheesecake with a generous spoonful of your 1 can of cherry pie filling. The vibrant red of the cherry pie filling not only adds a beautiful pop of color but also a burst of sweet and tart flavor that perfectly complements the rich cheesecake. Serve immediately and enjoy your homemade mini cheesecakes!
Conclusion:
Congratulations on mastering the art of the Super Easy Mini Cheesecakes with Vanilla Wafer Crust! As you’ve seen, these delightful treats are incredibly simple to whip up, making them perfect for any occasion, from casual gatherings to more festive celebrations. The classic vanilla wafer crust provides the ideal sweet and crum extractbly base for the rich and creamy cheesecake filling. Don’t be afraid to experiment and make these your own!
For serving, these mini cheesecakes are fantastic on their own, but they truly shine with a dollop of whipped cream or a drizzle of your favorite fruit compote, like a fresh berry sauce or a tangy raspberry coulis. They also make a beautiful addition to a dessert platter.
Looking for variations? Consider adding a hint of lemon zest to the cheesecake filling for a brighter flavor, or finely chopped chocolate chips for a decadent twist. You could also try a grabeef ham cracker or even an Oreo cookie crust for a different textural experience. The possibilities are endless!
I encourage you to give this recipe a try. You’ll be amazed at how quickly you can create such impressive desserts. Enjoy every bite of your Super Easy Mini Cheesecakes with Vanilla Wafer Crust!
FAQs
Can I make these ahead of time?
Absolutely! The Super Easy Mini Cheesecakes with Vanilla Wafer Crust can be made a day or two in advance and stored in an airtight container in the refrigerator. This makes them a perfect make-ahead dessert for parties.
How do I prevent the cheesecakes from cracking?
While mini cheesecakes are less prone to cracking than larger ones, a common tip is to avoid over-mixing the batter and to bake them at a consistent temperature. For larger cheesecakes, a water bath is often recommended, but for this recipe, gentle baking should suffice.
Super Easy Mini Cheesecakes Vanilla Wafer Crust
Delightful mini cheesecakes with a crisp vanilla wafer crust and a creamy, smooth filling, topped with sweet cherry pie filling.
Ingredients
-
15 vanilla wafer cookies
-
16 ounces full-fat cream cheese, softened
-
¾ cup granulated sugar
-
2 large eggs, at room temperature
-
1 teaspoon vanilla bean paste or vanilla extract
-
1 can cherry pie filling
Instructions
-
Step 1
Finely crush 15 vanilla wafer cookies using a food processor or a zip-top bag and rolling pin until they resemble coarse sand. -
Step 2
Divide the crushed vanilla wafer crumbs evenly among 12 cups of a standard muffin tin. Press the crumbs firmly into the bottom of each cup to create a compact crust. -
Step 3
In a large bowl, beat 16 ounces of softened full-fat cream cheese and ¾ cup granulated sugar with an electric mixer until light and fluffy. Scrape down the sides of the bowl as needed. -
Step 4
Add 2 large room-temperature eggs one at a time, beating well after each addition. Stir in 1 teaspoon of vanilla bean paste or vanilla extract on low speed until just combined. Do not overmix. -
Step 5
Divide the cheesecake batter evenly among the 12 prepared muffin cups, filling each about two-thirds to three-quarters full. Gently tap the muffin tin on the counter to release air bubbles. Bake in a preheated oven at 325°F (160°C) for 20-25 minutes, or until the edges are set and the centers are slightly jiggly. -
Step 6
Let the cheesecakes cool in the muffin tin for 10-15 minutes, then carefully transfer them to a wire rack to cool completely to room temperature. Cover loosely with plastic wrap and refrigerate for at least 2-4 hours, or preferably overnight. Top with cherry pie filling before serving.
Important Information
Nutrition Facts (Per Serving)
It is important to consider this information as approximate and not to use it as definitive health advice.
Allergy Information
Please check ingredients for potential allergens and consult a health professional if in doubt.